App registrations
Introduction
The App registrations page is the administration area for OAuth client applications in Backup Administration for Microsoft 365. Here, administrators can create and manage applications used to authenticate and sign in to contentACCESS, and they can manage related settings such as secrets, certificates, and other application properties used in integrations and automation scenarios.
The page provides a list-level view and an application details view. In the list, administrators can refresh data, create new entries, search and filter applications, and review key fields such as Display name, Client ID, User identity, Type (System or User-defined), and Enabled status.
On this page, you can learn how to open and use app registrations, create and manage applications, work with secrets and certificates, and understand user identity and permission-related behavior.
Prerequisites
- You need the permission
Manage users and rolesto open the App registrations page and the application detail page. - App registrations are tenant-scoped. Make sure the correct tenant is selected.
If you do not see System > App registrations in the left menu, contact your administrator to confirm you have the required permissions.
Open App registrations
- In the left menu, select System > App registrations.
- If you can access multiple tenants, select the tenant first.
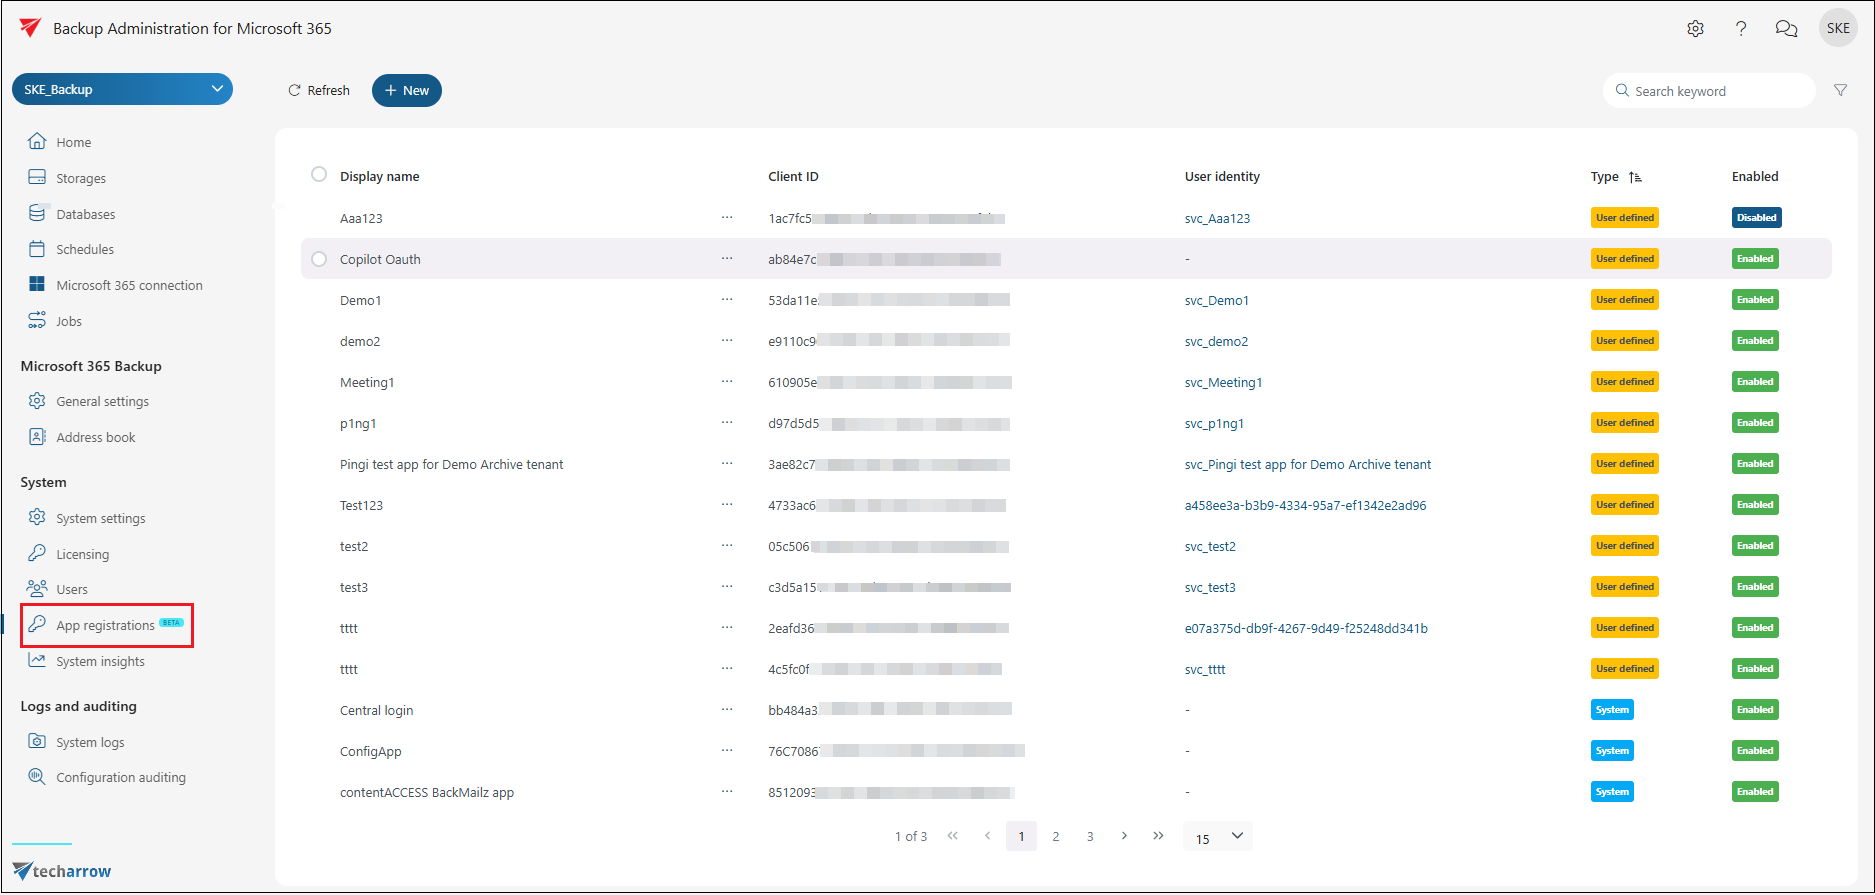
Applications list
On the list page, you can:
- View all app registrations for the selected tenant.
- Search and filter applications by common properties such as display name, name, client ID, description, app URL, and user identity.
- Create a new app registration.
- Open an existing app registration for editing (for example, by double-clicking it or using the row actions).
System apps vs. user-defined apps
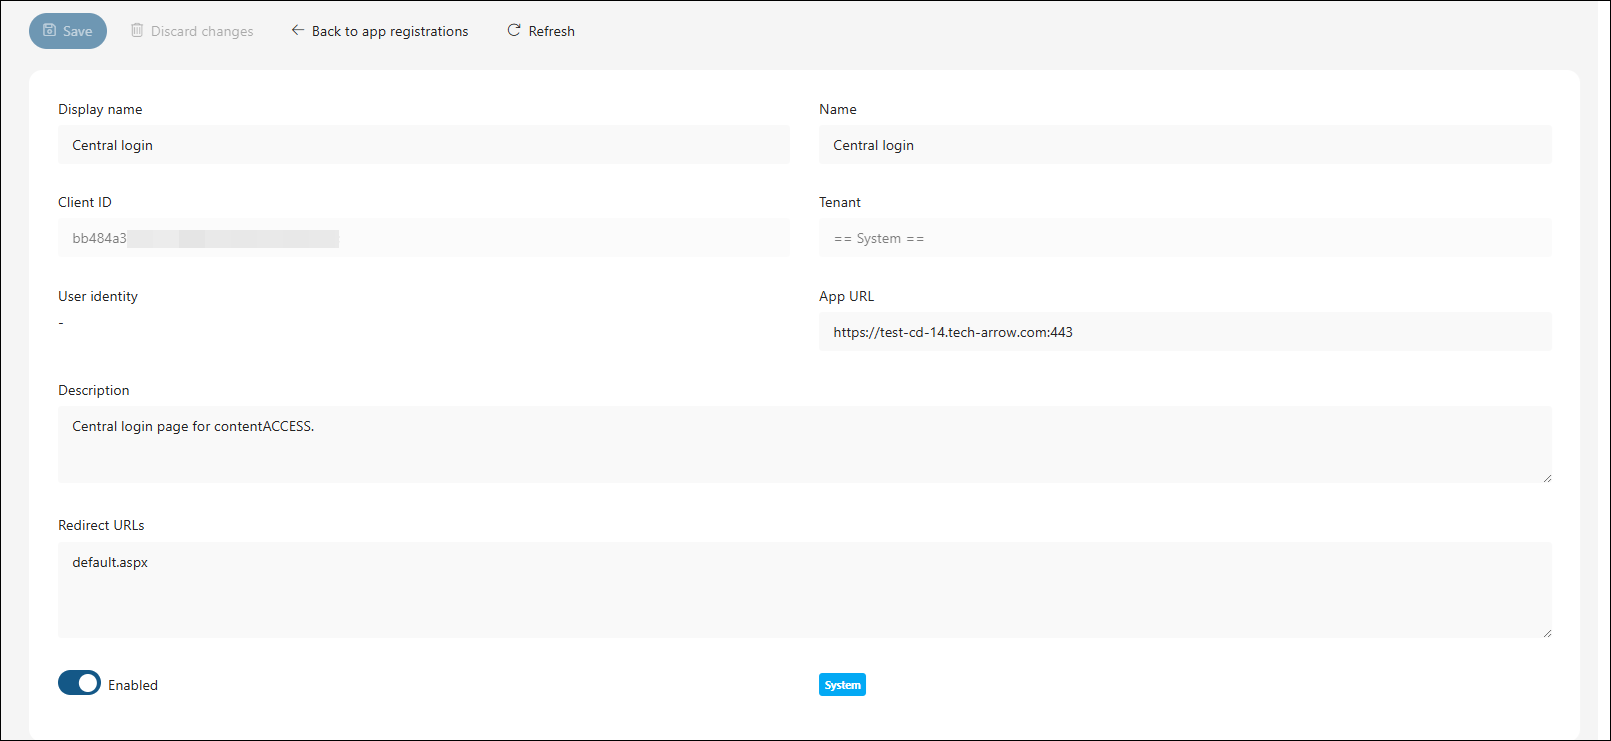
System apps are created and maintained by the system and cannot be deleted from the UI. They do not have a user identity assigned (shown as - in the User identity column).
User-defined apps are created manually by an administrator. User-defined apps can be fully managed: created, edited, disabled, and deleted.
Create an app registration
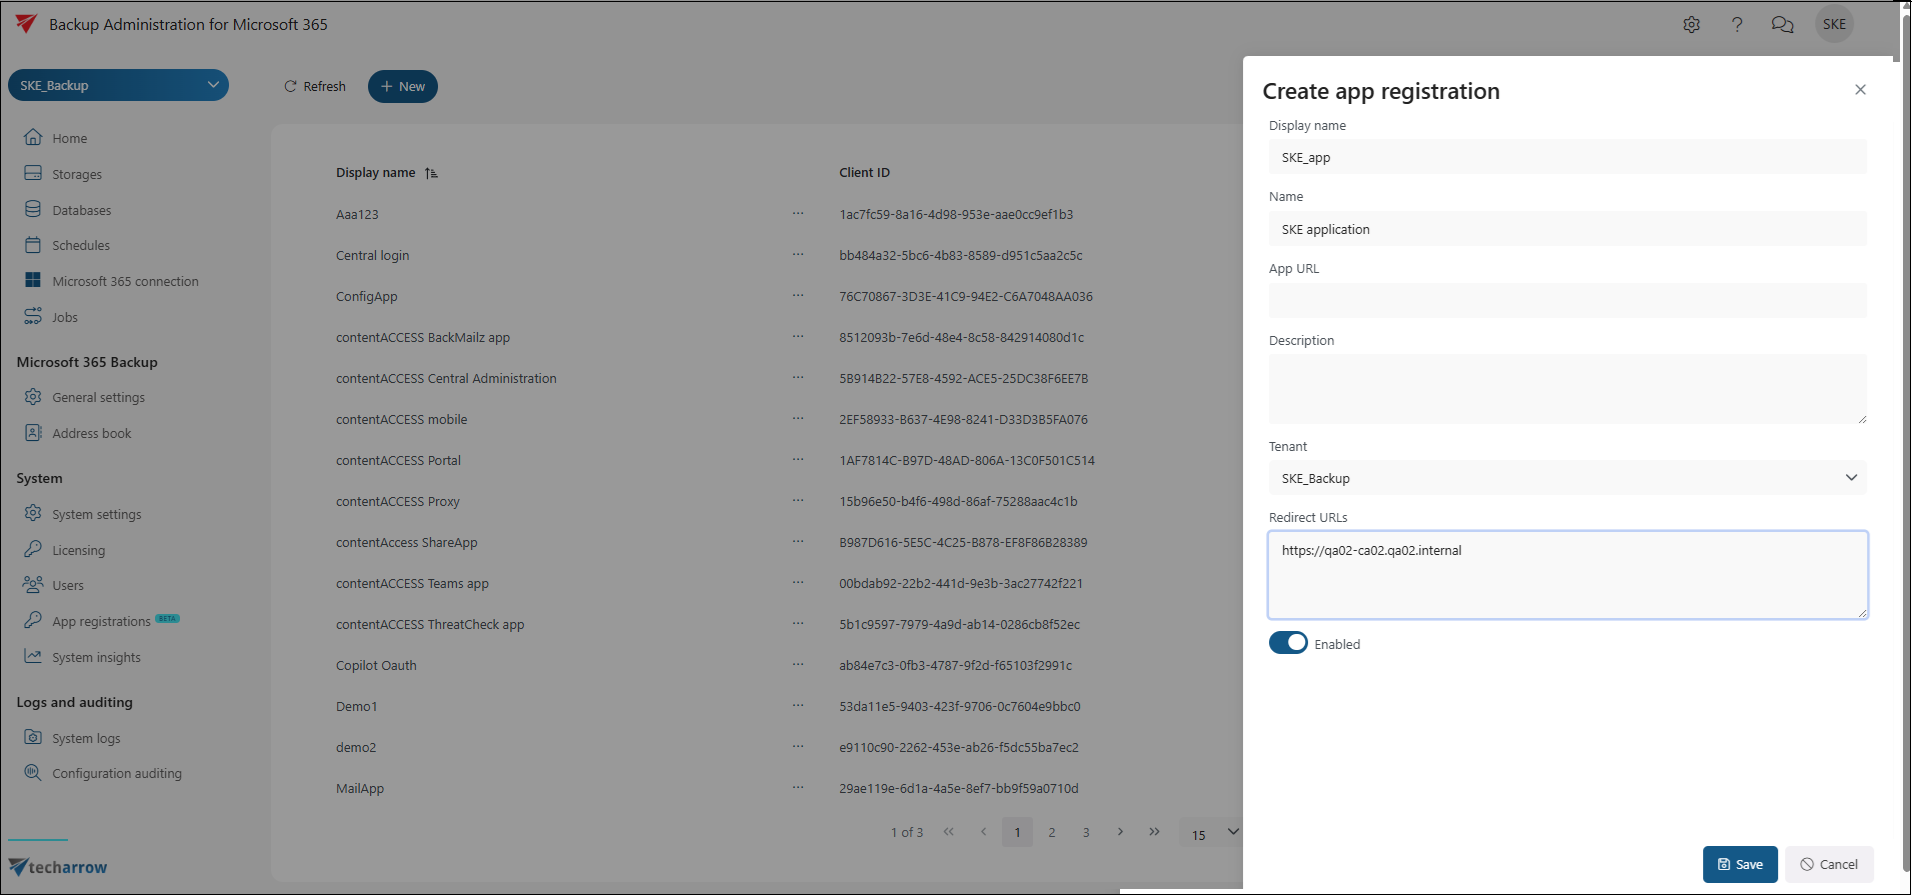
- Select New. The Create app registration panel opens on the right side.
- Fill in the required fields:
- Display name: the name shown in the app registrations list.
- Name: the internal name of the application.
- (Optional) Configure additional fields:
- App URL: the URL where the application is hosted or accessed.
- Description: notes describing what the application is used for.
- Tenant: select the tenant the app registration belongs to. If you have access to multiple tenants, make sure you select the correct one. Some environments may also show a special tenant entry labeled
== System ==. - Redirect URLs: enter one URL per line. These are used during OAuth sign-in flows that require a redirect (for example, Authorization Code Flow).
- Enabled: toggle to control whether the application is allowed to authenticate immediately after creation.
- Select Save.
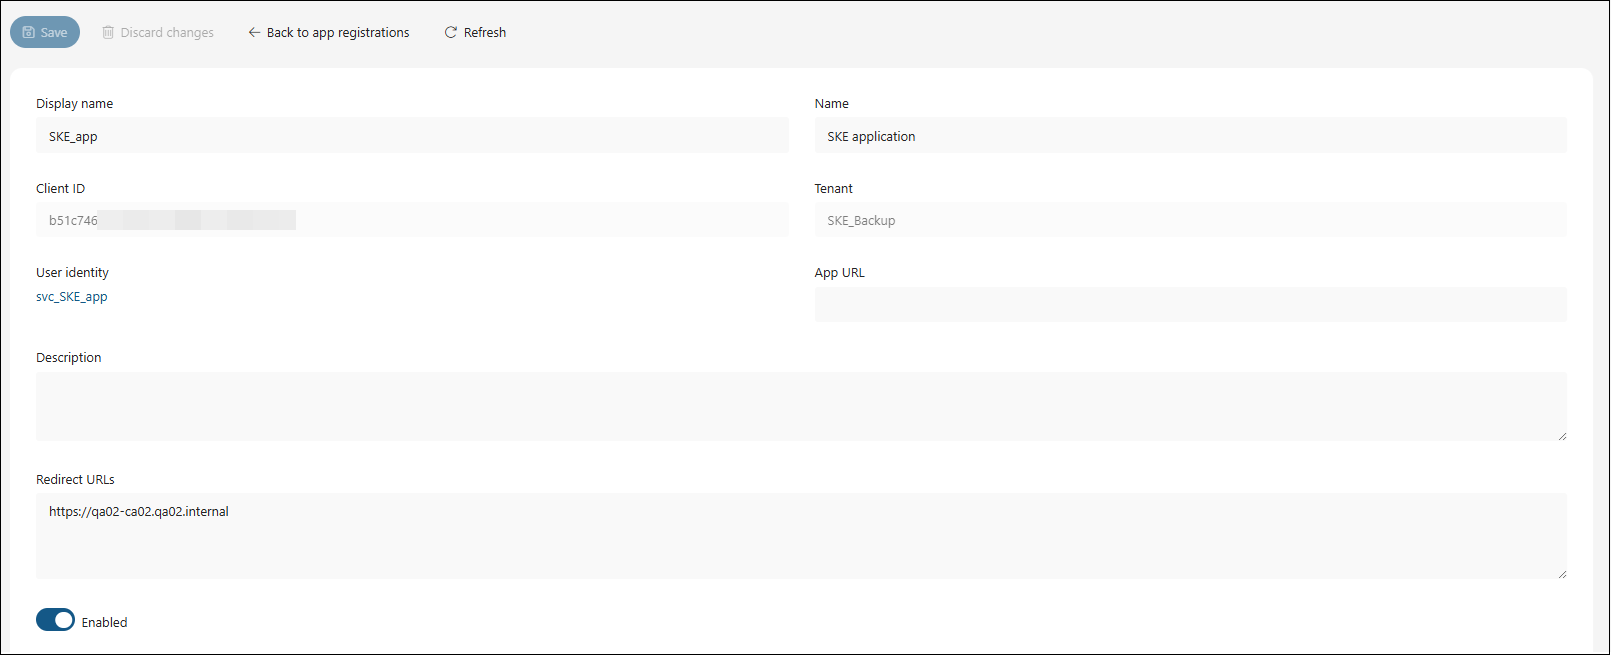
After saving, you are redirected to the application detail page.
Application details
On the detail page, you can review and update application settings.
Editable settings
- Display name: The friendly name shown in the App registrations list. Use a name that helps administrators quickly recognize the purpose of the application.
- Name: The internal name of the application.
- App URL: The main URL associated with the application. This helps document where the application is hosted or accessed.
- Description: Optional notes describing what the application is used for.
- Redirect URLs (one per line): The redirect URLs used during sign-in for OAuth flows that require redirects (for example, Authorization Code Flow and Implicit Flow). The URLs are validated during authentication, so make sure they match the URLs used by the application.
- Enabled (toggle): Controls whether the application is allowed to authenticate. If an app is disabled, authentication requests for that app are refused.
Read-only information
- Client ID: The unique identifier of the application. You typically copy this value into the client application configuration.
- Tenant: The tenant the app registration belongs to.
- User identity: The identity assigned to the application. This identity represents the user context the application runs under when logged in and it controls which permissions the application has.
- Type/System indicator: Shows whether the entry is a system app or a user-defined app. System apps are maintained by the system and cannot be deleted.
Delete an app registration
You can delete app registrations directly from the list page.
- In the applications table, select one or more app registrations using the row checkbox.
- Delete the selected entry or entries using one of these methods:
- Select Delete in the top command bar (recommended for deleting multiple apps).
- Open the context menu (
...) and select Delete (for single-item deletion).
- Confirm the delete action in the dialog.
After deletion, use Refresh to reload the list if needed.
System apps cannot be deleted.

App secrets
Use the App secrets tab to manage existing secrets and create new ones for an application. For more information, see the related section in the Microsoft documentation.
In this tab, you can:
- View existing secrets, including their description, creation time, and expiration date.
- Create a new secret.
- Revoke a secret (the secret remains visible in the list but is marked as revoked).
- Delete a secret.

Create a secret
- Open the app registration.
- Select the App secrets tab.
- Select New.
- Provide:
- (Optional) Description
- Expiration date (must be at least one day in the future)
- Select Save.
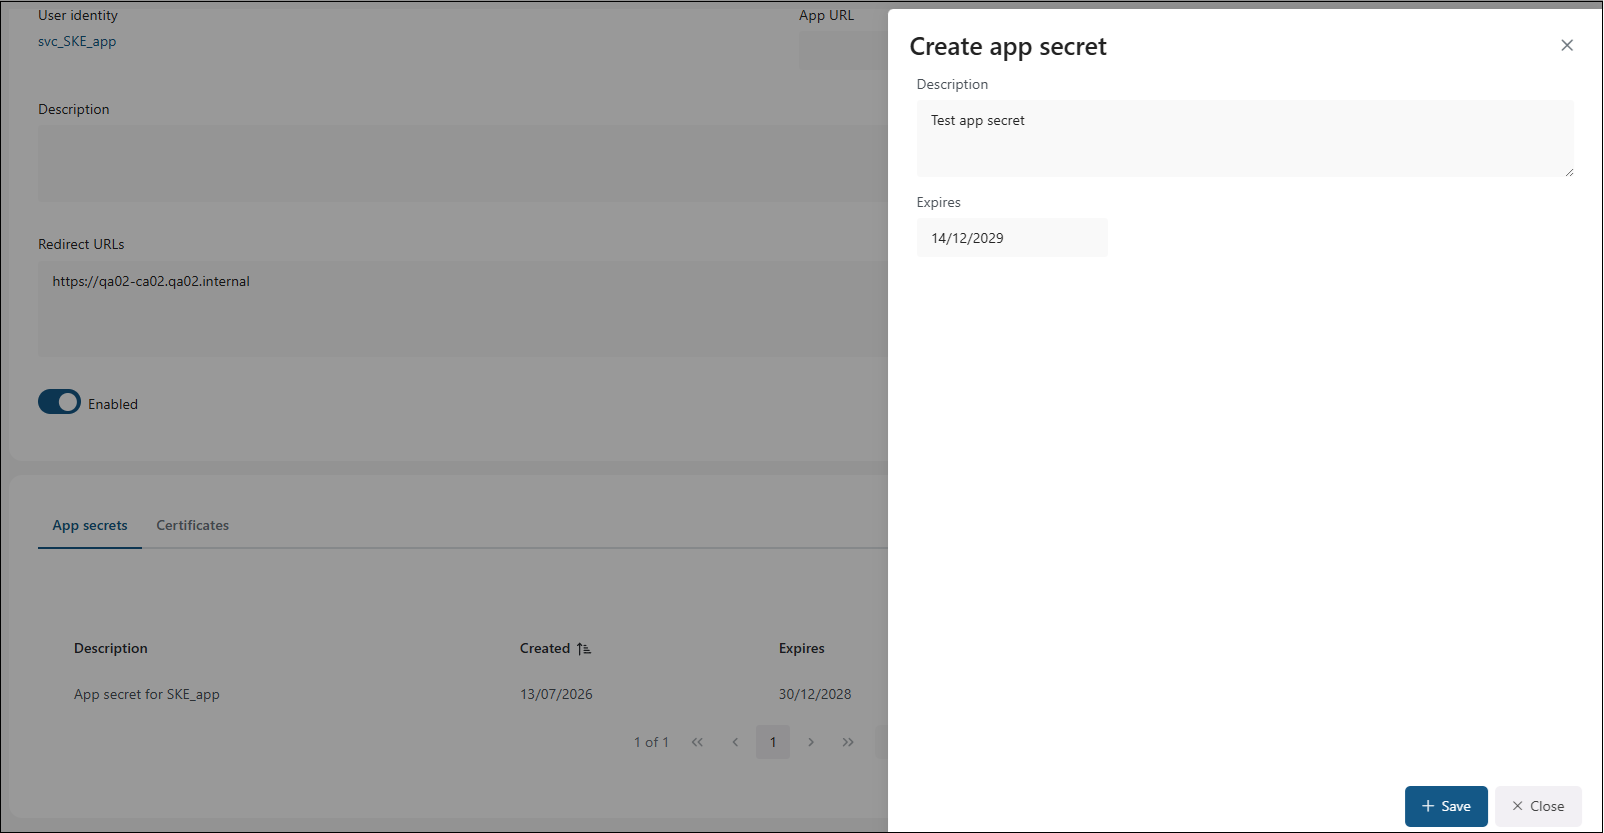
After saving, the Create app secret panel displays the generated value in Secret (copy now). Copy the value (or select Copy secret), then confirm I have copied and securely stored this secret before closing the panel.
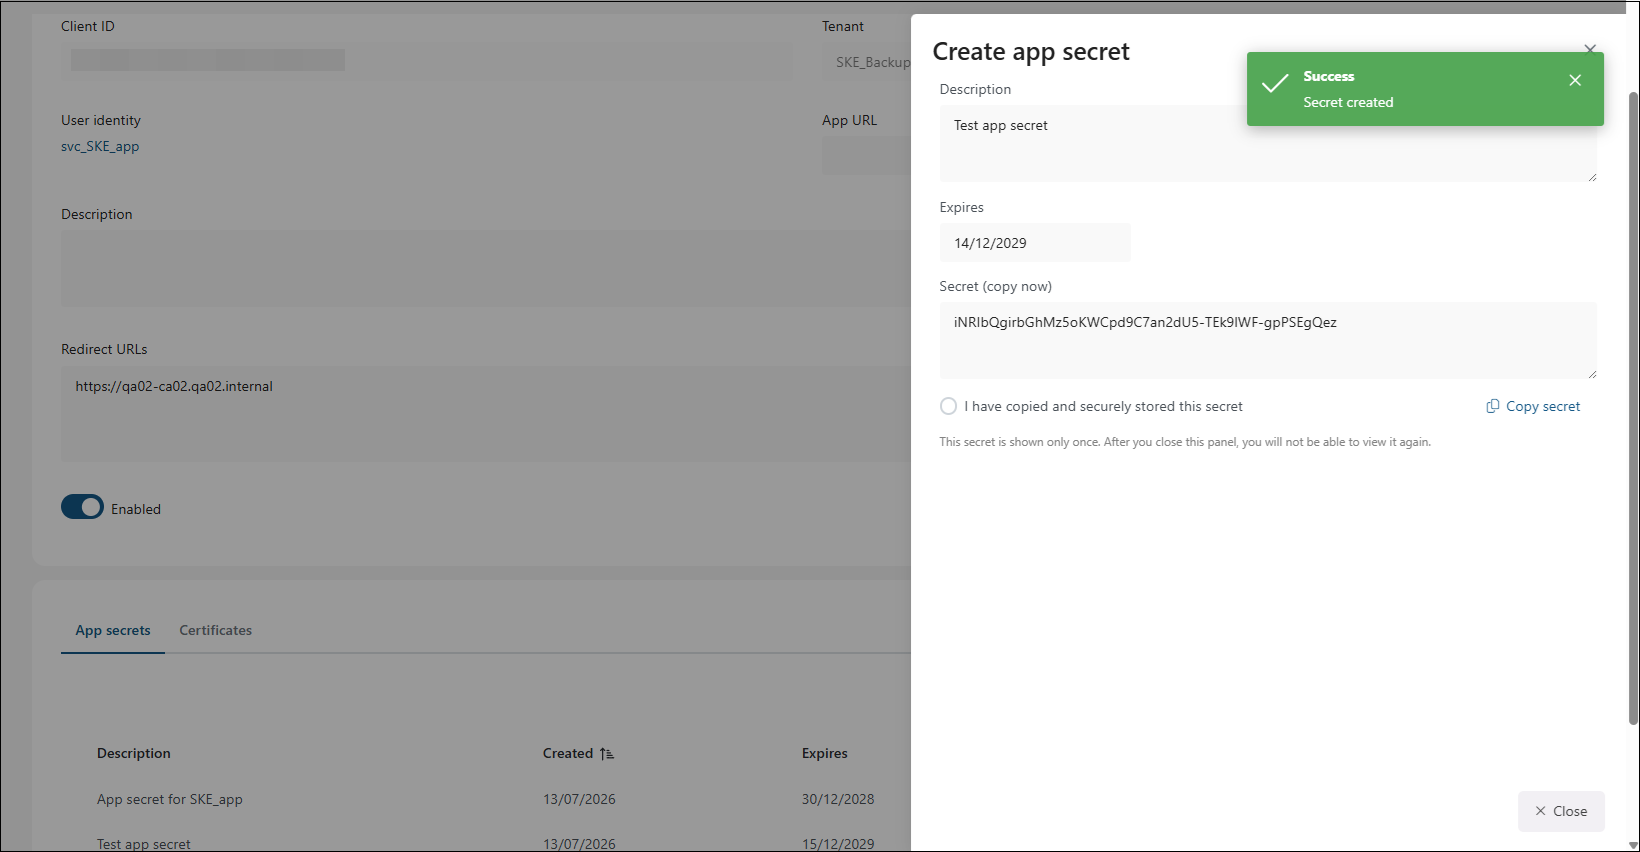
If you try to close the panel before confirming, a Secret not confirmed dialog appears. Select Go back to return and confirm first, or Close anyway to close the panel without being able to view the secret again.

The secret value is shown only once immediately after creation. Copy it and store it securely right away because it cannot be displayed again later.
Certificates
Use the Certificates tab to manage certificates for an application.
You can:
- View uploaded certificates, including thumbprint and expiration.
- Add a certificate by uploading a public-certificate file.
- Revoke a certificate.
- Delete a certificate.
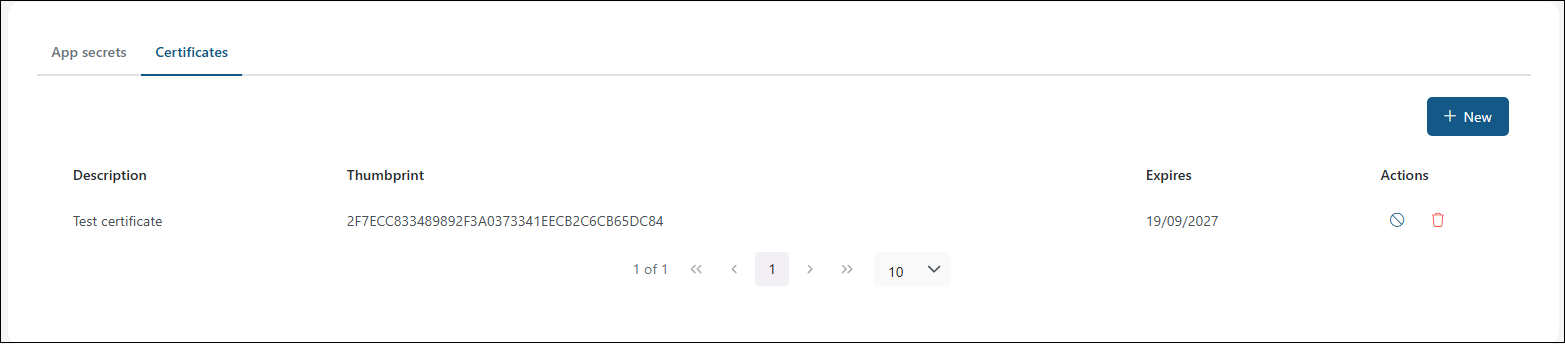
Add a certificate
- Open the app registration page.
- Select the Certificates tab.
- Select New.
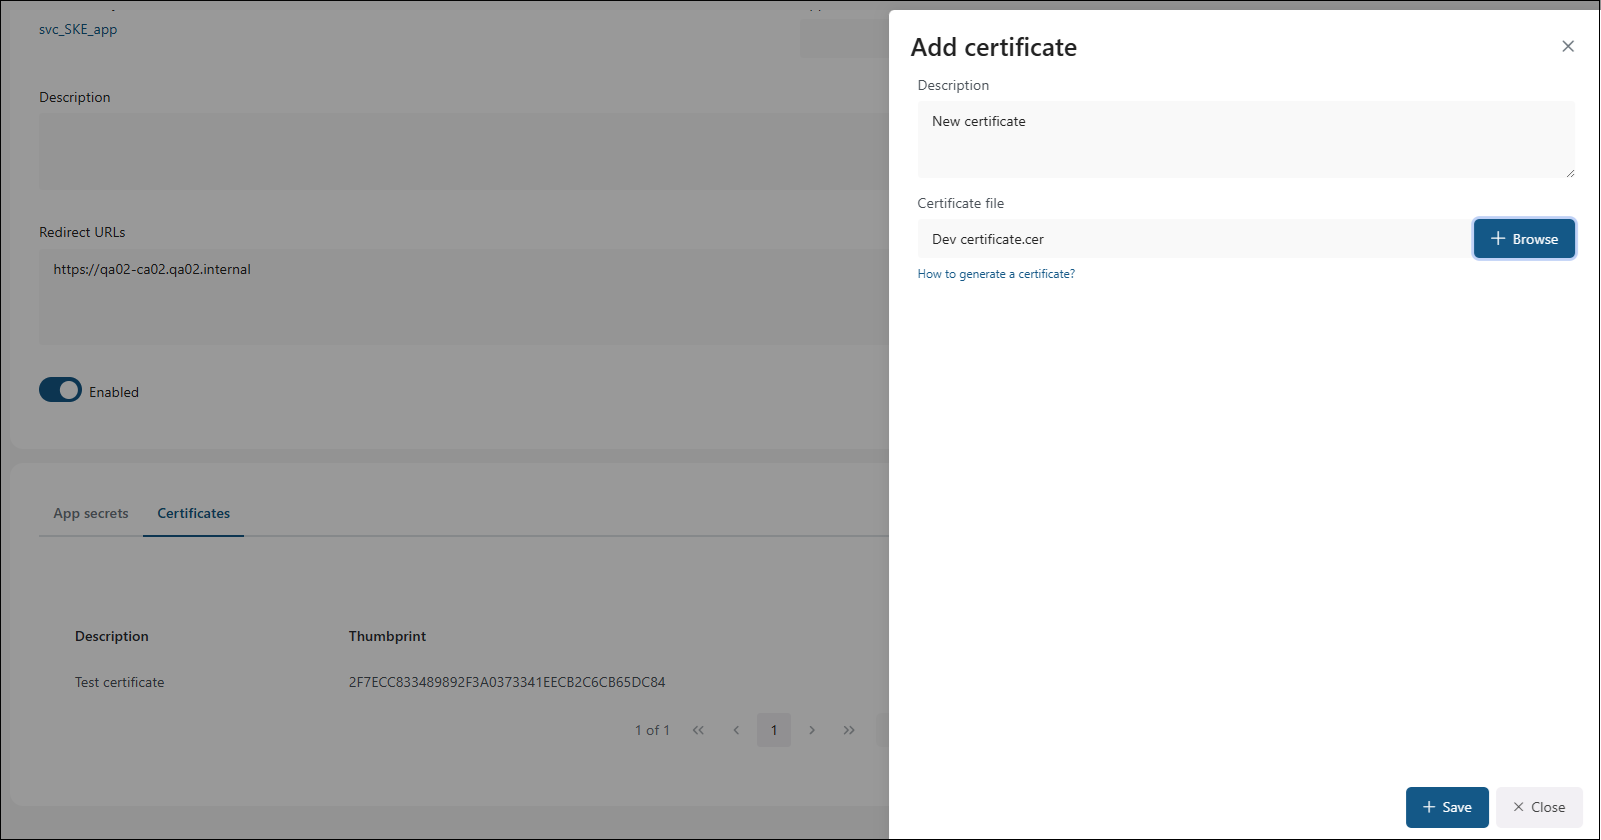
- Provide:
- (Optional) Description
- Certificate file (
.cer,.crt, or.der)
- Select Save.
Generate a certificate (PowerShell)
If you do not have a public certificate file yet, you can generate one using the PowerShell script included with this documentation.
- Download: Create-Certificate.ps1
Basic usage:
-
Open PowerShell.
-
Navigate to the folder where the script is located:
cd .\assets -
Run the script.
If your environment blocks running scripts, you can allow it for the current PowerShell session only:
Set-ExecutionPolicy -Scope Process -ExecutionPolicy Bypass.\Create-Certificate.ps1Or, if scripts are already allowed, you can run:
.\Create-Certificate.ps1 -
When prompted, provide:
- App name (used in the certificate subject and filenames)
- Output folder (where the files will be saved)
- Certificate password (press Enter to let the script generate a password)
-
Upload the generated public certificate (
.cer) in the Certificates tab.
The script creates these files in the output folder:
<app name>.cer: Public certificate file (use this one for upload).<app name>.pfx: Password-protected certificate file that contains the private key.<app name>.txt: A short summary with file paths and certificate details (including the generated password, if applicable).
The .pfx file contains the private key. Store it securely and only share it with trusted administrators.
User identity and permissions
Each user-defined app has a user identity. When you create a new application, its user identity is created automatically.
In Backup Administration, this identity is shown as read-only information. When available, you can open it to view the related user details.
Practical notes:
- The user identity is not editable from the App registrations page.
- System apps do not have a user identity assigned. In the list, this is shown as
-in the User identity column, and on the application details page, the read-only User identity value is also-. - What an app can do is determined by the roles assigned to its user identity.
- To change permissions for an app, update the role assignments for the linked user identity using your organization's role management process, then verify the roles in Backup Administration.
Screenshot A: System app – no user identity assigned
Screenshot B: User-defined app with assigned user identity