Grant permissions for the SharePoint archive
In this section, we describe step by step how to grant permissions for the SharePoint archive, which enables contentACCESS to authenticate and connect to the Microsoft Dataverse environment using a modern and more secure way of authentication.
-
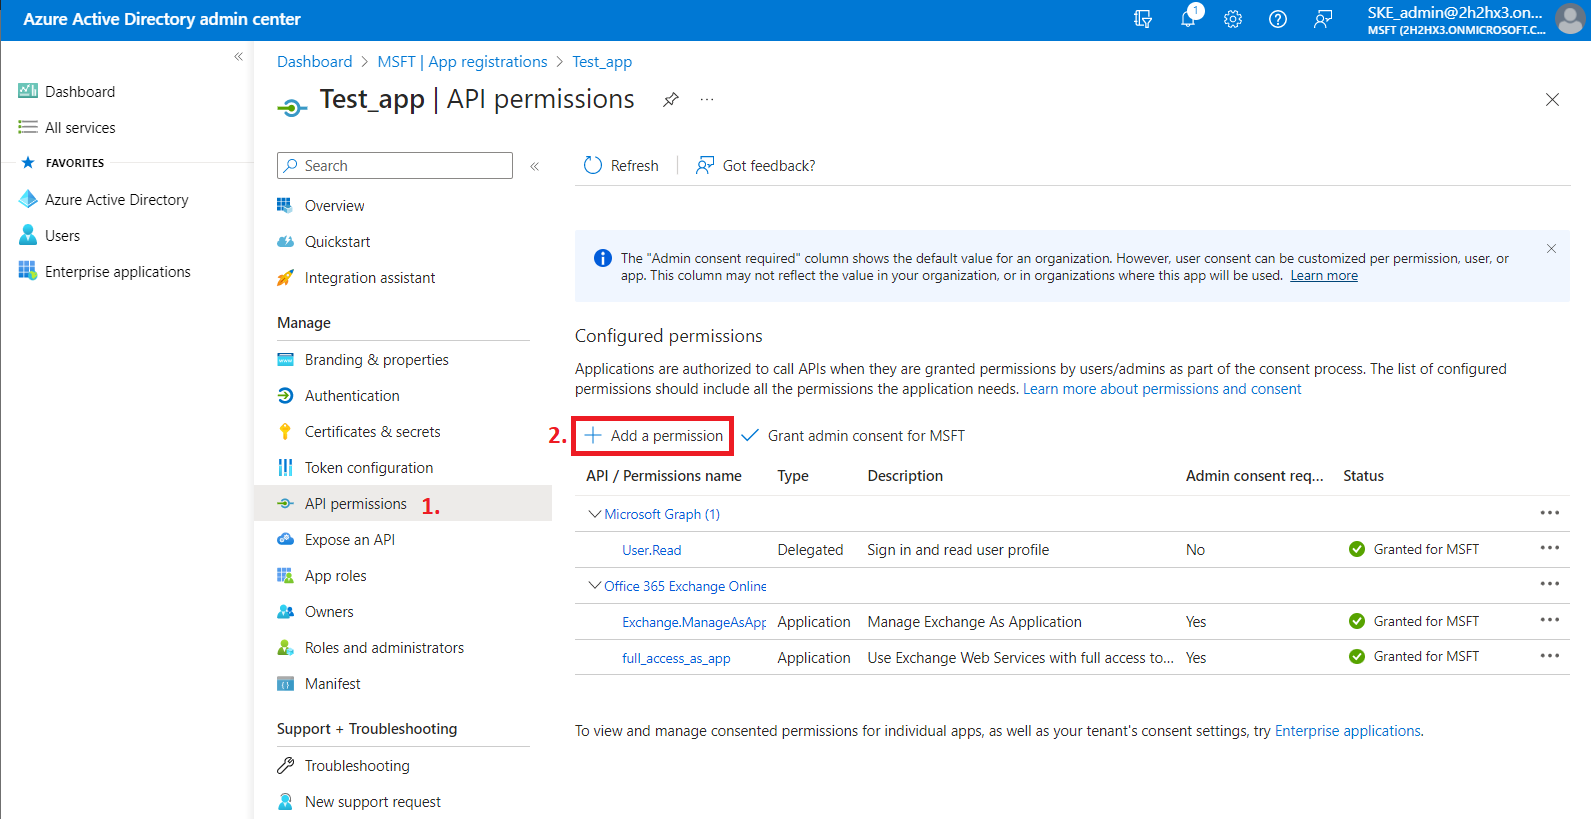
Navigate to your registered application (Azure Active Directory => App registration => Owned applications => registered application [Test_app in our example] => open the application by clicking on the title). On the application details page, click the API permissions button on the left menu. When the configured permissions page loads, click the + Add permission button and select the requested API.
-
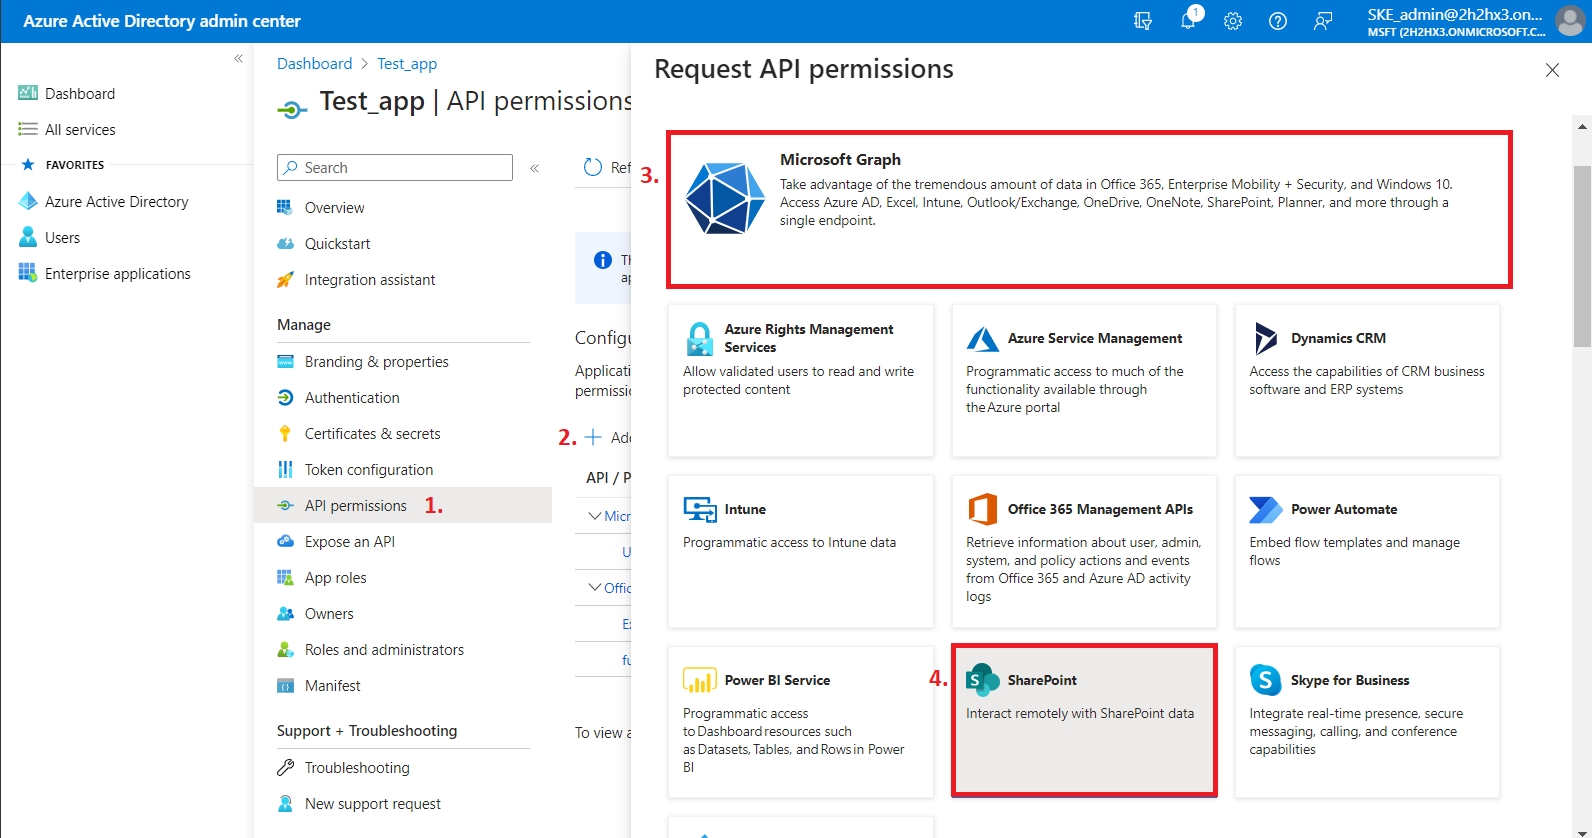
On the Request API permissions => Microsoft APIs tab, you need permissions from Microsoft Graph and SharePoint options to support all the functions of contentACCESS and other client applications (including AAD groups support in SharePoint archive).
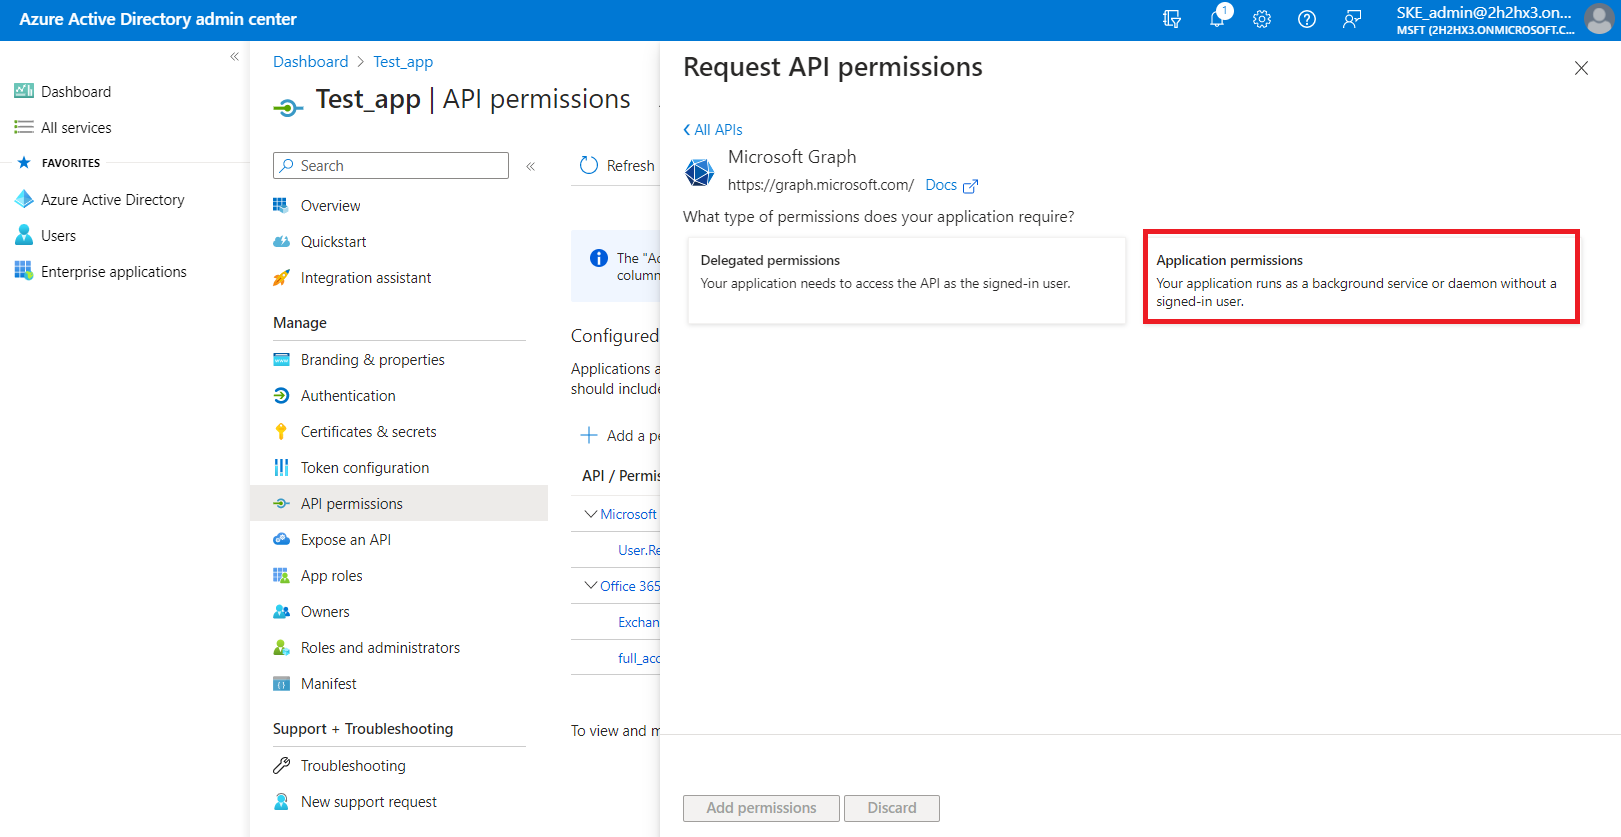
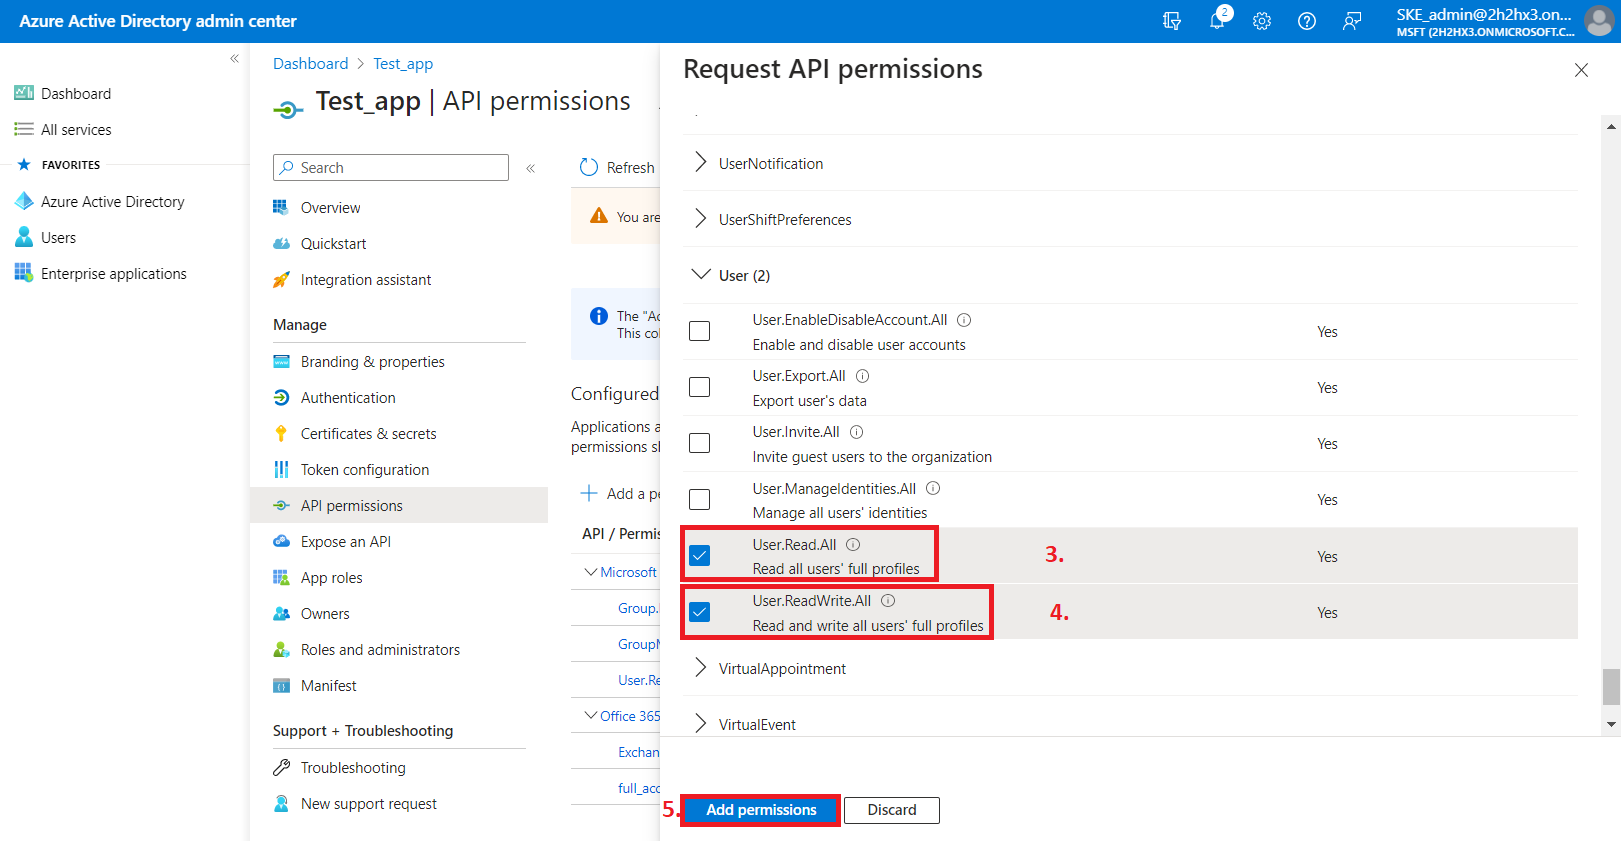
First, let's go through with the Microsoft Graph permissions. After selecting the option from the list, choose the Application permissions box, where the available permissions from this category will be shown.
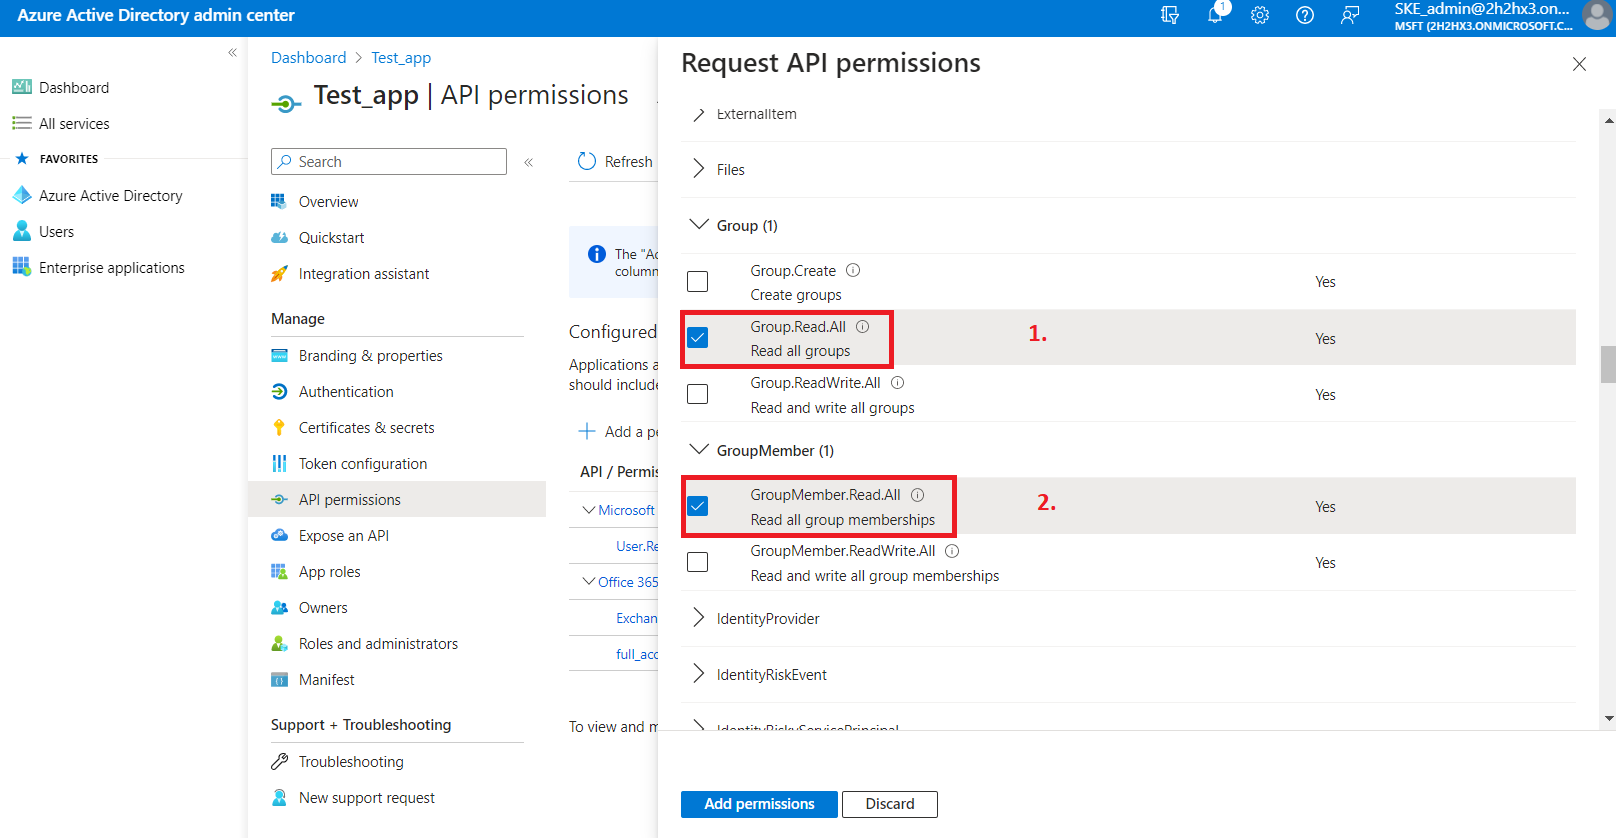
Locate the:
- Group.Read.All (read all groups) from the Group option;
- Group.Members.Read.All (read all group memberships) permission from the GroupMember option;
- User.Read.All (read user profiles) and User.ReadWrite.All (read and write user profiles) permissions from the User option,
then click on the Add permissions button.
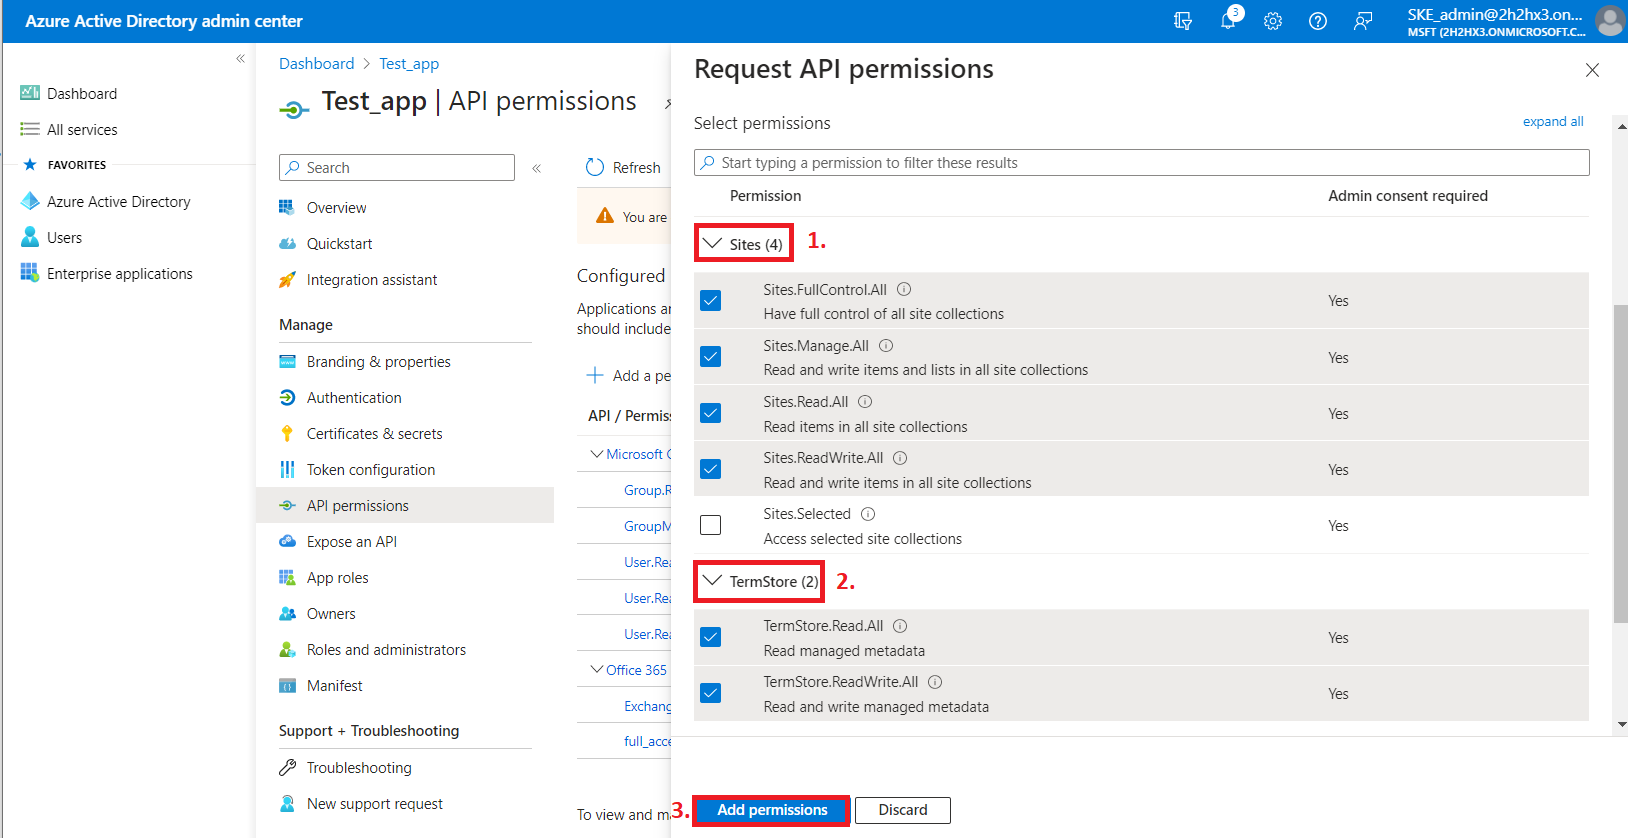
From the SharePoint option, the following Application permissions are required (from the Sites and TermStore groups):
- Sites.FullControl.All – have full control of all site collections
- Sites.Manage.All – Read and write items and lists in all site collections
- Sites.Read.All – Read items in all site collections
- Sites.ReadWrite.All – Read and write items in all site collections
- TermStore.Read.All – Read managed metadata
- TermStore.ReadWrite.All – Read and write managed metadata
-
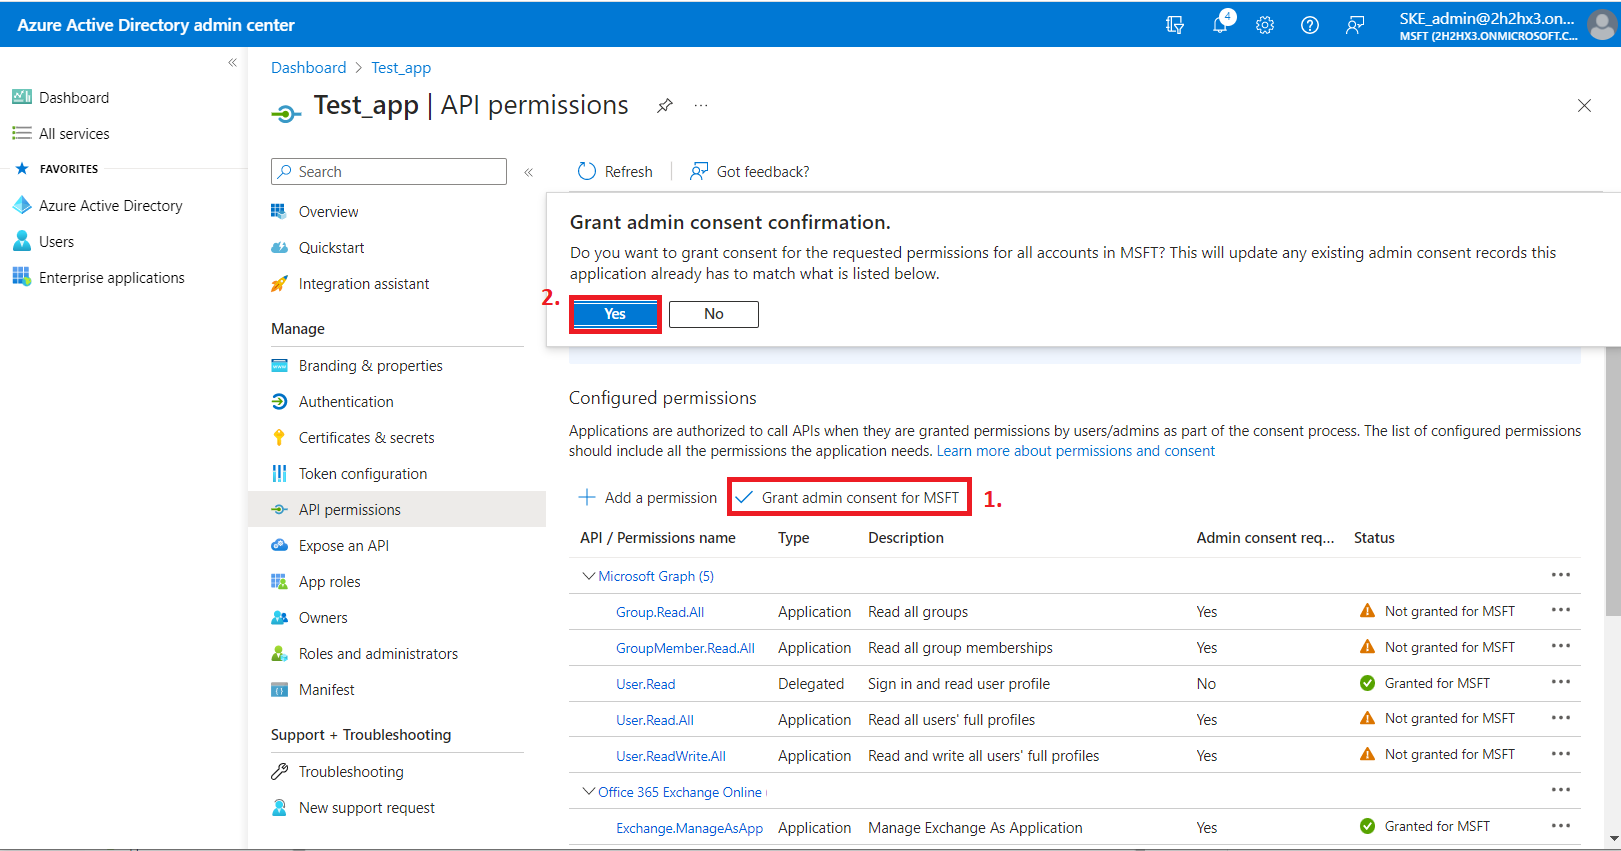
After the permissions have been assigned to the application, the administrator must grant consent for these permissions. Click on the Grant admin consent for "TENANTNAME" button.

-
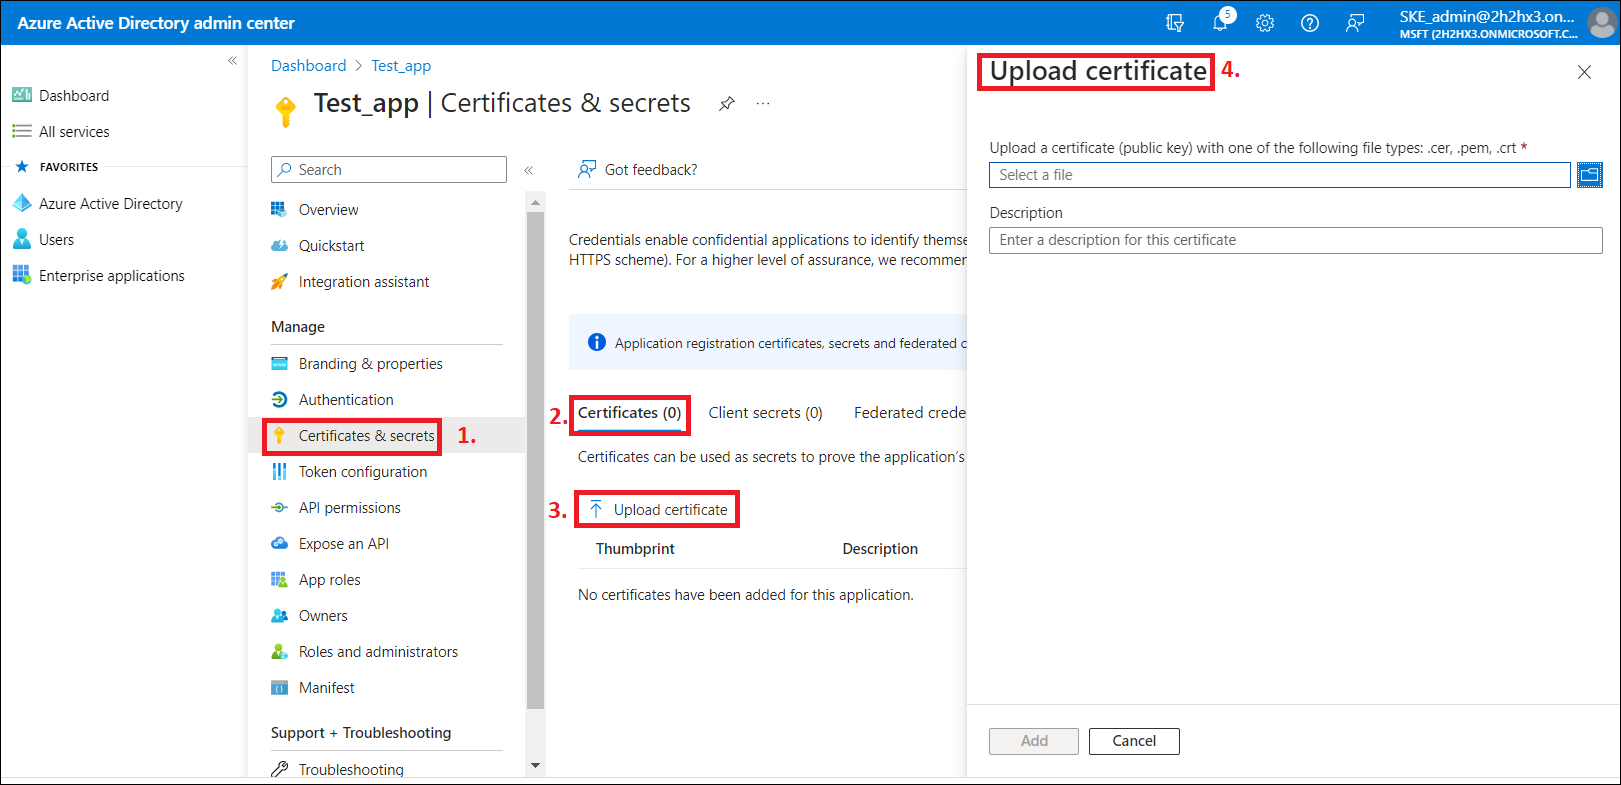
When the permissions are assigned to the application and the admin consent is granted, the client access certificate needs to be assigned to the application. Click on the Certificates & secrets option in the left side menu. On the certificate management screen click on the Upload certificate (Certificates tab) button. Browse the client certificate you want to use and upload it. It can be a self-signed certificate or an already existing one. A PowerShell script for creating a self-signed certificate can be downloaded here.
-
Next, add a new client secret by clicking on the + Next client secret button. This is necessary for some plugins and client applications (Test_client secret in our example).

After the configuration is done, copy the client secret shown on the Get client secret dialog box to a secure location so that you can refer to it later. The client secret will be required when configuring certain contentACCESS models with modern authentication– like Email archive, SharePoint archive, Teams archive, GDPR Exchange, and Exchange connection.
Note: The App registration is using a client secret that has a limited lifetime (usually 1 year). It is important to maintain this information: every year a new client secret needs to be generated for the App registration. The modified client secret needs to be updated in all affected contentACCESS configurations.