Configuration of Delete job in SharePoint archive
This job type deletes data, which have been archived, from the archive.
Note: First, you need to mark files/emails for delete in contentACCESS Portal (read more in this section).
Go to Jobs -> Add new -> Delete from archive.

On the job's configuration page go through the following sections; most of them are mandatory, filtering settings are optional:
✓ Running mode settings
The job can be run in 3 modes:
- Immediate deletion -> collects the expired documents and deletes them.

- Create report -> collects the expired documents and provides a csv file with a list of documents. The administrator can delete documents from the list.

- Apply report -> a csv file with a list of documents to be deleted must be uploaded. The administrator can delete documents from the list before running the job (only documents which are in the list will be processed). The job reads the list and if the documents are expired, deletes them.

✓ Scheduling settings
In this step the running times of the delete job must be selected. It is possible either to select a scheduler from the list or to create a new scheduler via the "Create new …" option.

✓ Sites to process
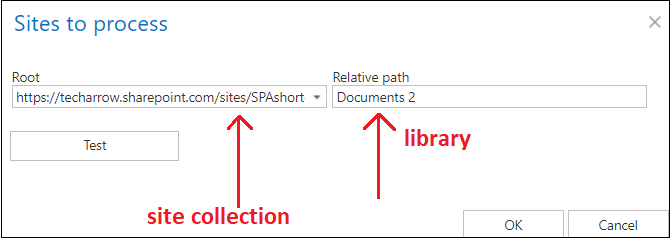
In this section the user is required to select the site connection(s) where the data are located. A root can be a site collection, a subsite, a library or folder already defined in the Site section.
In On-premise mode, only the select site option is accessible for the users. Click on “+ select site” to specify the connection from where the items should be deleted. In the “Connections to process” dialog unroll the list of already created roots and select the one that should be applied. Enter the Relative path if necessary, test the path via the “Test” button and click “OK”.

In Microsoft 365 mode, the user can either process all sites (the archived data will be deleted from all provisioned and archived sites) or selected sites, or select sites and/or groups by clicking on “+ select site” or + select group. Specify the root and the relative URL in the pop-up window, and if necessary, test the path via the “Test” button and click “OK”.

✓ Processing settings
In this section, you may check the Delete even if not marked for delete checkbox. If you do so, the Delete job will delete the expired item without them needing to be marked for delete.

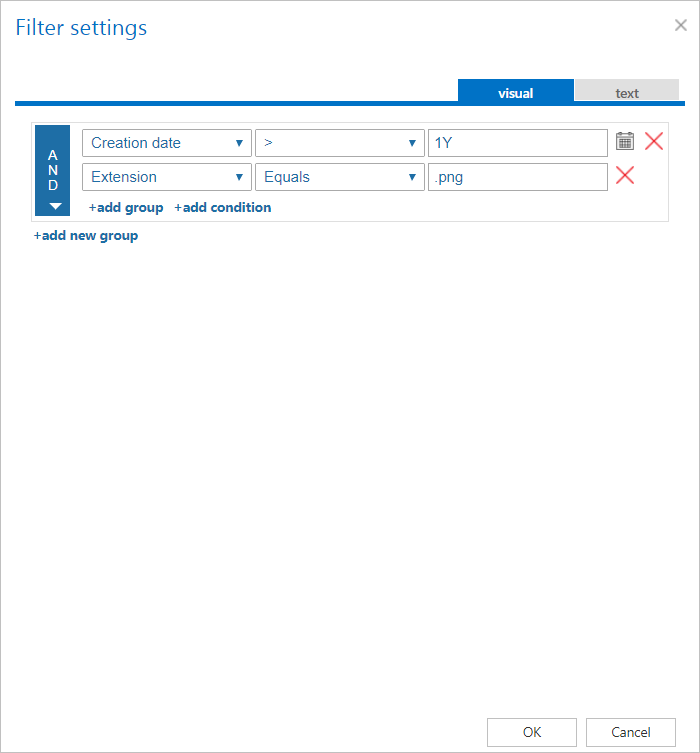
✓ Filtering settings
Click on the Change filter button and set the filtering according to your needs and/or regulations. To learn more about how to work with filtering settings, please, check this section of our documentation.
✓ Notification settings
Select here, when you will need to get notification emails from the Delete job. It is possible to set here if you need a notification email always/never, or you need it only if an error/warning occurred during the process − for example, if the deletion of one or more items failed, then you may get a notification email about this error. Into the Recipient list textbox insert the email addresses of the people whom you would like to send these emails to – if there are multiple recipients, the addresses must be separated by “,” or “;”.

✓ Resource settings
Set the value, which will determine how many items will be processed simultaneously by the delete job. The recommended value is 2, as in our case.

At the end never forget to save your job configurations: click on Save in the left upper corner of UI.
When does the document expire?
-
If the protected retention has expired (archive date / reference date + protected retention is in the past) and the document is not under legalhold and the document is marked for deletion
-
If the unprotected retention is defined and has expired (archive date / reference date + unprotected retention is in the past)