SharePoint shortcut repair job configuration
The SharePoint shortcut repair job is a specialized maintenance tool designed to help locate and repair shortcut files based on specific parameters. Its primary function is to ensure that shortcuts have the correct FileType, filtered according to the selected UFO filter and shortcut type. To run the job, selecting both the UFO filter and the shortcut type is mandatory. The repair process only applies to HTML shortcuts. The tool operates strictly within the selected shortcut repository ID, meaning it will ignore shortcuts outside this scope.
Please note that when a shortcut matching the criteria is found, it is always reported as "repaired", even if no actual modification was made. The “repaired” status only indicates that the shortcut was identified and processed, not necessarily that any change was applied.
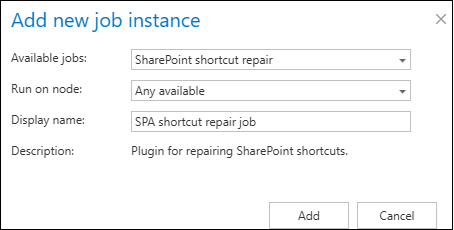
The SharePoint shortcut repair job can be created and configured on the Jobs page. Click the “+ new” button, fill the required settings (Job type, Run on node, Display name) in the pop up window and click on “Add“.
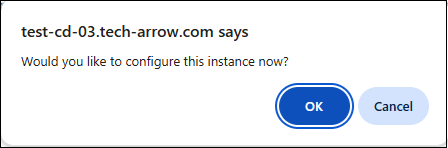
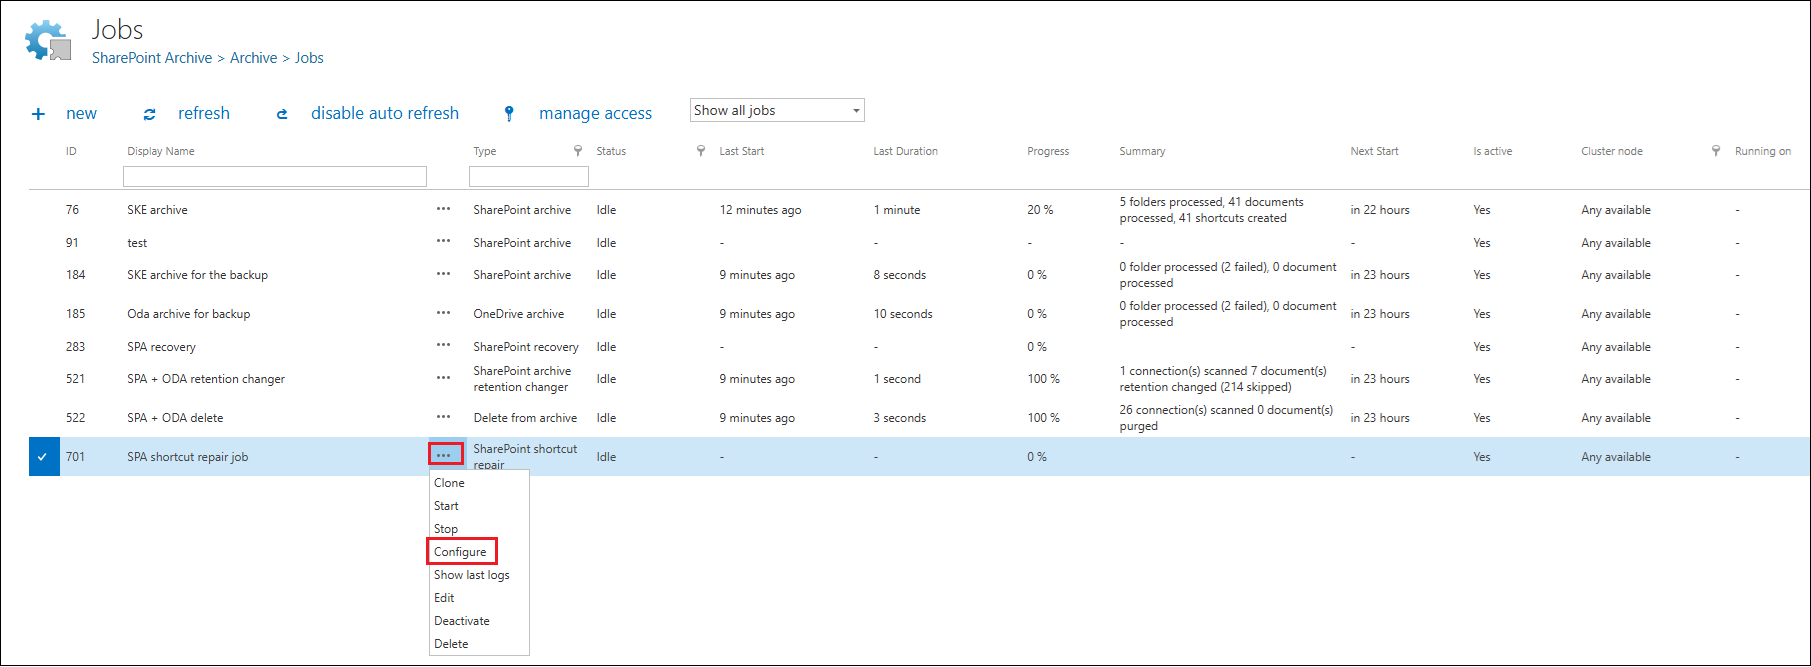
To configure the job immediately, click “Yes” in the next pop up window, or configure it later on (using the “Configure” option in the job's context menu).
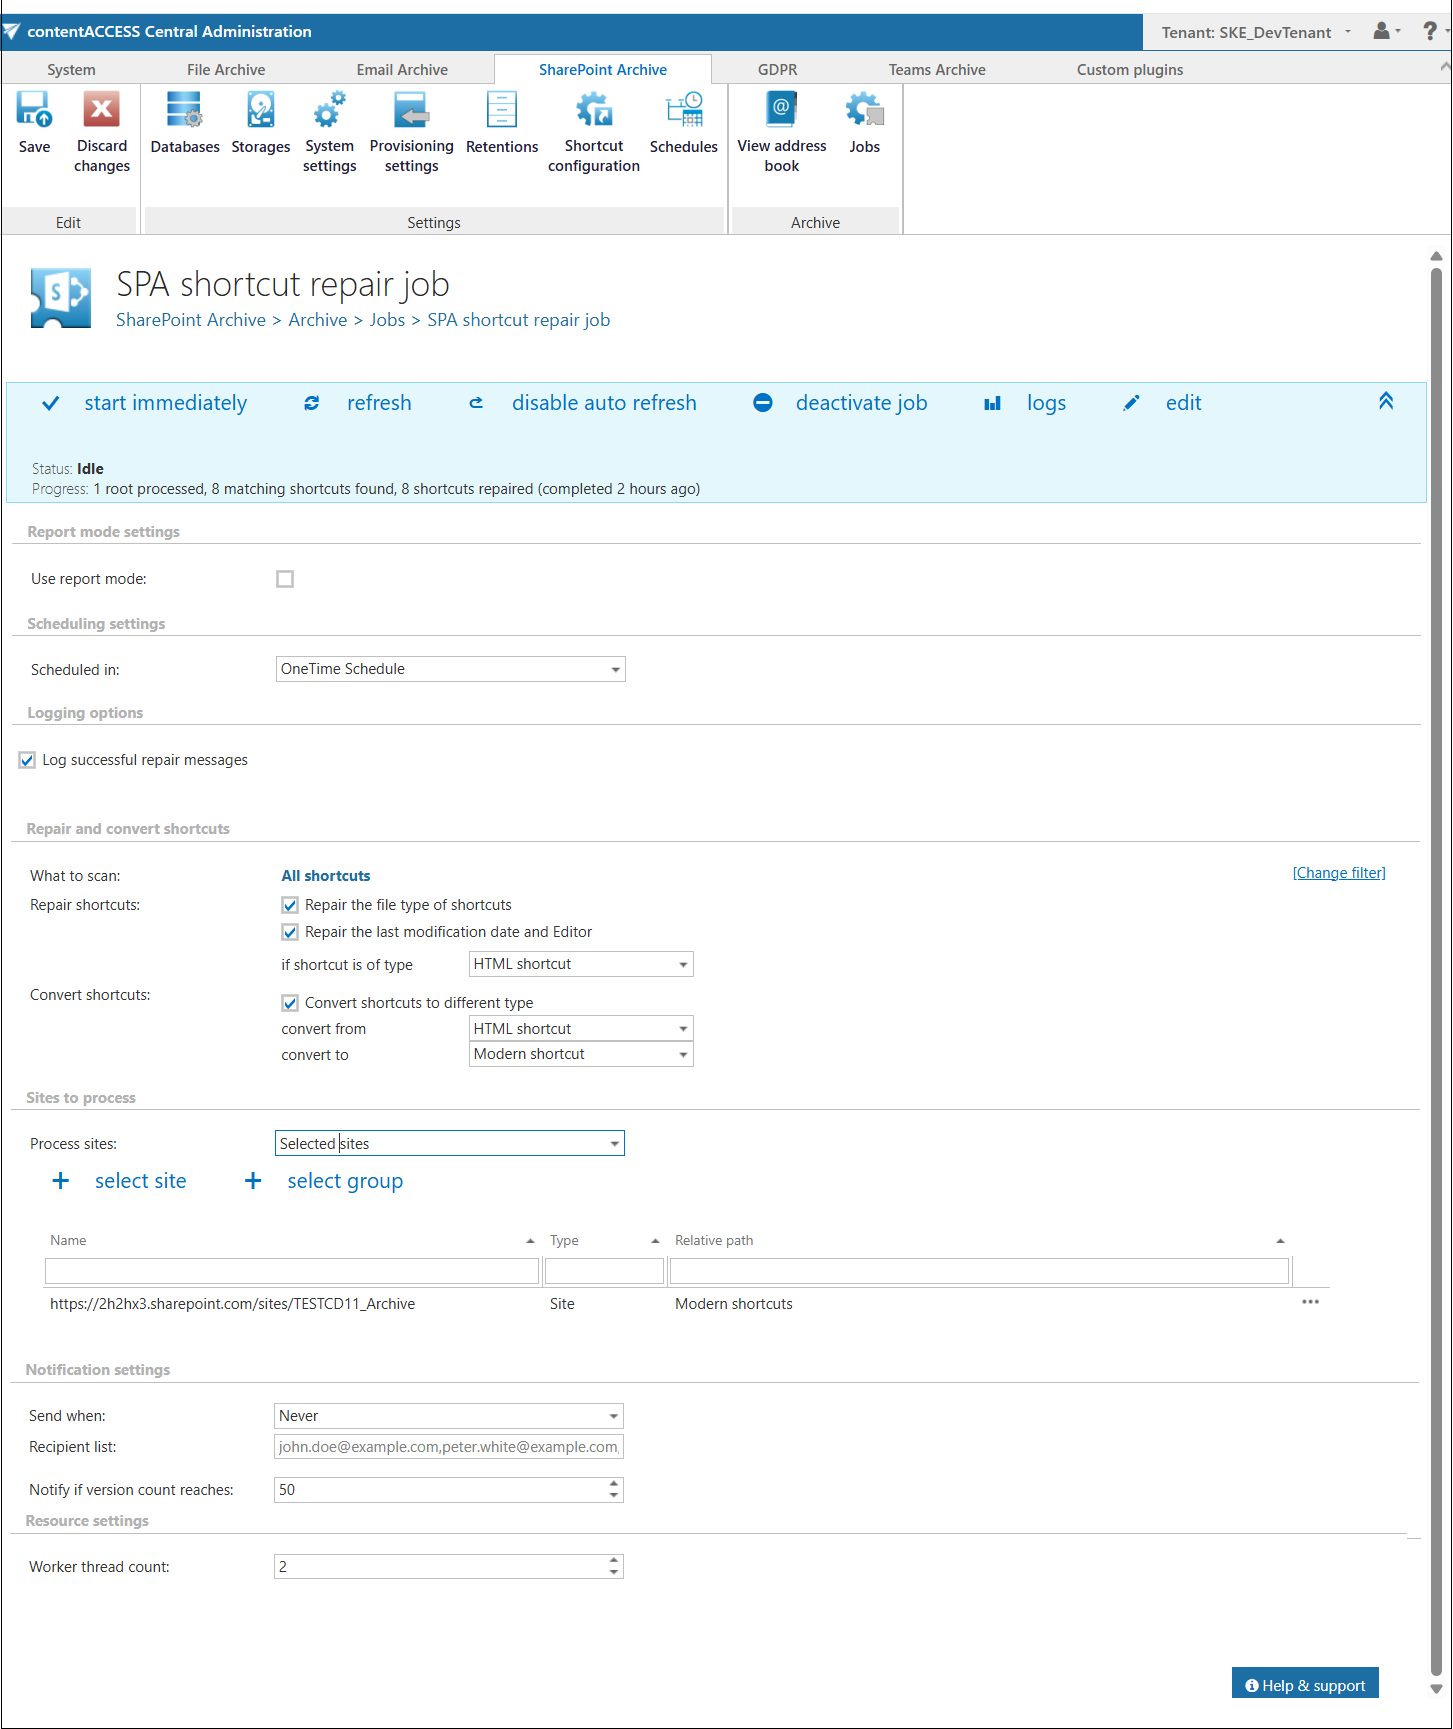
On the job’s configuration page go through the following sections. Most of them are mandatory, but filtering settings is optional.
✓ Report mode settings
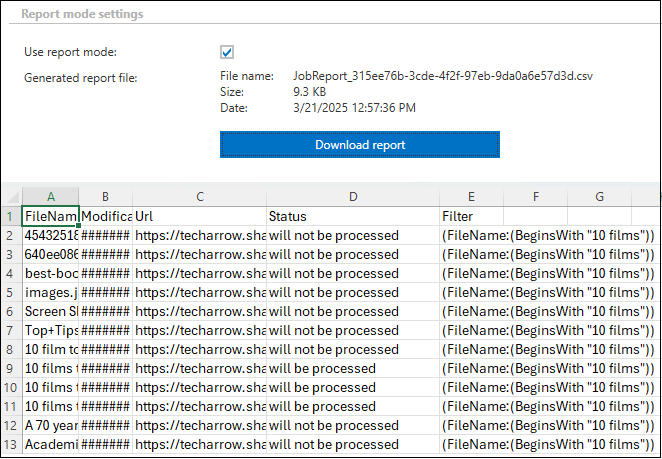
If the 'Use report mode‘ checkbox is checked, the job will run in report mode and the user will be able to download a .csv report here in this section after the job finishes the run. This file will contain a list of items that belong to the site(s)/related path(s) that is (are) selected in section ‘Sites to process‘ of the job and some information about them, including whether they will be processed or not.
✓ Scheduling settings
In this step, the running times of the shortcut repair job must be selected. It is possible either to select a scheduler from the list or to create a new scheduler via creating a new option. For shortcut repairing jobs, it is recommended to set up a One time scheduler for or to start the job manually from the status bar. For more information about how to set schedules please refer to the section Schedules above.

✓ Logging options
This section controls the logging behaviour of the SharePoint shortcut repair job.
By enabling the ‘Log successful repair messages’ option, the job will record log entries not only for errors and warnings, but also for successfully processed repair actions. This can be useful for auditing and troubleshooting purposes, as it provides detailed visibility into completed operations.

✓ Repair and convert shortcuts
This section allows you to define what the job should do with the shortcuts, including repairing shortcut properties and converting shortcuts between different types.
Here, you can configure the following options:
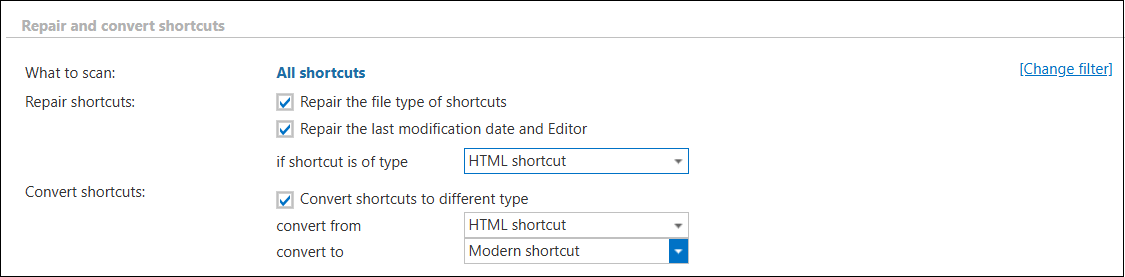
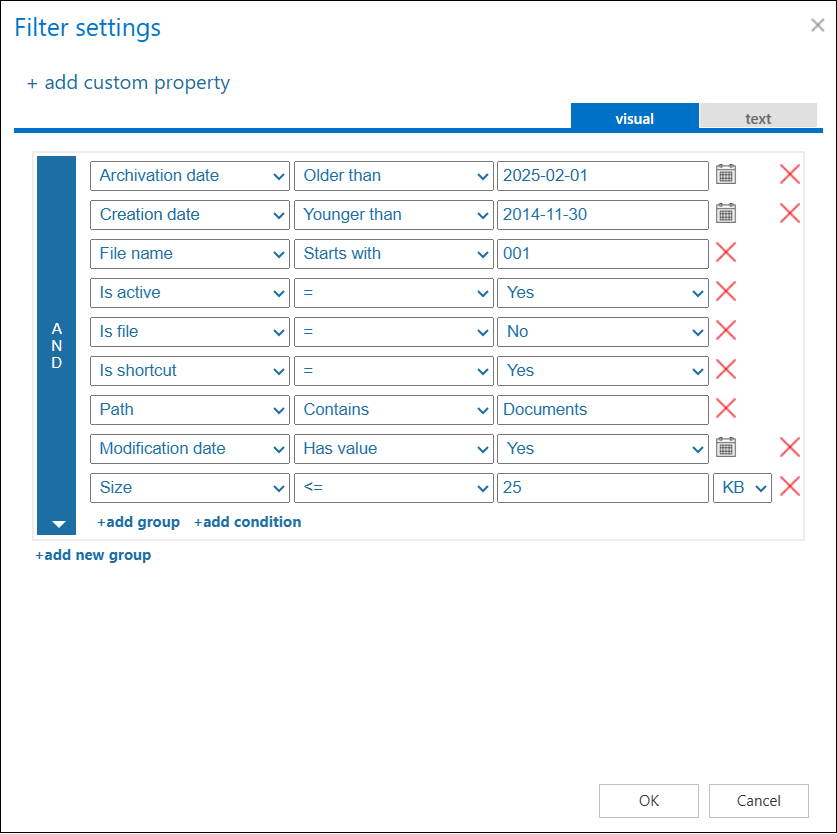
- What to scan – defines the scope of the scan. By default, all shortcuts are included, but you can also filter out shortcuts by clicking on the “not set” or “Change filter” buttons. The filtering settings allow you to define which files or items will be repaired. More details about the filtering options can be found in the related section.
- Repair shortcuts – decides what happens with the shortcuts. By checking the ‘Repair the file type of shortcuts’ option, you can configure the job to ensure that shortcuts have the correct FileType. The repair process applies only to HTML shortcuts, which can be selected from the dropdown menu.
By enabling the ‘Repair the last modification date and Editor’ option, the job will update the shortcut’s metadata so that the Last modified date and Editor fields are corrected according to the current repair operation. - Convert shortcuts – in addition to repairing shortcuts, this section also supports shortcut conversion. By selecting the ‘Convert shortcuts to different type’ option, the job can convert shortcuts from one type to another. The ‘Convert from’ and ‘Convert to’ dropdown lists allow you to specify the source shortcut type and the target shortcut type.
✓ Sites to process
In this section, you can decide which site(s) or group(s) will be processed. The options are changing based on the settings.
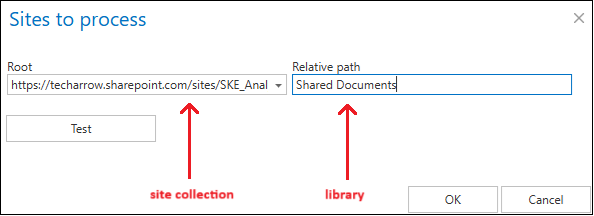
In On-premise mode, only the select site option is accessible for the users. Click on “+ select site” button, and specify the root connection and the relative URL in the pop-up window. A root can be a site collection, a subsite, a library or a folder already defined in the Site section.

When Microsoft 365 type is selected on the System settings page, you can either process all sites (all provisioned sites will be processed), or selected sites and/or groups in this section.

When the selected sites option is selected from the drop-down list, click on “+ select site” or “+ select group” and specify the root connection and the relative URL (if you do not wish to process the whole site) in the pop-up window. A root can be a site collection, a subsite, or a library. It is also possible to test the connection by using the Test button.

✓ Notification settings
Select here, when you will need to get notification emails from the SharePoint shortcut repair job. Into the Recipient list textbox insert the email address(es) of the person(s), who get the notifications. It is also possible to set that the emails will be sent only when the version count reaches a certain number.

✓ Resource settings
The number of worker threads responsible for the repairing processes can be set here; by default this value is set to 2.