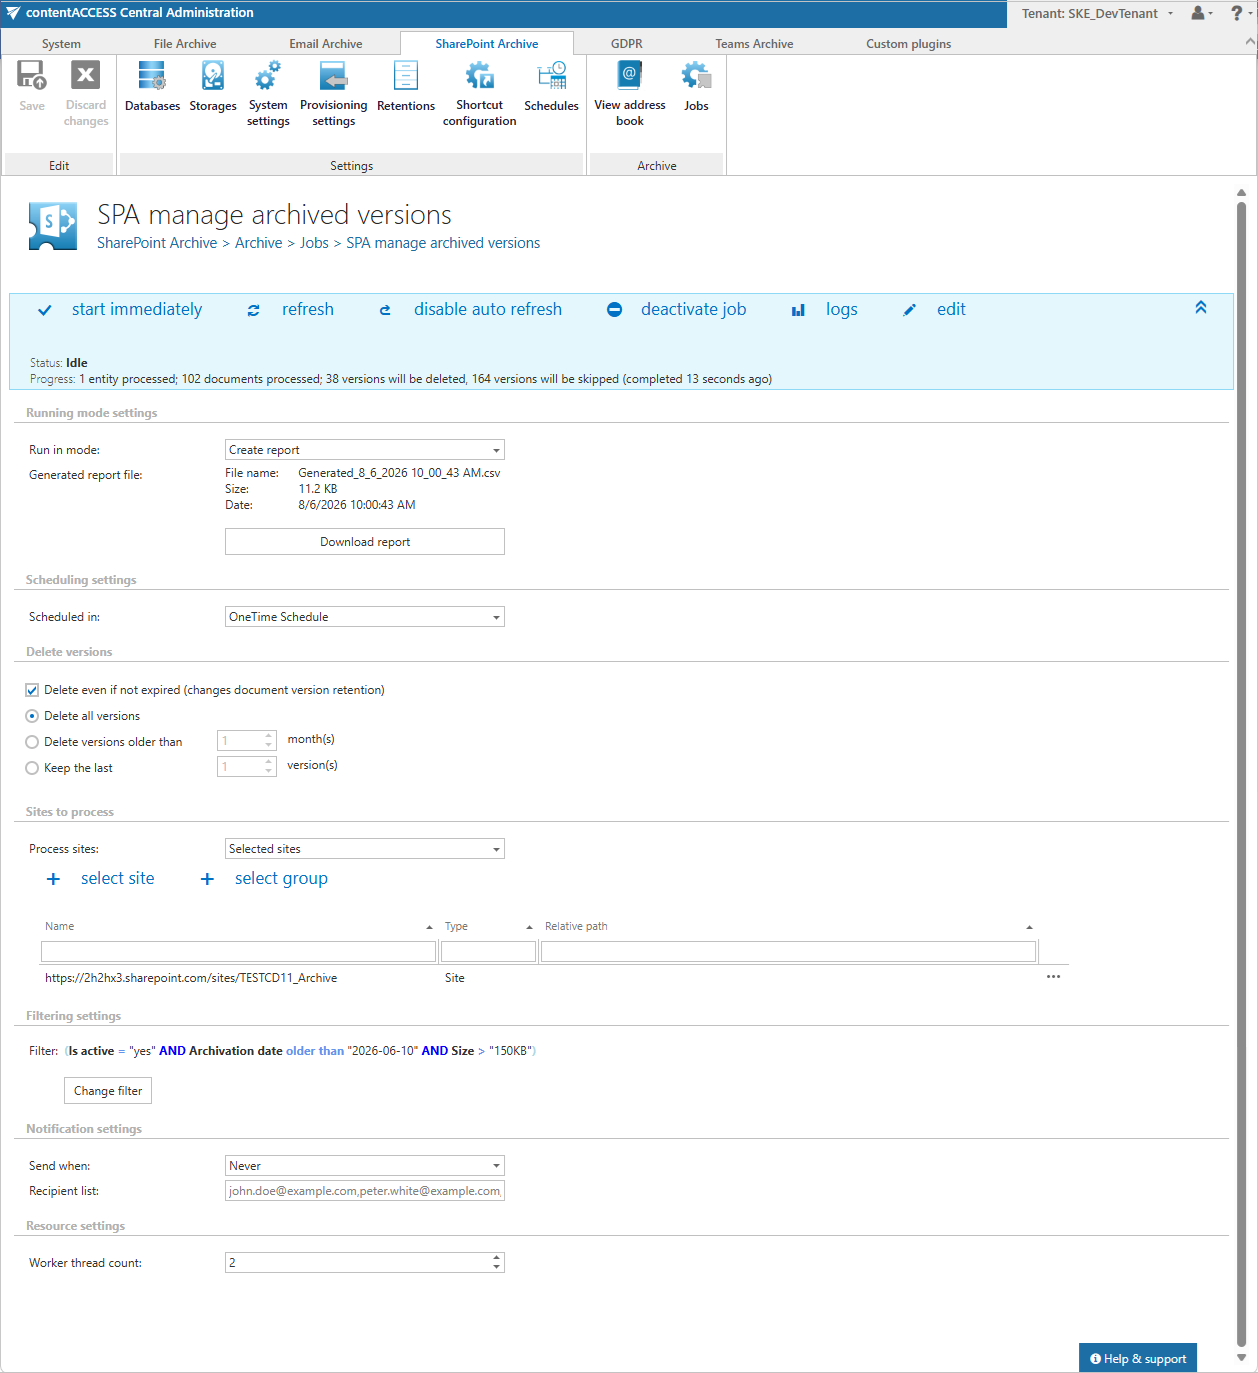
Configuration of Manage archived versions job in SharePoint archive
Introduction
The Manage archived versions job removes archived file versions in SharePoint archive. By default, it processes only versions whose retention period has already expired. If needed, administrators can enable an option to override document version retention so that the job also processes versions that have not yet expired. This retention override option is license-dependent and is available only with a valid Retention changer license.
With this job, administrators can control how archived versions are removed by keeping the last X versions of each archived file, or by keeping versions younger than a selected threshold — either a fixed date or X months. The job can run in Immediate processing, Create report, or Apply report mode. For a controlled workflow, run Create report first to review the affected items, then use Apply report to process the reviewed list.
This page describes how to create and configure a Manage archived versions job, including its running mode, scheduling, deletion, site scope, filtering, notification, and resource settings.
Create a new job
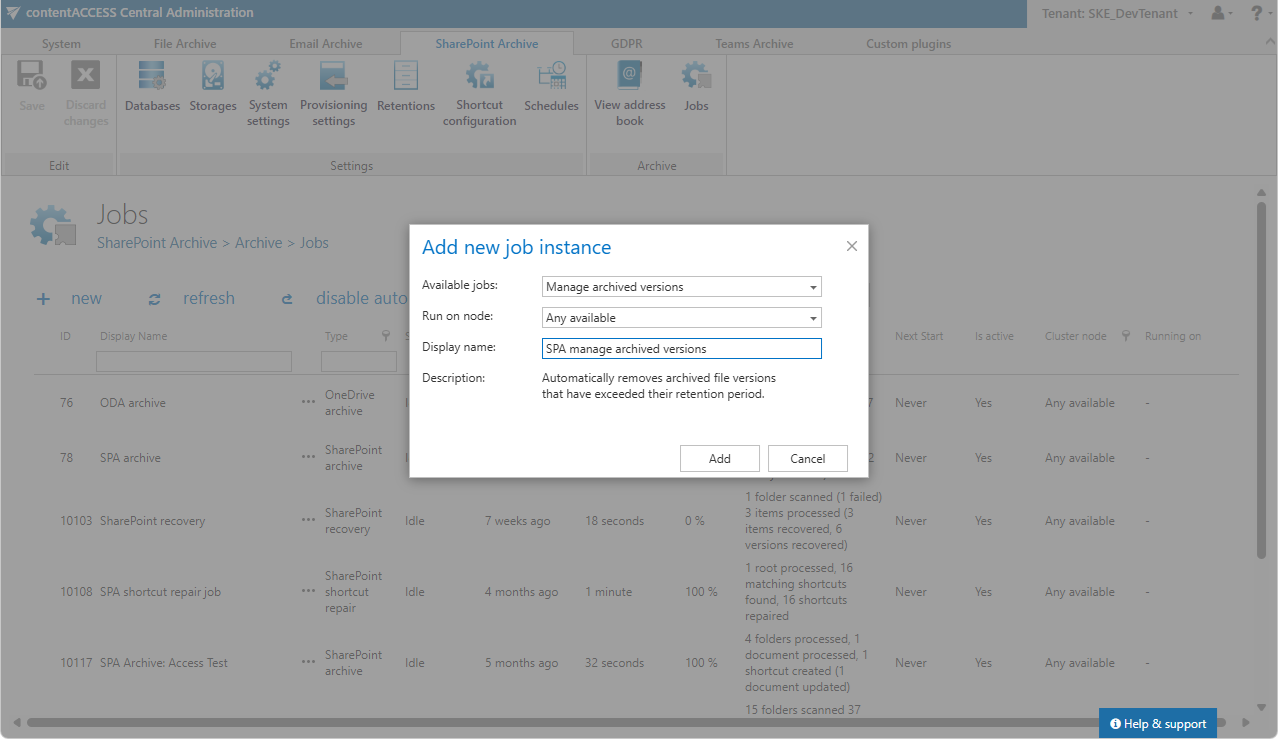
Navigate to SharePoint Archive tab => Archive group => Jobs, then click + new.
- In the Add new job instance dialog, select Manage archived versions from the Available jobs list.
- Select the node where the job should run from the Run on node list. If you do not want to specify a dedicated node, select Any available.
- Enter a Display name.
- Click Add.
On the job configuration page, review the following sections. Most of them are mandatory, while filtering settings are optional.
Running mode settings
The job can run in three modes:
- Immediate processing — Collects all archived file versions matching the filtering criteria and deletes them immediately.
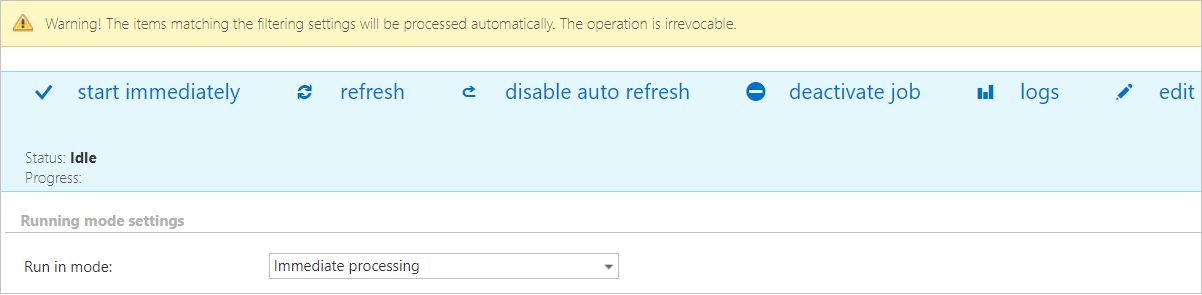
- Create report — Collects archived file versions matching the filtering criteria and generates a CSV report listing the affected items. The administrator can review and edit the list before any deletion takes place.

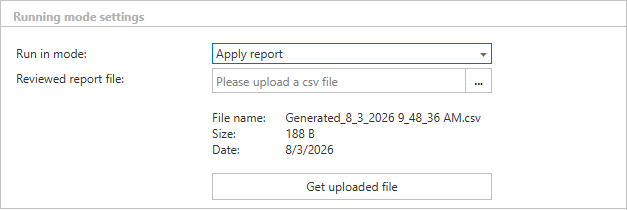
- Apply report — A CSV file previously generated in Create report mode must be uploaded here. The administrator can remove items from the list before running the job; only the versions listed in the file will be processed and deleted.
Scheduling settings
In this section, the job schedule must be configured. The job can run either as a one-time task or on a recurring schedule. You can select an existing scheduler from the Scheduled in dropdown list or create a new one by clicking Create new.... For more information on configuring schedulers, refer to Schedules.

Delete versions
In this section, you can define which archived file versions should be removed.
- Delete even if not expired (changes document version retention): If checked, the job deletes versions regardless of whether their retention period has expired. Enabling this option overrides the document version retention setting. This option is license-dependent and is only available if the tenant has a valid license for the Retention changer feature.
When this checkbox is unchecked, the options below apply only to expired versions:
- Delete all expired versions — All archived versions whose retention period has already expired will be deleted.
- Delete expired versions older than [X] month(s) — Only expired versions that are older than the specified number of months will be deleted.
- Keep at least the last [X] version(s) — Regardless of expiry, the specified number of most recent versions will always be retained.

When this checkbox is checked, the retention period is no longer considered, and the options apply to all versions:
- Delete all versions — All archived versions will be deleted regardless of their retention status.
- Delete versions older than [X] month(s) — Versions older than the specified number of months will be deleted.
- Keep the last [X] version(s) — The specified number of most recent versions will always be retained.

Sites to process
In this section, you can define which site(s) or group(s) should be processed. The available options depend on the SharePoint archive system settings.
- In On-premise mode, only + select site is available. Click + select site and specify the root and relative URL in the pop-up window. A root can be a site collection, subsite, library, or folder already defined in Site connections in the SharePoint archive.

- In Microsoft 365 mode, you can process all sites or selected sites, and you can select sites and/or groups. If selected sites is chosen, click + select site or + select group, then specify the root and relative URL. Use the Test button to verify the connection before saving.

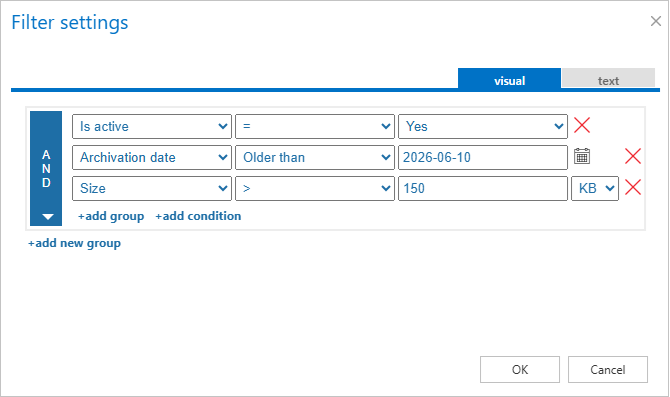
Filtering settings
Click the Change filter button and configure filtering according to your needs and/or regulations. To learn more about filtering, refer to Filtering in jobs.

Notification settings
In this section, you can configure job notifications. You can choose whether notification emails are sent always, never, or only when an error or warning occurs. In the Recipient list textbox, enter the email address(es) of the recipients. If there are multiple recipients, separate the addresses with a comma (,) or semicolon (;).

Resource settings
In this section, you can configure job resource settings. Set the value that determines how many items are processed simultaneously. The recommended default value is 2.
Once the job is configured, click Save. The job will be listed in the Jobs list and will run according to the defined schedule.