Teams archive Provisioning settings
Introduction
The Provisioning settings page in Teams Archive allows administrators to configure the provisioning job responsible for synchronizing Teams and Azure Active Directory (AAD) data with the Teams archive Address book.
The provisioning job:
- Synchronizes users of the Teams and AAD groups specified on the Provisioning settings page to the Teams archive Address book.
- Verifies the user's Teams memberships and records these memberships in contentACCESS.
- If contentACCESS Portal user creation is turned on in the Address book for an object (Teams/Team groups/Teams' users/AAD group), creates a contentACCESS Portal user for the object's users with a Microsoft 365 authentication type.
- Based on the roles assigned in the Address book, grants permissions on the specific Teams and private chats.
In contentACCESS, a provisioning job is created automatically when Teams Archive is activated for the first time.
Teams Archive provisioning settings are available on the Provisioning settings page (Teams Archive -> Settings -> Provisioning settings):
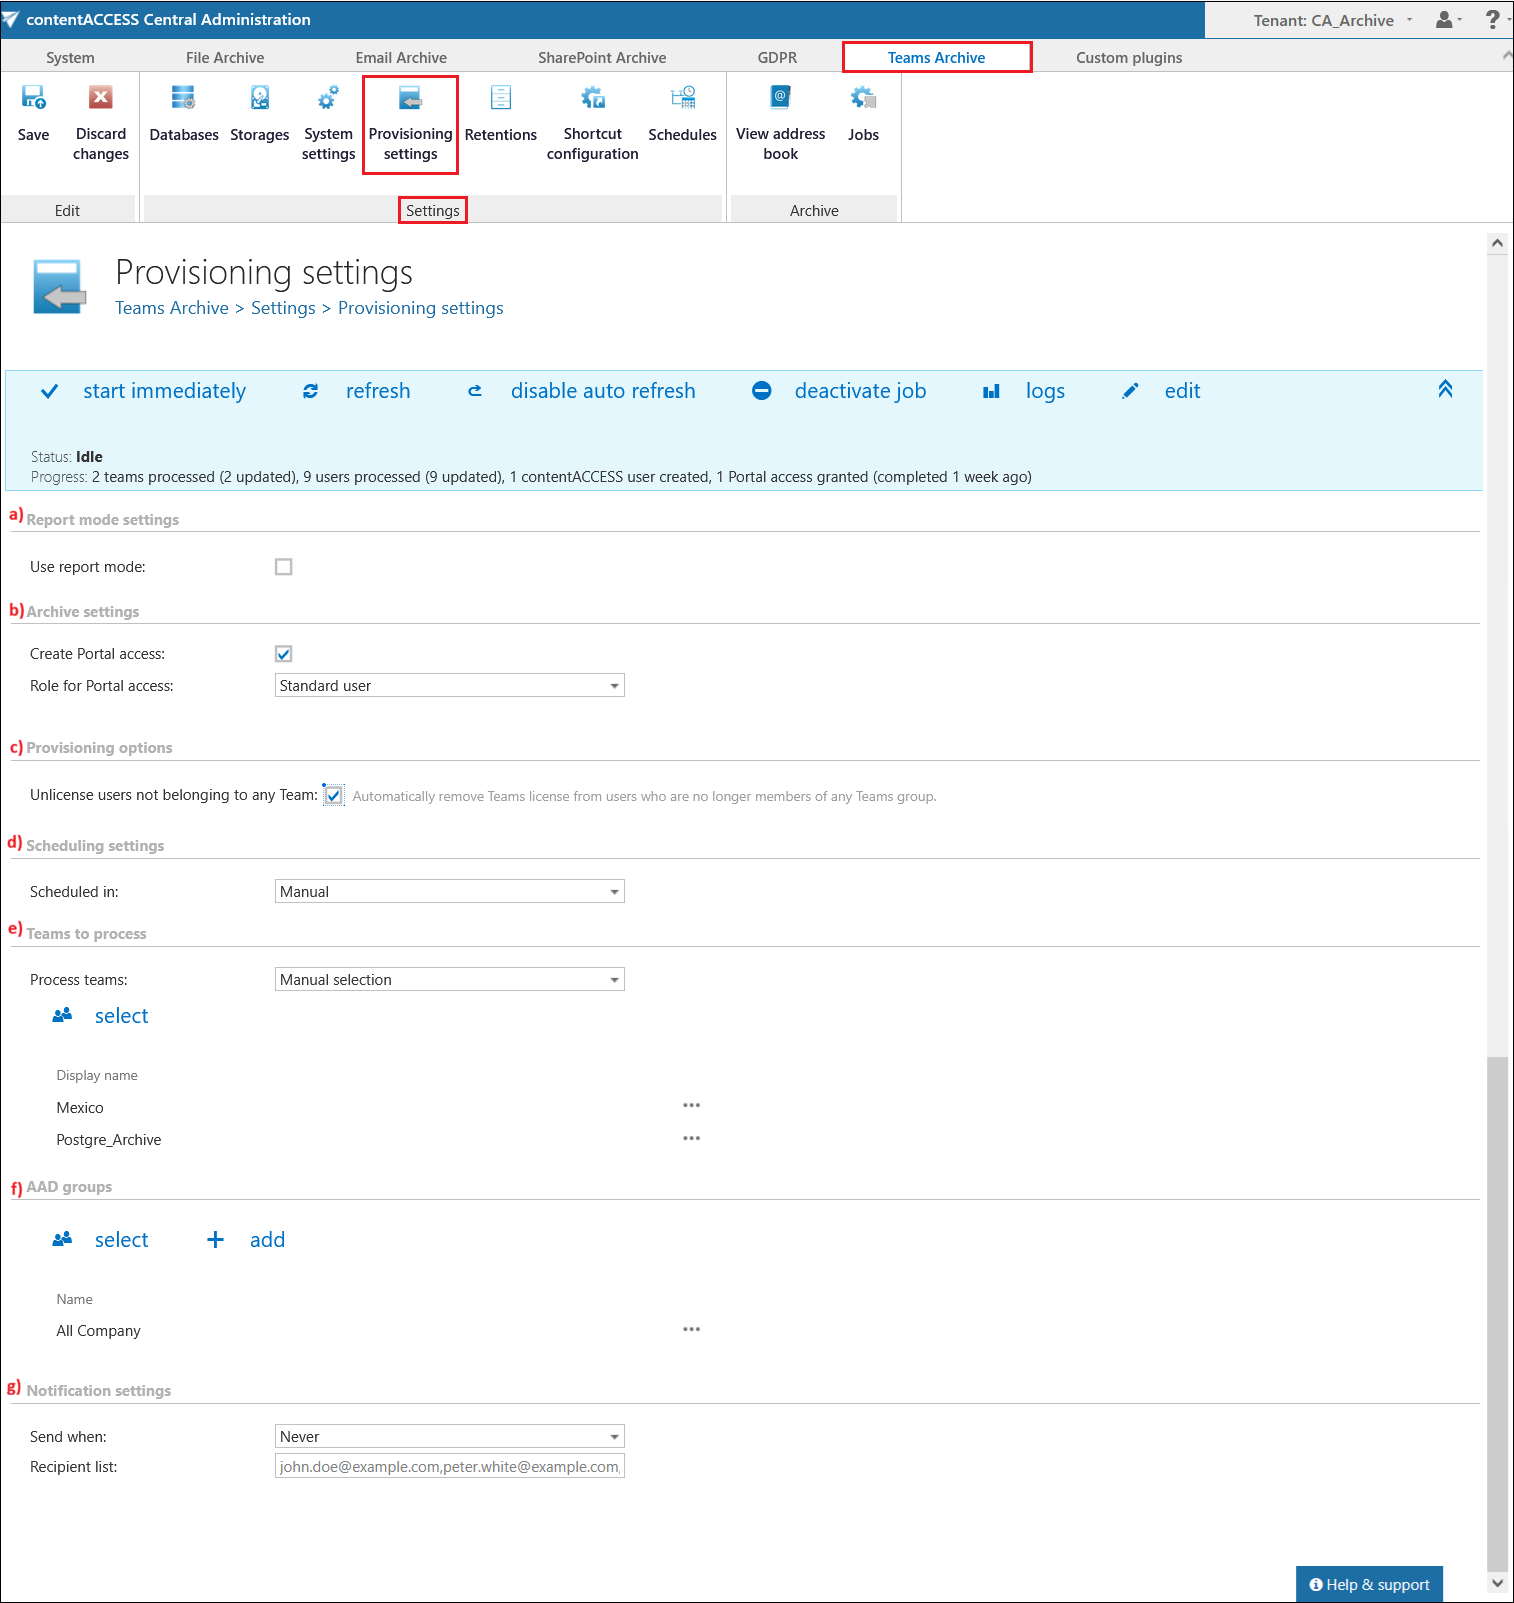
This page covers the following configuration areas: report mode, archive settings, provisioning options, scheduling, teams to process, AAD groups, and notification settings.
Report mode settings
If the Use report mode checkbox is checked, the job will run in report mode. After the job finishes its run in this mode, the user will be able to download a .csv report file in this section. The file contains a list of teams selected in the Teams to process section of the job, along with information about them, including whether and how they will be processed.
Archive settings
This configuration section allows assigning default contentACCESS Portal user roles for Teams archive users. During provisioning, users can be automatically granted Portal access with a predefined role selected here (for example, Standard user). This works similarly to other archives such as SharePoint, ensuring that Portal access is assigned immediately without requiring additional configuration in the Address book. It is recommended to assign a default role with limited contentACCESS Portal permissions. Roles must be created on the Roles page.
The Create Portal access setting controls whether users receive Portal access during provisioning. The system first evaluates the settings defined in the Address Book in the following order: User → Team → Team Group. An explicit Enabled or Disabled setting on a higher level always overrides lower levels and the provisioning job setting. If all levels in the Address Book are set to Inherit or remain undefined, the Create Portal access checkbox configured on the Provisioning Settings page determines whether Portal access is created.
Provisioning options
When the Unlicense users not belonging to any Team option is enabled, the system checks whether a user is assigned to any archived team. If the user is not a member of any archived team, the provisioning job removes the Teams license from this user.
As a result, the user's status in Address Book -> Users -> License status column changes from Licensed to Allowed. After the telemetry job has been executed, the User count in the Teams archive section on the Licensing page is reduced accordingly.
Note: The Unlicense users not belonging to any Team option does not apply to private chats. It only works with archived teams.
Scheduling settings
Select the running times of the provisioning job or create a new scheduler. For more information on how to configure scheduler settings, refer to the Schedules section.
Teams to process
In this section, you can choose whether to process all accessible Teams and Team groups or select only some of them manually.
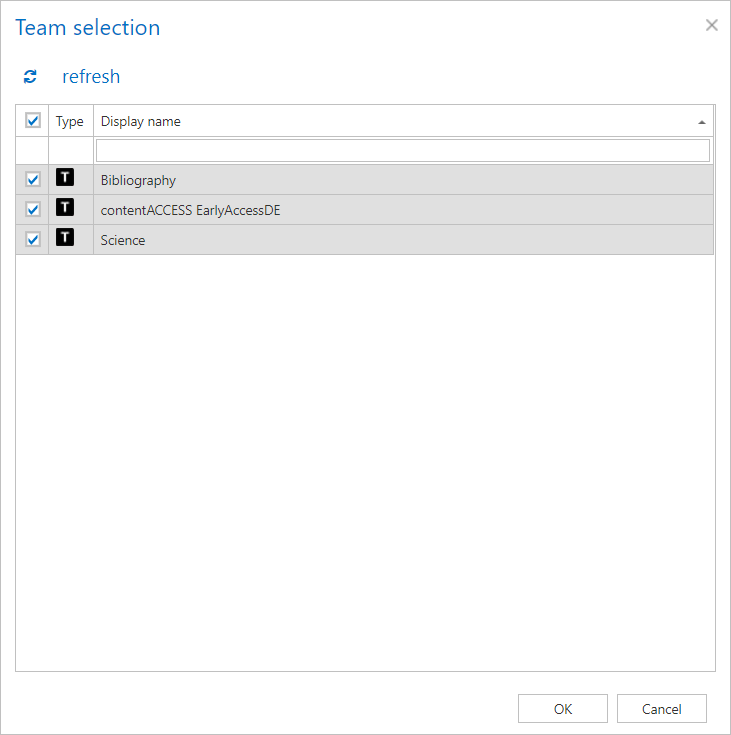
If you decide to select them manually, the  select option will appear. After clicking on it, the Team selection window opens, allowing you to select the Teams or Team groups to be processed.
- Click the select option.
- In the Team selection window, select the Teams or Team groups to be processed.
- Click OK.
Automated Team provisioning
There is also an option to set up Automated Team provisioning.
- From the Process teams dropdown list, select this option, then click + new.
- The Team selection window opens, where you can specify a list of filters for a group, based on which teams you want to be processed. Every filter is associated with one group. All teams matching the specified filter are added to the group.

Before specifying a filter, select a Group from the dropdown list. If no groups exist, you can create one directly from here by clicking Create group. For more information about group creation, see the Teams archive Address book section.

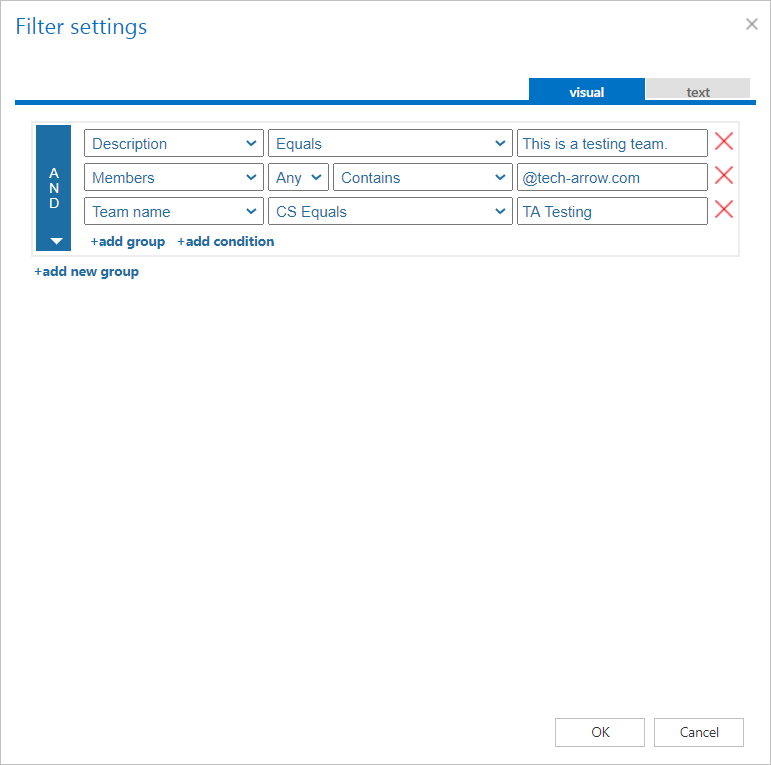
To specify a filter, click Change filter and specify your desired filtering options in the Filter settings window.
- Team name and Description are specified when a team is created.
- Members must be specified as UPN (User Principal Name) — the email address used to log in to Microsoft 365.
- Team name can also be specified in a case-sensitive (CS) manner.
Note: If the description is not filled in for a team during team creation, the team's name is used as the description for filtering purposes. For example, if a team is named "Team A" (no description) and the Description filter is set to "starts with 'Team'", this team will be processed, because the text "Team A" is returned as the description value.
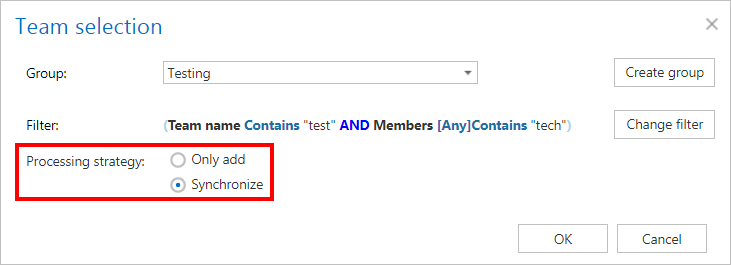
Select one of the Processing strategy options:
- Only add – new teams matching the filtering settings will be added, but old team members that do not match the filtering settings will not be removed from the group.
- Synchronize – only teams that match the filtering settings can be group members; teams that do not match the filtering settings will be removed from the group.
Click OK. The group settings (database, store, index zone, creation of contentACCESS Portal access) will be applied to the teams that are members of the group. If a team already has an associated database, store, or index zone, it will not be overwritten by the provisioning job.
AAD groups
In this section, you can select AAD groups that you want to add to the Address book and later use for private chat archiving. There are two available group types and three group membership types.
- Group types:
- Security — used to manage user and computer access to shared resources.
- Microsoft 365 — provides collaboration opportunities by giving group members access to a shared mailbox, calendar, files, SharePoint sites, and more.
- Group membership types:
- Assigned — lets you add specific users as members of a group with unique permissions.
- Dynamic user — lets you use dynamic membership rules to automatically add and remove members.
- Dynamic device — lets you use dynamic group rules to automatically add and remove devices.
For more information about group and group membership types, see the Microsoft Entra groups article.
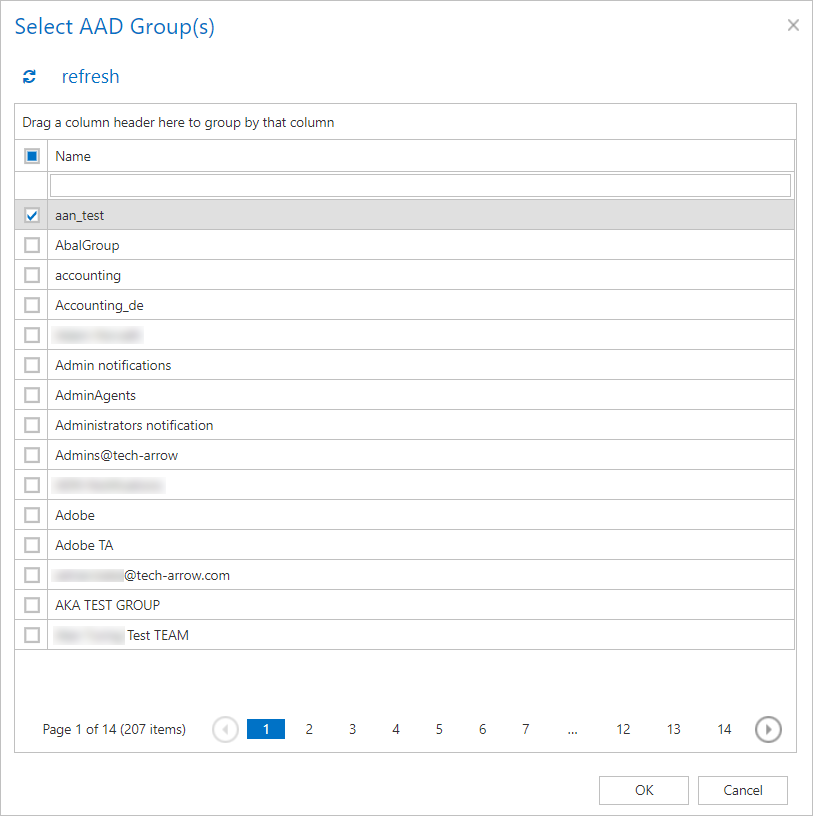
To manually select from the available groups:
- Click the select button. The Select AAD Group(s) window opens.
- Select the AAD groups to be processed.
- Click OK.
If you want to add a group that is not in the list of available groups:
- Click + add. The Add AAD group window opens.
- Specify the group's name.
- Click OK to add it to the AAD groups list in Provisioning settings.

Notification settings
If the provisioning job fails to run properly, contentACCESS can send a warning about the problem. A notification email is sent to the email address set under the Recipient list option. You can also choose when these email messages should be sent: only if errors occur, when errors or warnings occur, or always, regardless of whether the provisioning job completed successfully.
Save the settings and start the Provisioning job.