Email management job configuration
This plugin was developed for scanning mailboxes and processing & archiving the email messages and its contents into a specific storage.
After you have successfully created a new job for Email management plugin (for more information how to create a new job please refer to section Creating new jobs in contentACCESS), you can start to configure it. Navigate to the Custom plugins ⇒ General ⇒ click on Jobs button and choose the job from the list. Click on ellipsis (…) and choose Configure option from the context menu as on Screenshot A (or double click on it in the grid). It is also possible to open the job for further configuration with a double click on the corresponding job icon in the Jobs ribbon group (Screenshot B).
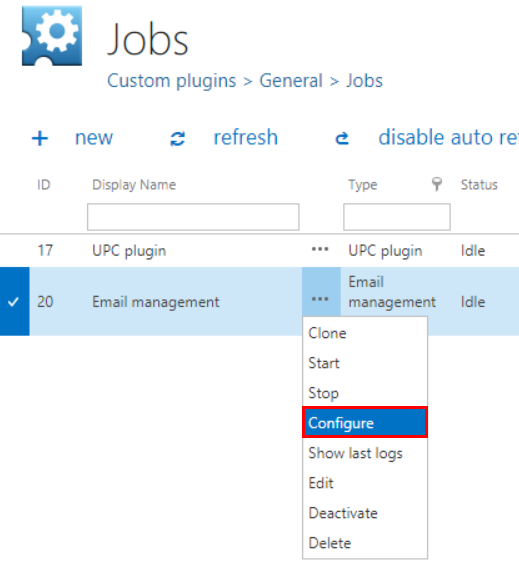
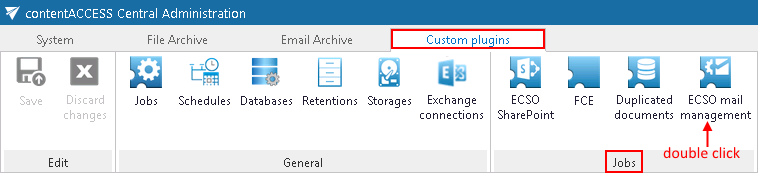
Screenshot A Screenshot B
The job's configuration page will open. The following sections must be configured here:
✓ EWS Settings
As first step it is necessary to select the previously configured Exchange connection from the dropdown list. Using these connection settings, the user will be allowed to operate over the mailboxes (check section Mailbox settings below). For further information on how to perform EWS (Exchange Web Services) settings please refer to section Exchange connections.

Note: The user set in the "Exchange connections" must have full access permission to all mailboxes.
✓ Database settings:
Select a connection, where the metadata will be stored, from the dropdown list. (For further information on how to set database connectors please refer to section How to create/configure databases — All databases.)

✓ Scheduling settings:
In this step the running times of the Email management plugin instance must be selected. It is possible either to select a scheduler from the list or to create a new scheduler via create new option. (For more information about how to set schedulers refer to the section Schedules above.)

✓ Include folders:
Email management plugin is crawling in one single or in multiple mailbox folders and also in recursive folder structures. Before you enter the folders to be crawled, it is necessary to select the folder filtering type.

If you set One single folder type, then only one predefined folder will be processed (e.g. if you set %INBOX%Subfolder1, then only Subfolder1 will be processed). If you set Recursive, starting from a single folder filtering type, then all folders starting from this folder will be processed (e.g. if you set %INBOX%Subfolder1, then starting from Subfolder1, every subfolders will be processed in the structure).
The same rule applies to the Multiple folders and to Multiple recursive, starting from a single folder types, too, but in this case we can work with more folders simultaneously (e.g.: %INBOX%, %OUTBOX%Folder name 5…or…%TASKS%, %CALENDARS%Folder name 6).
Note: It is possible to either select an item type from the dropdown list or to enter the item type to the textbox manually. If crawling more item types/folders always put item types between percent signs and also separate them with a comma.

✓ Storage settings:
Choose an already configured storage from the dropdown list. The processed emails will be stored here. (For more information how to set storages check section Storages above.)
✓ Item filtering:
This configuration allows you to filter among your mailbox-items by 3 types of criteria: by age, size or message class. It is also possible to use more filters simultaneously. To activate any of these filters, check the corresponding checkbox first, then click on the button to open the filter dialog:

- Age filter:
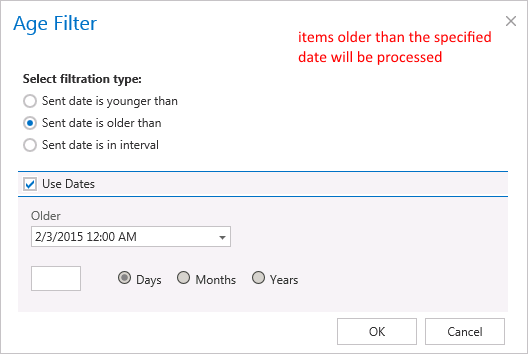
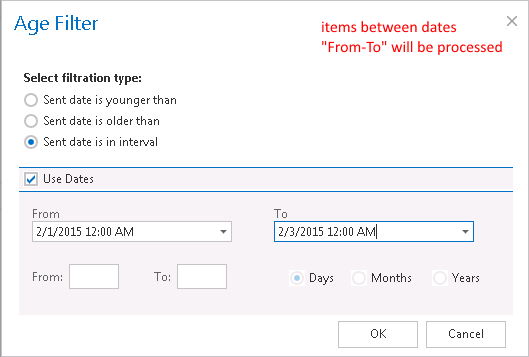
If you select an option from the “Select filtration type” list and check the Use Dates checkbox and specify a date, then the age filter will filter out all items, which have the sent date younger/older than this specific date. It is also possible to specify certain time interval with the Use Dates function. In this case the items falling under this sent date interval will be filtered out. This age filtering type should be used if you would like to process emails with a specific sent date.
Examples of using dates:

Examples of filtering using days/months/years: If the Use dates checkbox is not selected, then the date selection option becomes inactive. In this case it is allowed to filter between items that are Younger/Older than a certain number of days/month/years. Enter the number into the checkbox next to the Days/Months/Years radio button (screenshot A). It is also allowed to filter items which belong to a certain period of time, e.g. between items from months 1 to 3 (screenshot B). This age filtering type should be used if you would like to process items, which are older/younger than a certain number of days/months/years (e.g. items older than 1 year). If the Age filter has been set, click OK.


Screenshot A: processing items younger than 90 days. Screenshot B: processing items in age 1-3 months.
-
Size filter:
This filter can be very useful, because it allows to find the biggest emails for further processing. If these large emails (and large attachments) are permanently processed, the Exchange server will be relieved from redundant megabytes that cause its slowness in many cases.
For filtering emails according to this criteria, activate Size filter button by checking the checkbox next to it, then click on the active button.
In the Size filter dialog choose from the filtering types (Bigger then, Smaller then, or Between values), enter the size (in kilobytes) and click OK. -
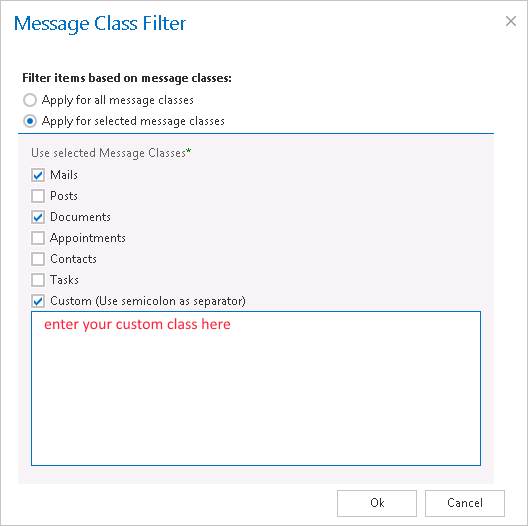
Message class filter:
This filter was improved to select certain message classes to be processed. Using this filter, the user will be allowed to filter out different document types, such as mails, documents, contacts etc. For filtering emails according to this criteria, activate Message class filter button by checking the checkbox next to it, then click on the active button.
In the Message class filter dialog it is possible to choose if the filter will be applied for all message classes (choose radio button Apply for all message classes) or only for some selected classes (Apply for selected message classes). It is also allowed to add Custom message classes to the list of the already existing ones. After all necessary custom classes have been checked, click on OK.
After all settings have been done, a summary of filtering settings will be displayed under section Item filtering as it is shown on the screenshot below:

✓ Processing settings:
The user can choose from 3 main ways of storing emails and attachments. It is possible either to archive the entire email message (in .msg format) with the attachment together (Simple archive), or just the attachment (Archive attachment). It is also possible to archive the entire email and copy it to the Public folder (Archive and copy to Public folder). This function helps to share the document with other users. Everyone with a user account and password on the Exchange server can access the Public Folder.

Insert Public Folder data into the below displayed textboxes to establish the connection between the Public Folder and the archive management system:

Custom categories to process function enables to restrict searching in the mailbox to the categories that are selected here. E. g. if Red Category is set, this means that only emails labeled with Red Category will be processed.
Split attachments:
by checking this checkbox, the email message in .msg format and the corresponding attachments will be stored separately from each other. Both will be stored in the selected storage, but separately from each other. This helps to save storage space. Let’s assume that emails of more users (for example 5 users) will be stored in the same storage. Split attachments function will recognize duplicate attachments and they will be stored only once (not 5x). However, email bodies will be stored 5 times, as emails in different mailboxes have different metadata.
Note: By splitting the attachments, it is possible to spare more storage space for the company documents. It is obligatory that the selected storage supports single instancing.
Create tag view:
contentACCESS Portal and officeGATE are both associated with contentACCESS. Thus emails and attachments processed in contentACCESS can be easily found in contentACCESS Portal and officeGATE, too. By creating tag view, the items falling under more custom categories will be gathered together under a main folder, which is set here in the Create tag view textbox. This main folder will be displayed under this “tag view root name” both in contentACCESS Portal and officeGATE systems. Subfolders under this main folder will gather together all items falling under a certain custom category.
✓ Mailbox settings:
A new mailbox that needs to be processed can be added here. Click on + new and fill in the Name and Email into the popup window. Also check Is Active checkbox, otherwise the added mailbox will not be crawled (crawling of the mailbox will be in sleeping mode). Click on OK:

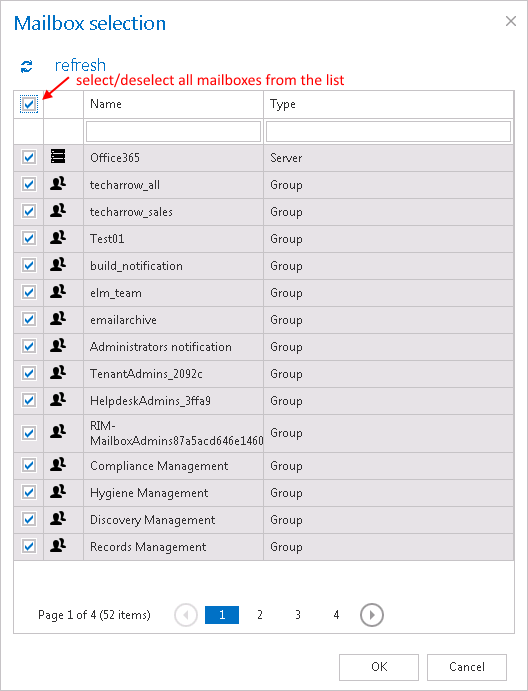
contentACCESS allows you to crawl more mailboxes at the same time. To select mailboxes to be crawled, navigate to ![]() select option and enter mailboxes into the Mailbox selection dialog box. With checking the checkbox next to Name you can select/deselect all mailboxes for further processing:
select option and enter mailboxes into the Mailbox selection dialog box. With checking the checkbox next to Name you can select/deselect all mailboxes for further processing:
Under Mailbox settings you can also edit/delete or manage access to the selected mailbox(es). Click with left mouse on the … (ellipsis) and choose an option from the dropdown list.

It is also possible to grant access to this mailbox for other users of contentACCESS Portal, officeGATE, or those who log in the mailbox through an online web application from mobile devices. By granting access to these users, they will have an access to the archived messages of the selected mailbox(es). Click on Manage access to mailbox in the context menu. Then click on + new and fill the Create new role association dialogue box.
There are multiple options how to grant access to a mailbox for a user in the Create new role association window. You can Create new user, you can Search for existing worker from the company or you can also Send an invitation to somebody who is not a contentACCESS user yet.
In any case, the “Standard user” role type must be selected from the dropdown list (a standard user has only the right to check the mailbox). On the below displayed screenshot we give access rights to the mailbox for an already existing contentACCESS user.

✓ Resource settings:
Under resource settings you can define the number of items that will be simultaneously crawled. It is not recommended to set here a value higher than the duplex number of cores of the processor, as it may extremely slow down the whole processing.

Never forget to save your job configurations at the end: click on Save in the upper left corner of the Central Administration ribbon.