How to configure and publish the Google Workspace Marketplace Add-on
Introduction
The Google Workspace Marketplace Add-on is a private Google Workspace application that lets users open migrated contentACCESS HTML shortcuts directly in Gmail. It is designed for contentACCESS HTML shortcuts and supports quick review and restore of archived email content without leaving the Google Workspace environment.
This page describes the end-to-end setup that a Google Workspace administrator must complete to create and publish the add-on. It covers:
- creating the required Google Cloud project,
- configuring OAuth consent,
- preparing the Apps Script project,
- enabling the Marketplace SDK,
- creating the deployment,
- configuring the Marketplace app and store listing,
- and installing the app for the target users or groups.
Prerequisites
Before you configure the add-on, make sure you have the following:
- A Google Workspace organization or domain where the add-on will be used.
- A customer account with sufficient permissions to create and manage the Cloud project and Marketplace configuration.
- The contentACCESS backend URL.
- A Google Workspace administrator for the final installation and approval if the organization restricts Marketplace installations.
Please note that private Marketplace apps are available only within the organization in which they are published.
How to configure and publish the add-on
The following steps describe the complete setup process for the Google Workspace Marketplace Add-on. First, you create the required Google Cloud project and connect it to the Apps Script project. Then you configure the OAuth consent and required scopes, enable the Marketplace SDK, and create the deployment that will be used by the app. After that, you define the Marketplace app settings, prepare the store listing, and publish the add-on. Finally, you install it in the customer’s Google Workspace environment and make it available to the selected users or groups.
Create a Google Cloud project
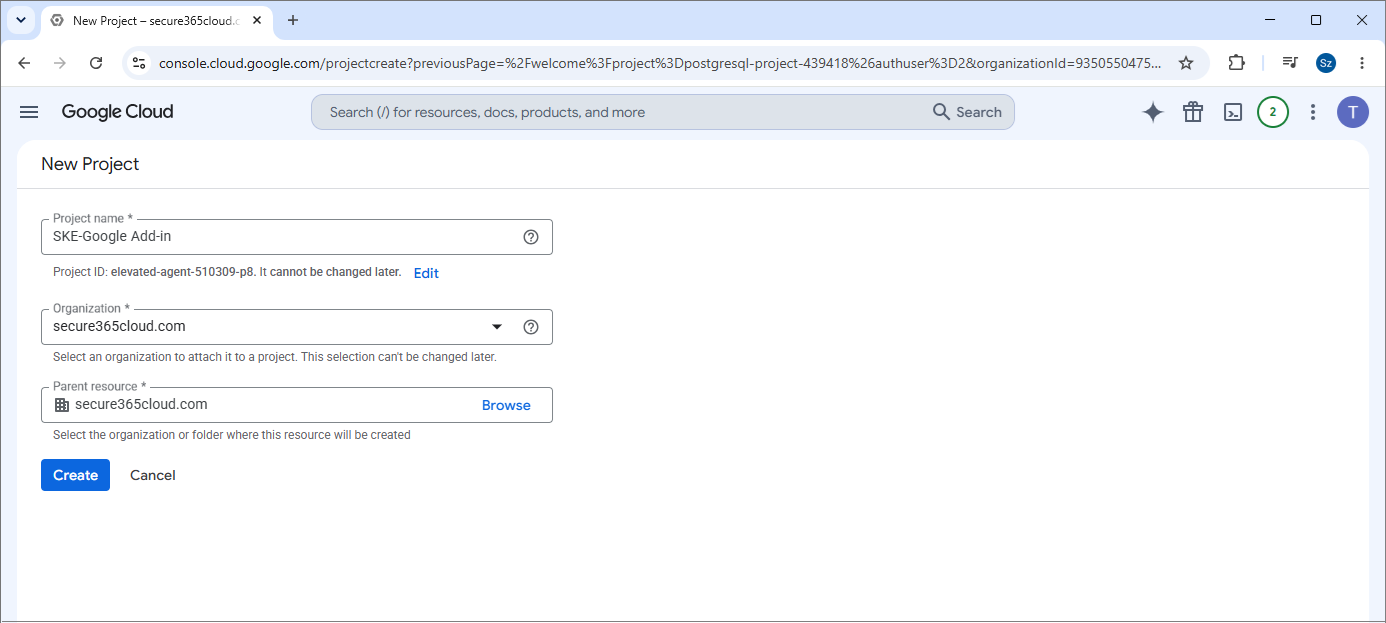
To create the required Google Cloud project, follow these steps:
- Sign in to Google Cloud with an account that has sufficient permissions for the Google Workspace environment.
- Open Google Cloud Console: https://console.cloud.google.com/
- At the top, click the project selector (the current project name or dropdown menu).
- Click New Project.
- Enter a project name.
- If the Organization/Location option appears, select your organization and the appropriate location.
- Click Create.
- Open the project selector again and select the newly created project.
Copy the Cloud project number
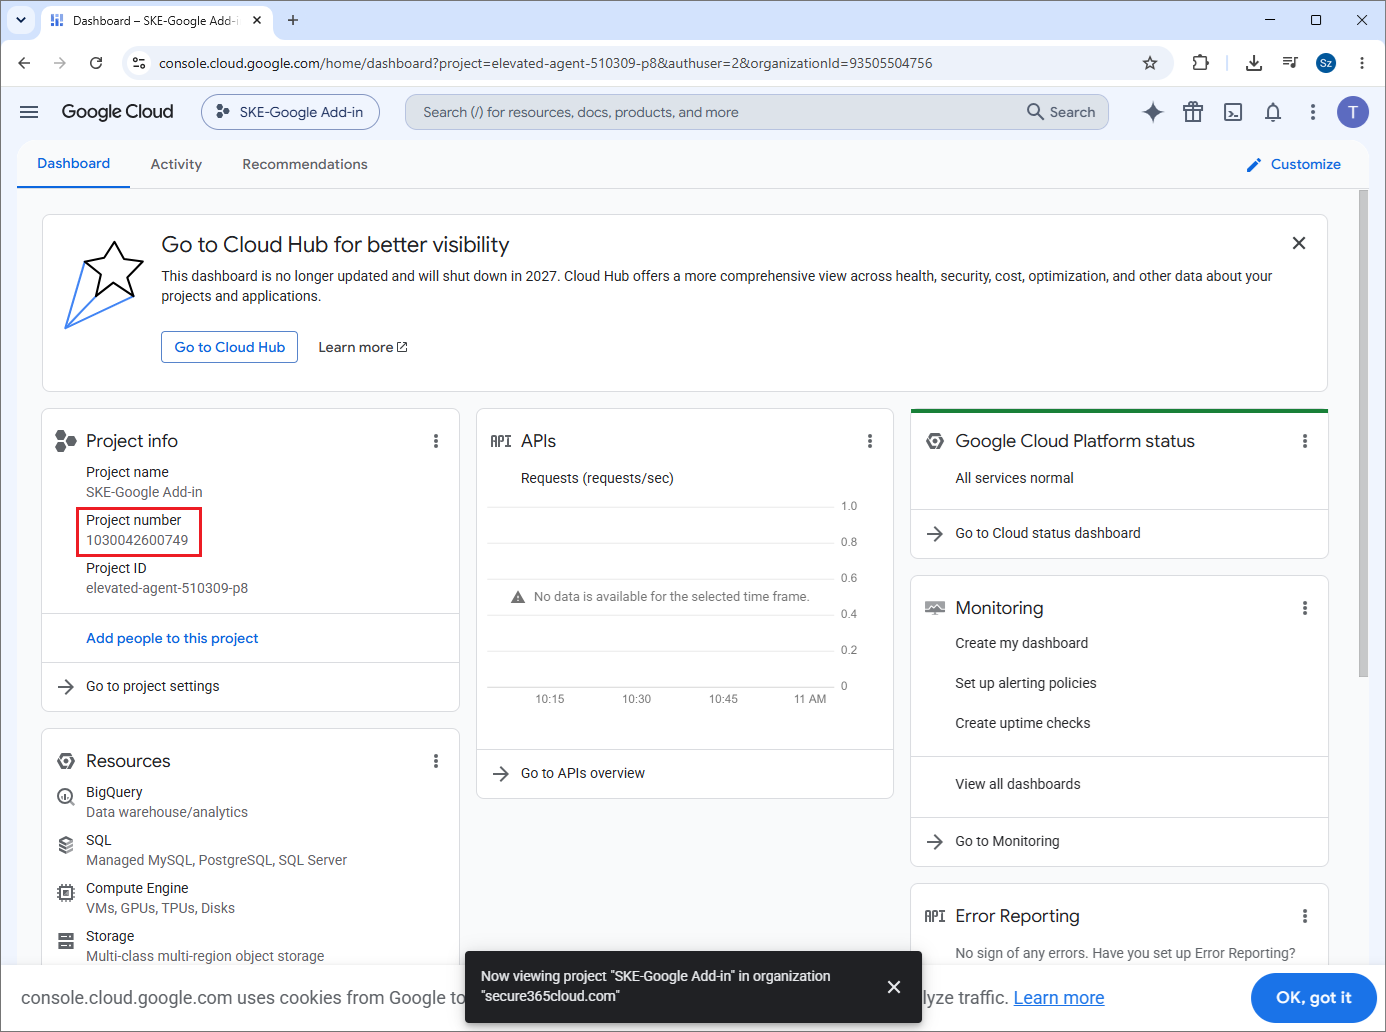
After you create the Cloud project, copy the Project number from the project dashboard. You will need this number when linking the Apps Script project to the Cloud project.
Configure Google Auth Platform / OAuth consent
This step is required so the add-on can access the required data from Gmail and read the related information from archived shortcuts. For the app to work correctly, it needs the appropriate Google permissions and an OAuth consent configuration for the customer’s Google Workspace environment.
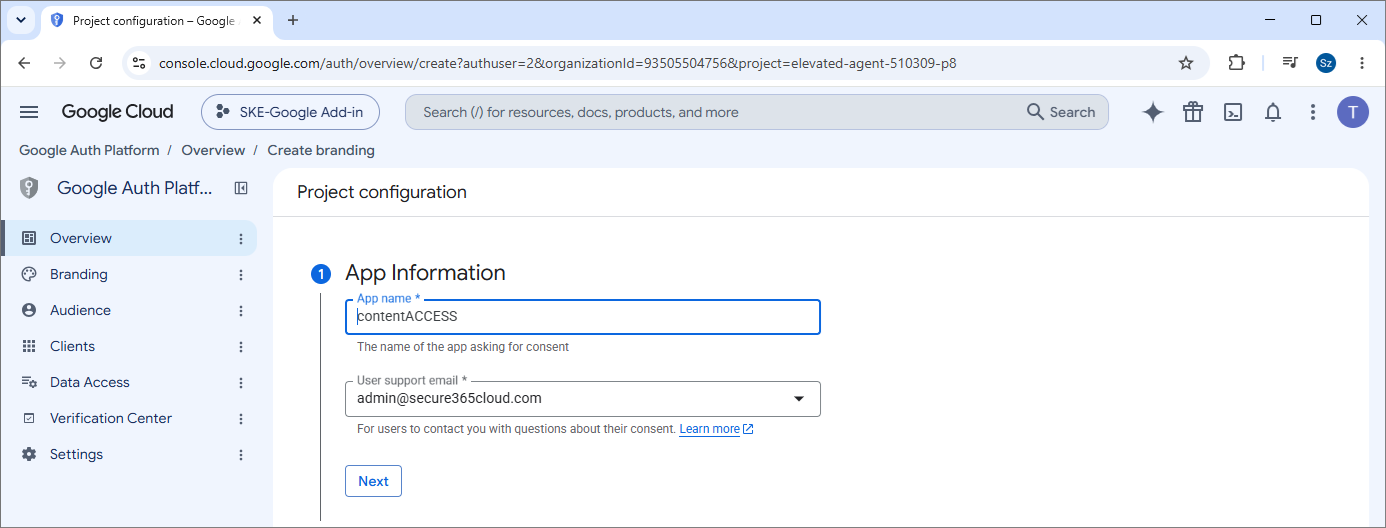
- Open Google Cloud Console, then go to Google Auth Platform > Branding. (From the hamburger menu in the top-left corner, select APIs and Services, and then choose OAuth consent screen. On the Google Auth Platform / Overview page, open the left-side menu and select Branding.)
- Configure the OAuth consent details for the new customer Cloud project:
- App name: contentACCESS
- User support email: customer/admin email
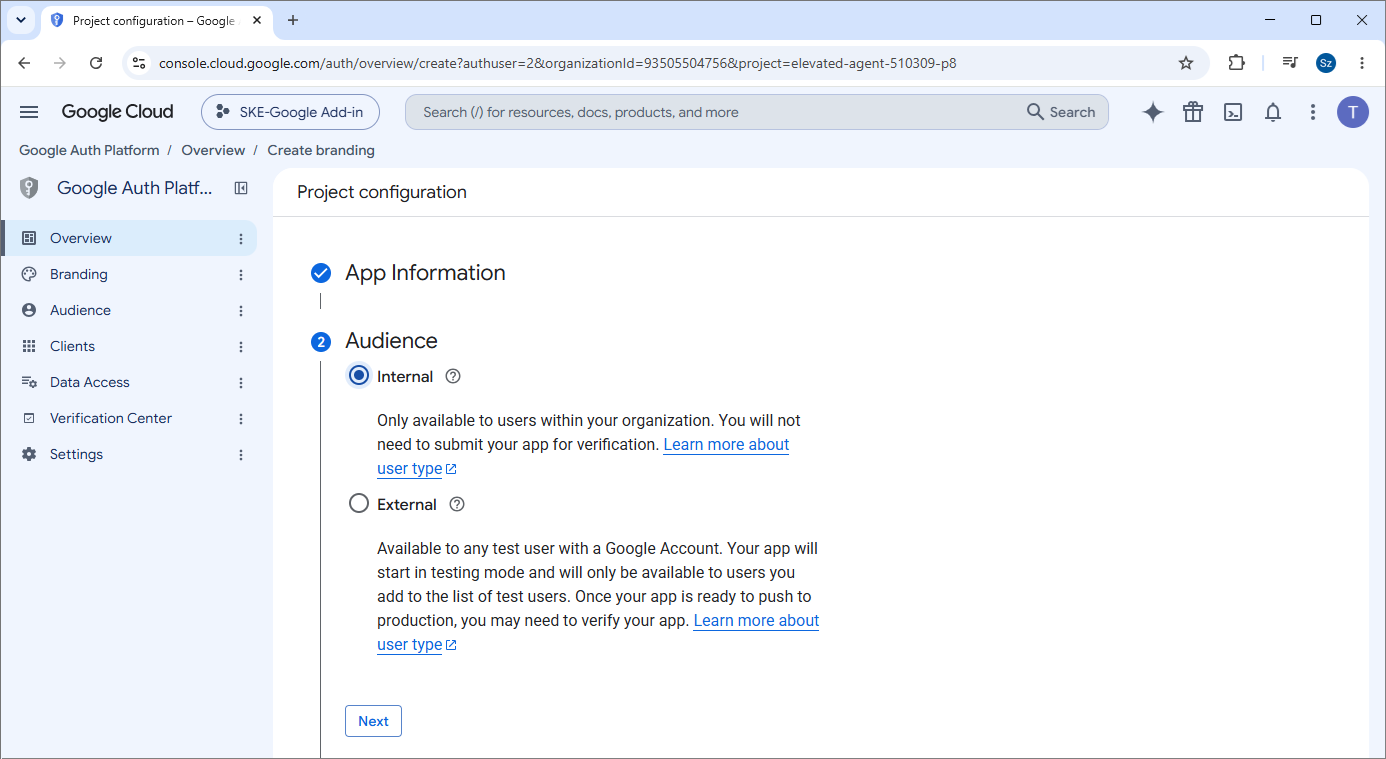
- Audience: Internal (for a private app used only within the customer’s Google Workspace organization)
- Developer contact information: developer/admin email (for example, support@tech-arrow.com or the customer’s administrator email)
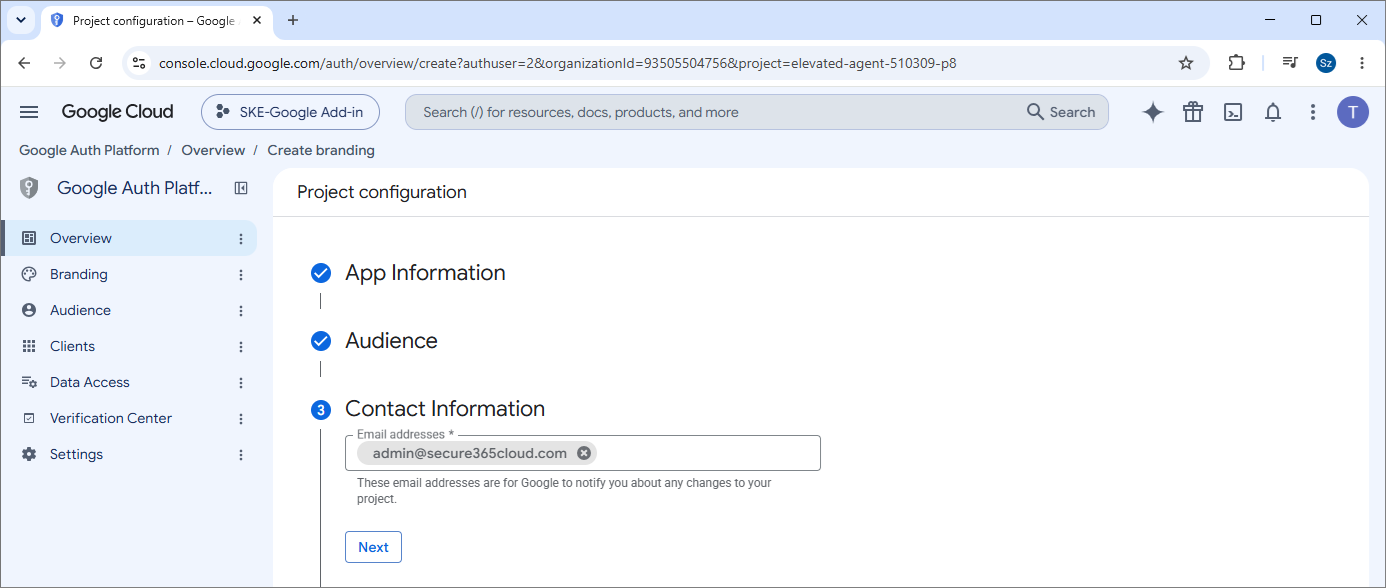
- Complete the required fields and save the configuration.
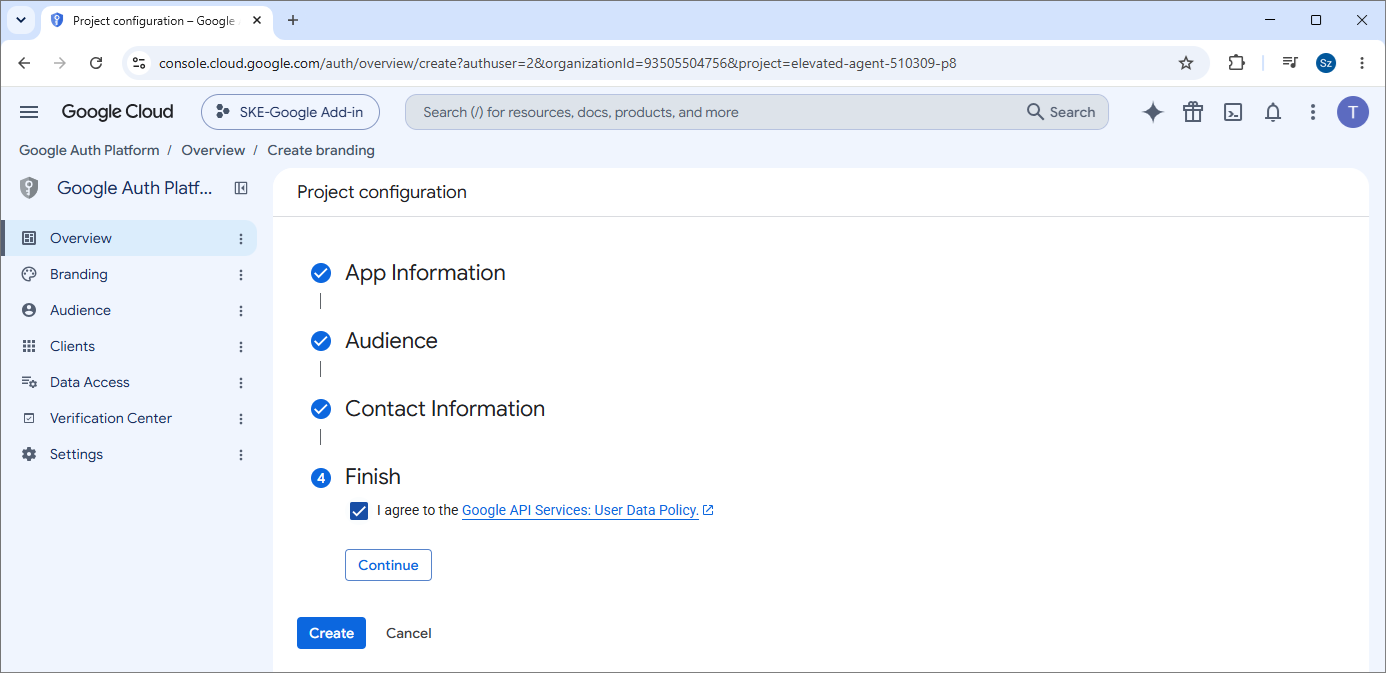
- After the OAuth configuration is complete, return to Apps Script > Project Settings > Google Cloud Project > Change project, and enter the Cloud project number.
This step must be completed before assigning the Cloud project to the Apps Script project. If the OAuth consent screen is not configured, Apps Script may display the message: “In order to change your project, you will need to configure the OAuth consent screen.”
This configuration allows the add-on to request and use the required Google Workspace permissions to read email data and shortcut metadata in the customer environment.
Create the Apps Script project
- Open Apps Script: https://script.google.com/
- Click New project.
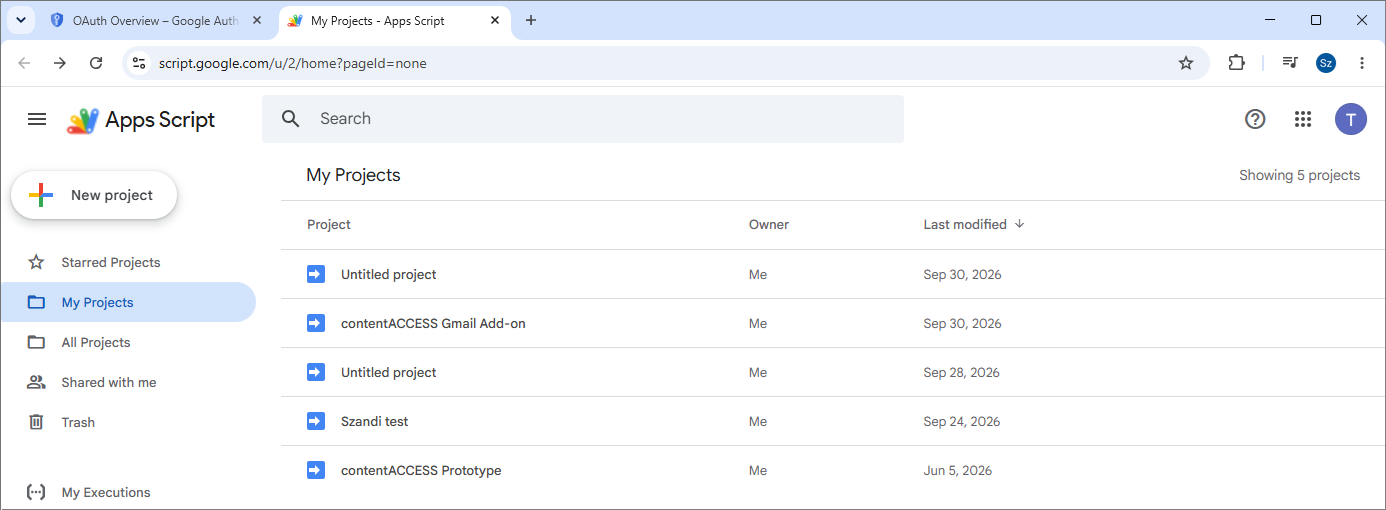
- Rename the project.
- Open Project Settings.
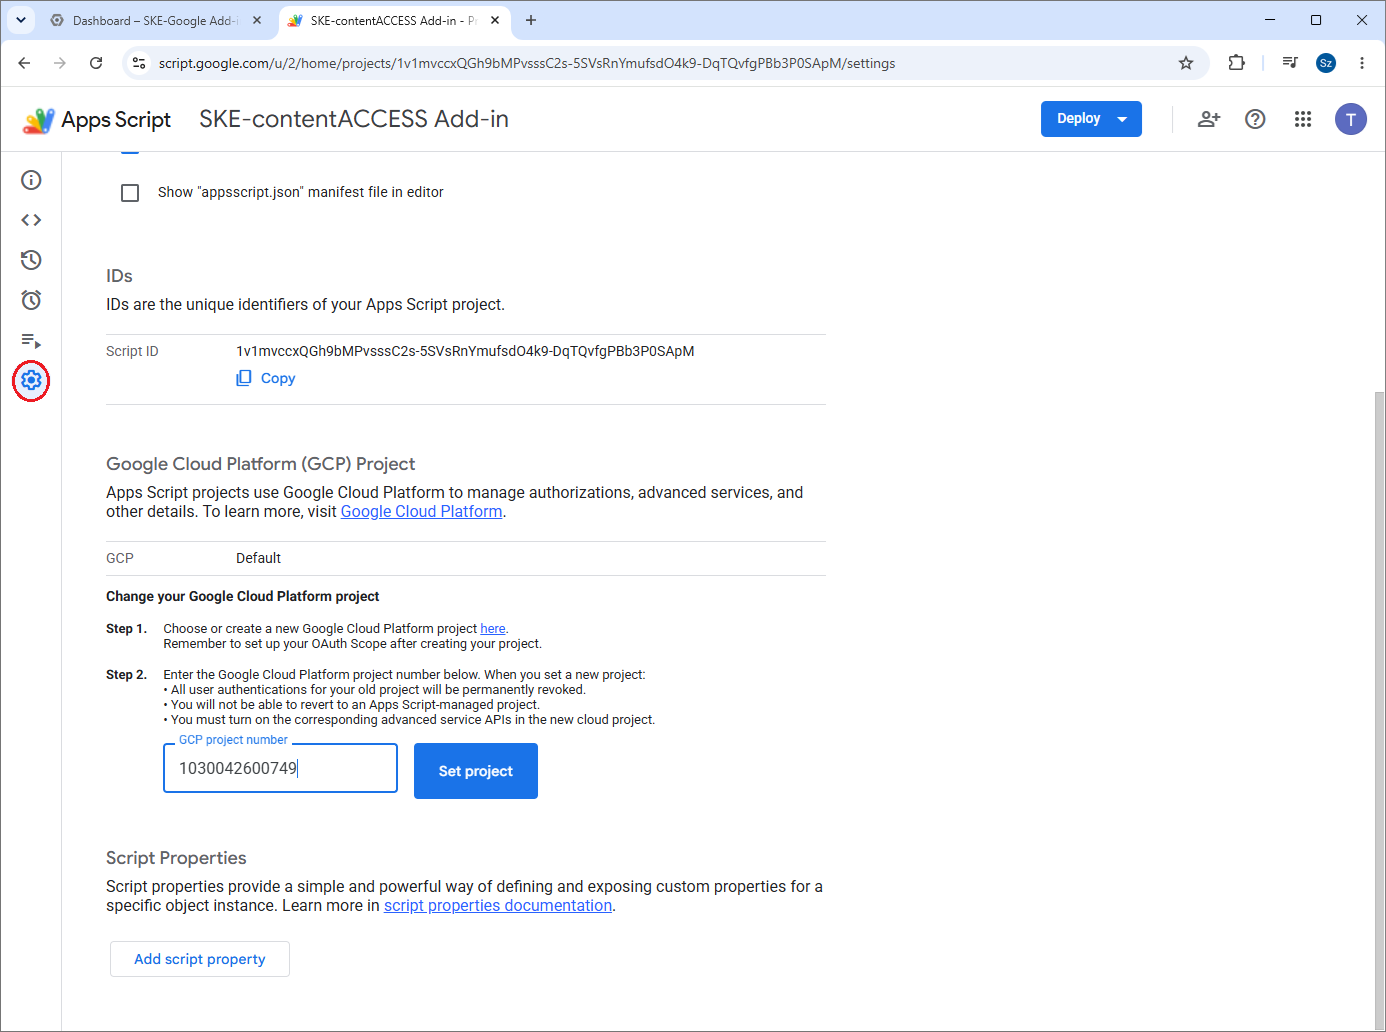
- Under Google Cloud Platform (GCP) Project, click Change project.
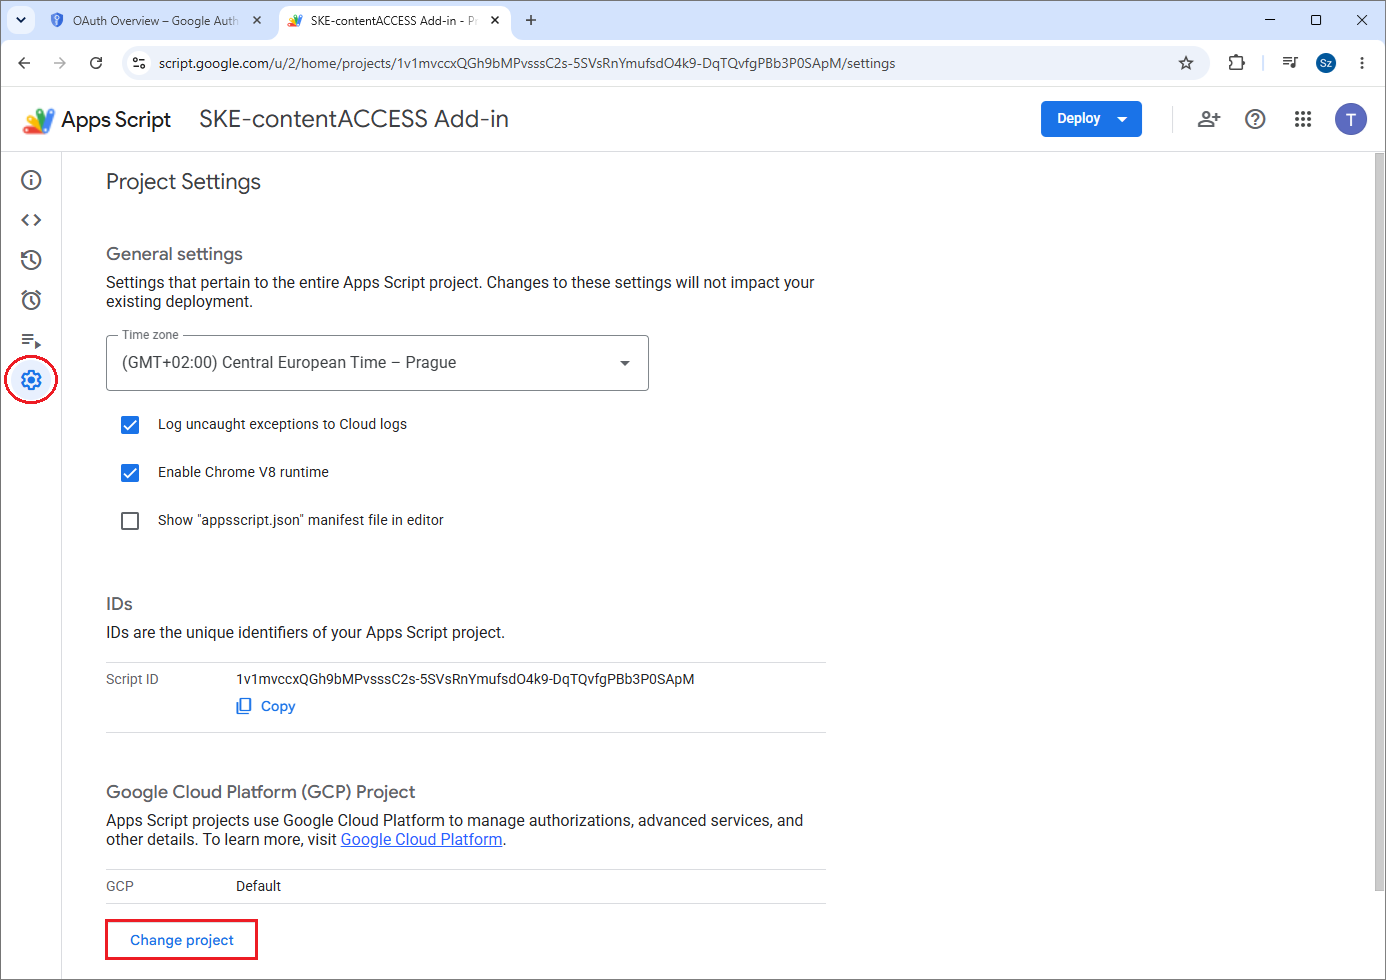
- Enter the Google Cloud project number.
- Click Set project.
Copy the source code
- Open the working developer Apps Script project (where you previously configured the project ID).
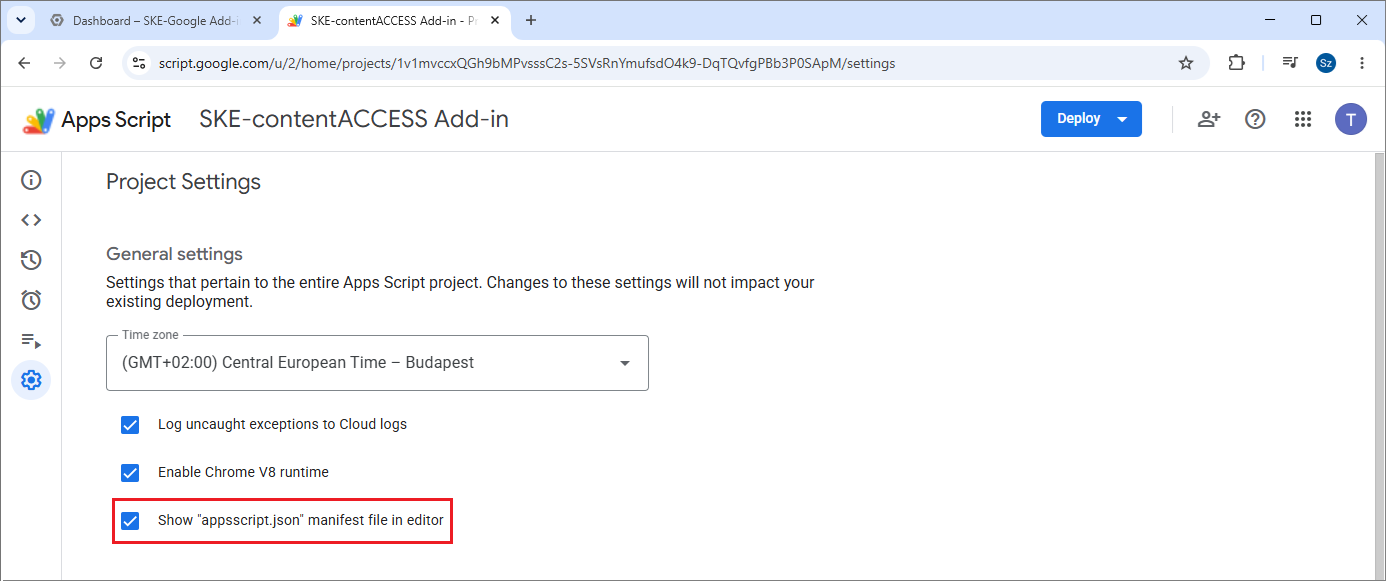
- Enable the Show "appsscript.json" manifest file option in the editor. After this, the
appsscript.jsonmanifest file appears in the Editor side menu.
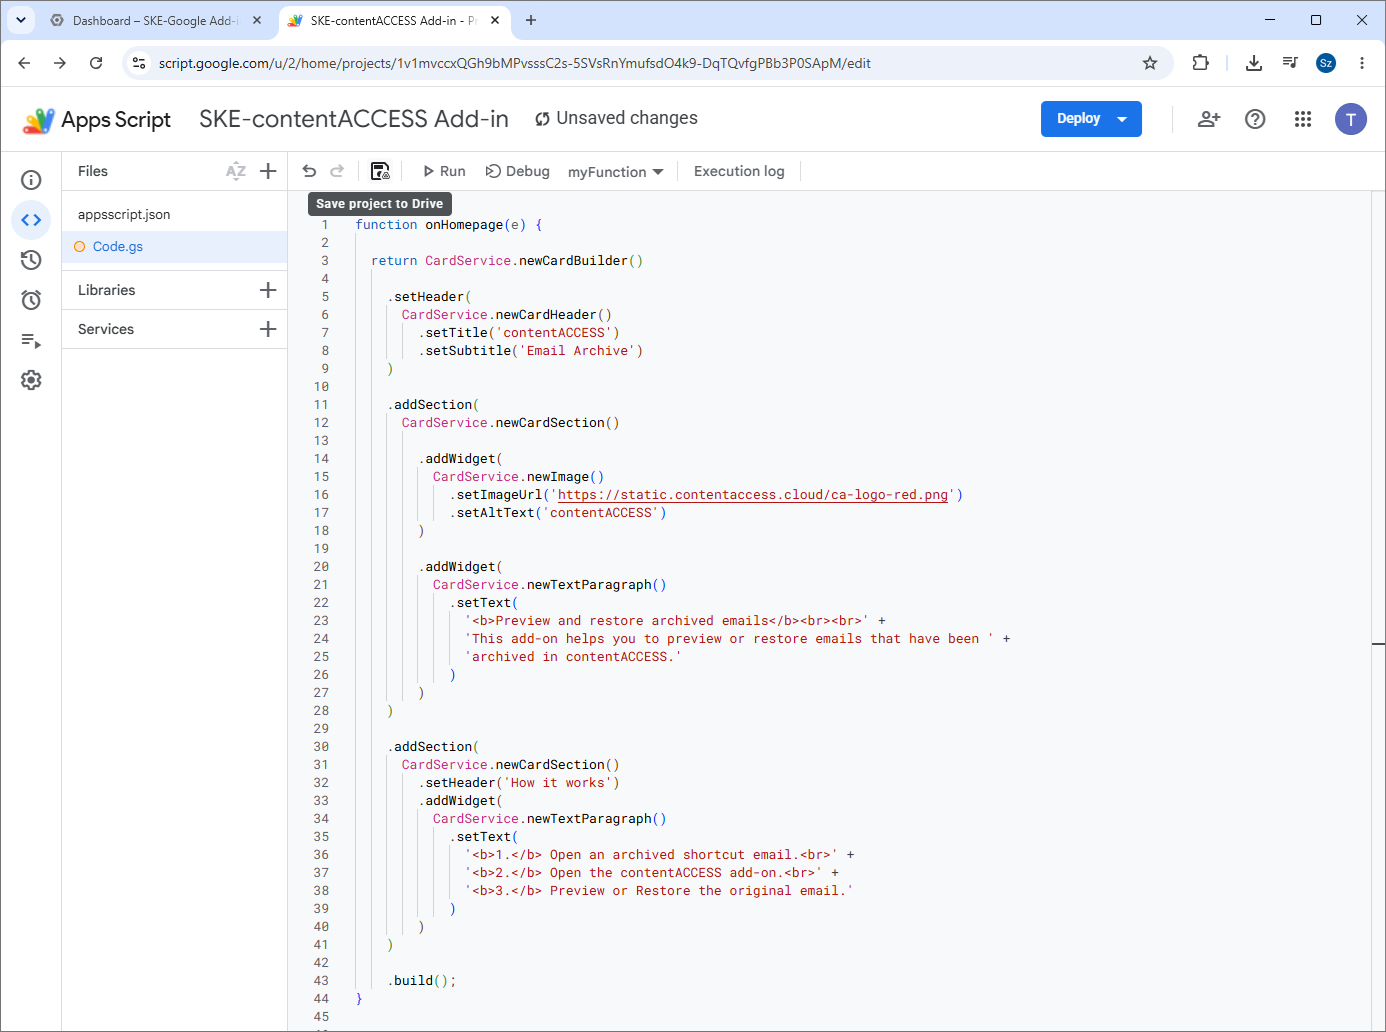
- Copy the developer source code into the customer project. Copy the required .gs Apps Script files into the customer project and keep the project structure consistent.
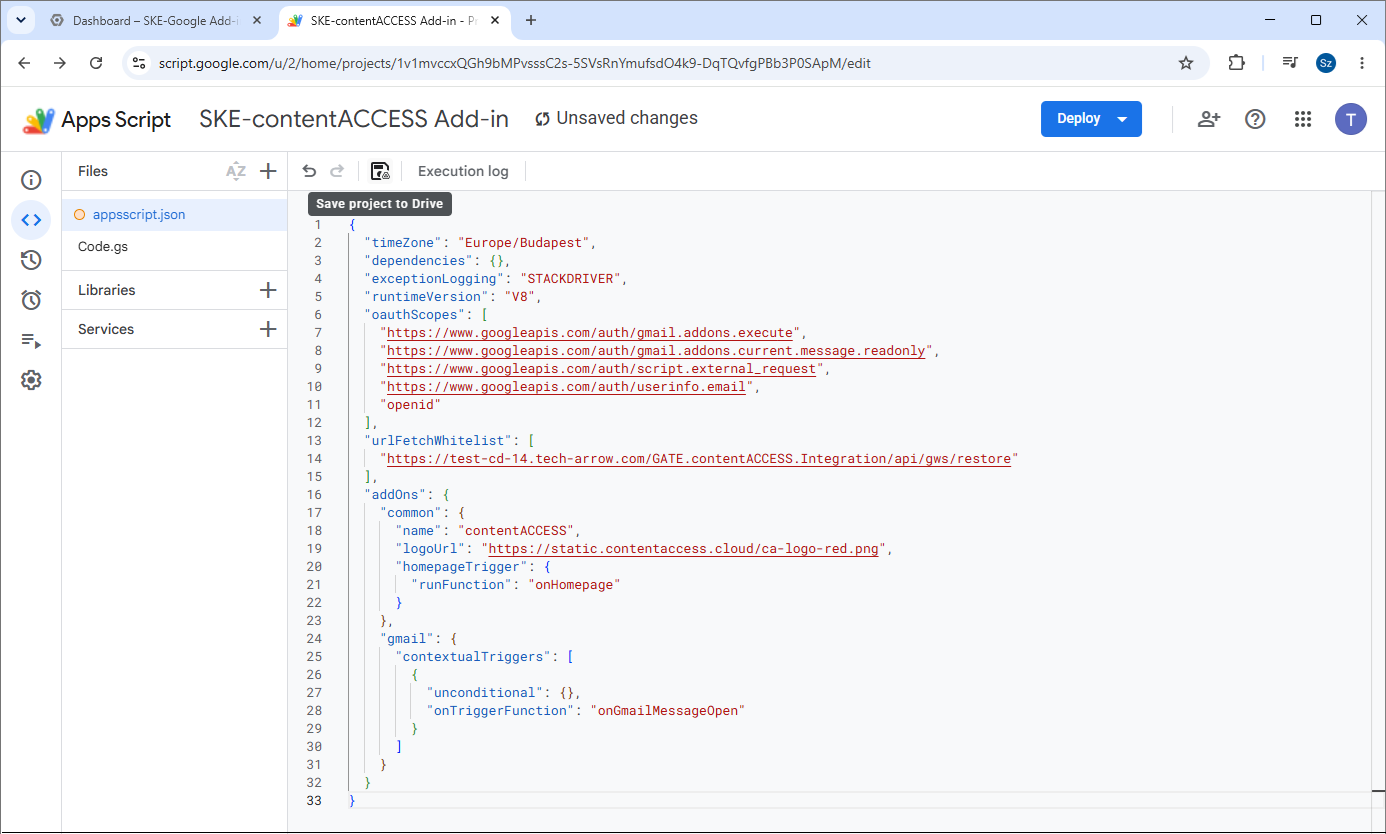
- Copy the complete appsscript.json manifest.
If the archive content is converted to PDF for preview or rendering, make sure the required Ghostscript (GS) tool is installed and configured in the environment that performs the conversion.
- Save the project.
Before finalizing the customer deployment, replace the backend URL with the customer’s production backend URL, update the URL allowlist to the customer’s HTTPS URL prefix, remove any test endpoints if the deployment is for production, review customer-specific IDs and configuration, and keep the OAuth scopes aligned with the tested application.
Configure Google Auth Platform
- Open Google Cloud Console with the customer project selected.
- Go to Navigation menu > Google Auth Platform.
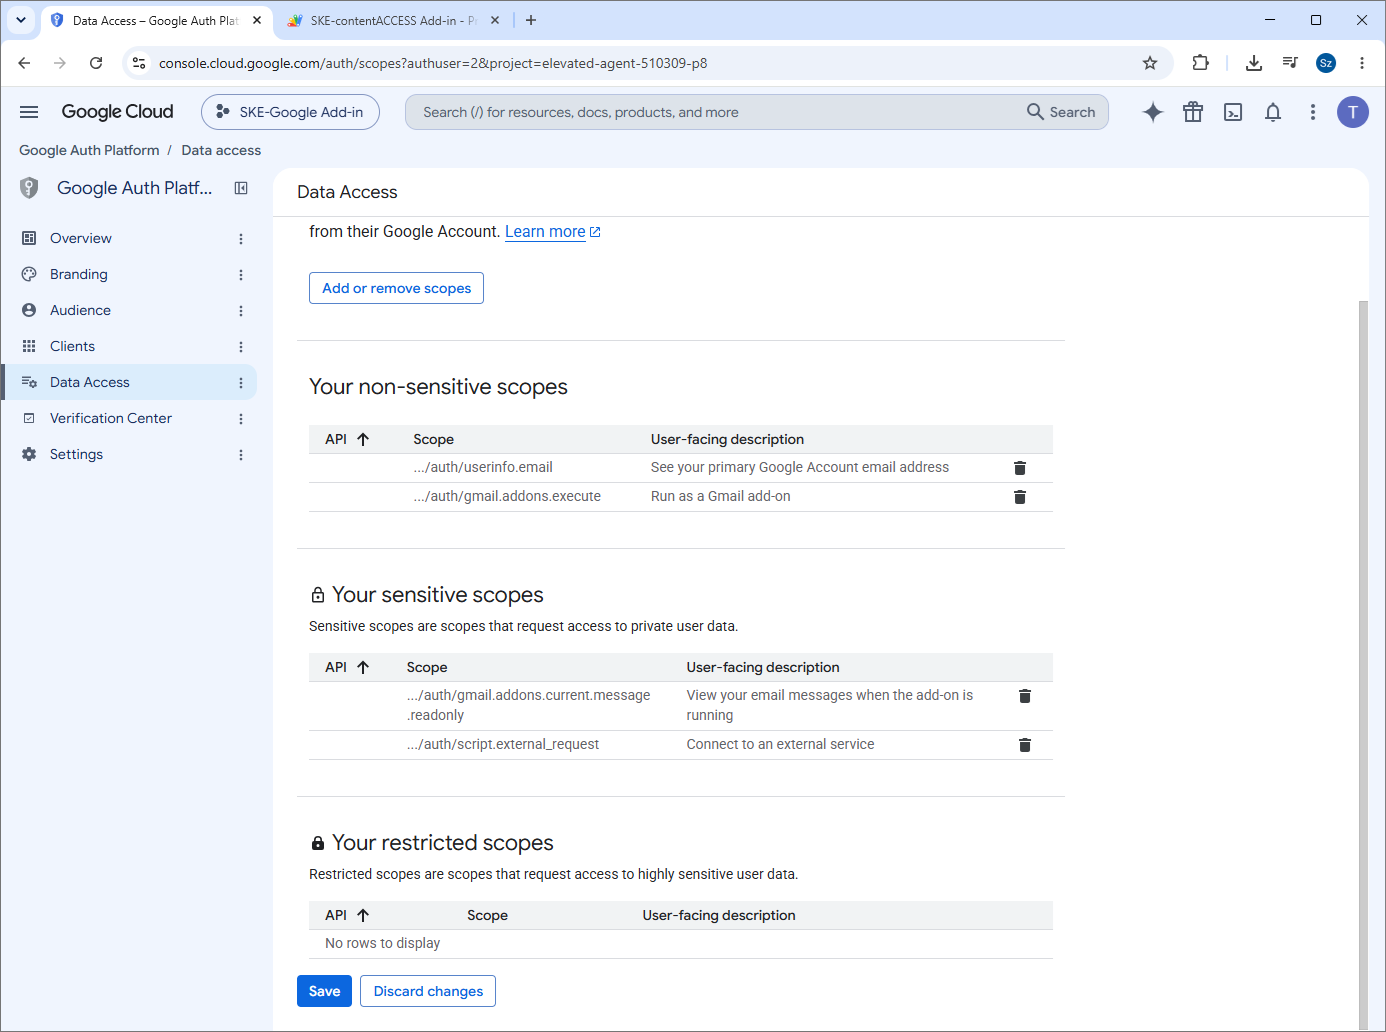
- Open Data Access and add the OAuth scopes used by the copied manifest. Copy the following values into the table text box:
These URLs are required so the add-on can view and read email and shortcut data and access the information stored in them.
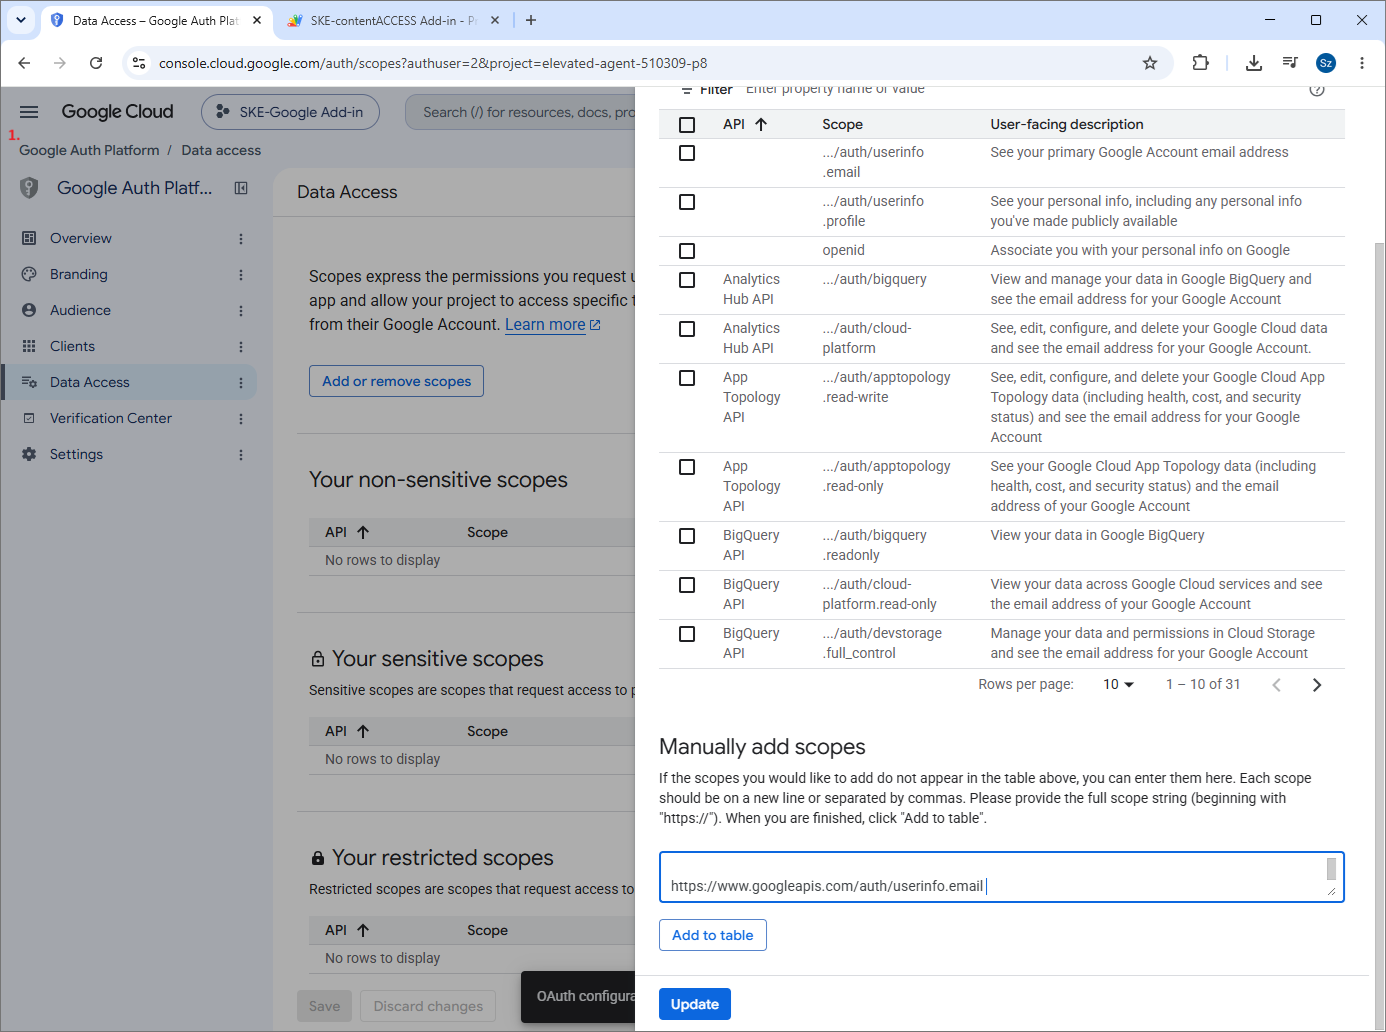
- Click Add to table, then save the configuration.
Enable the Google Workspace Marketplace SDK
- With the customer Cloud project selected, open Google Cloud Console.
- Go to Navigation menu > APIs & Services > Library.
- Search for Google Workspace Marketplace SDK.
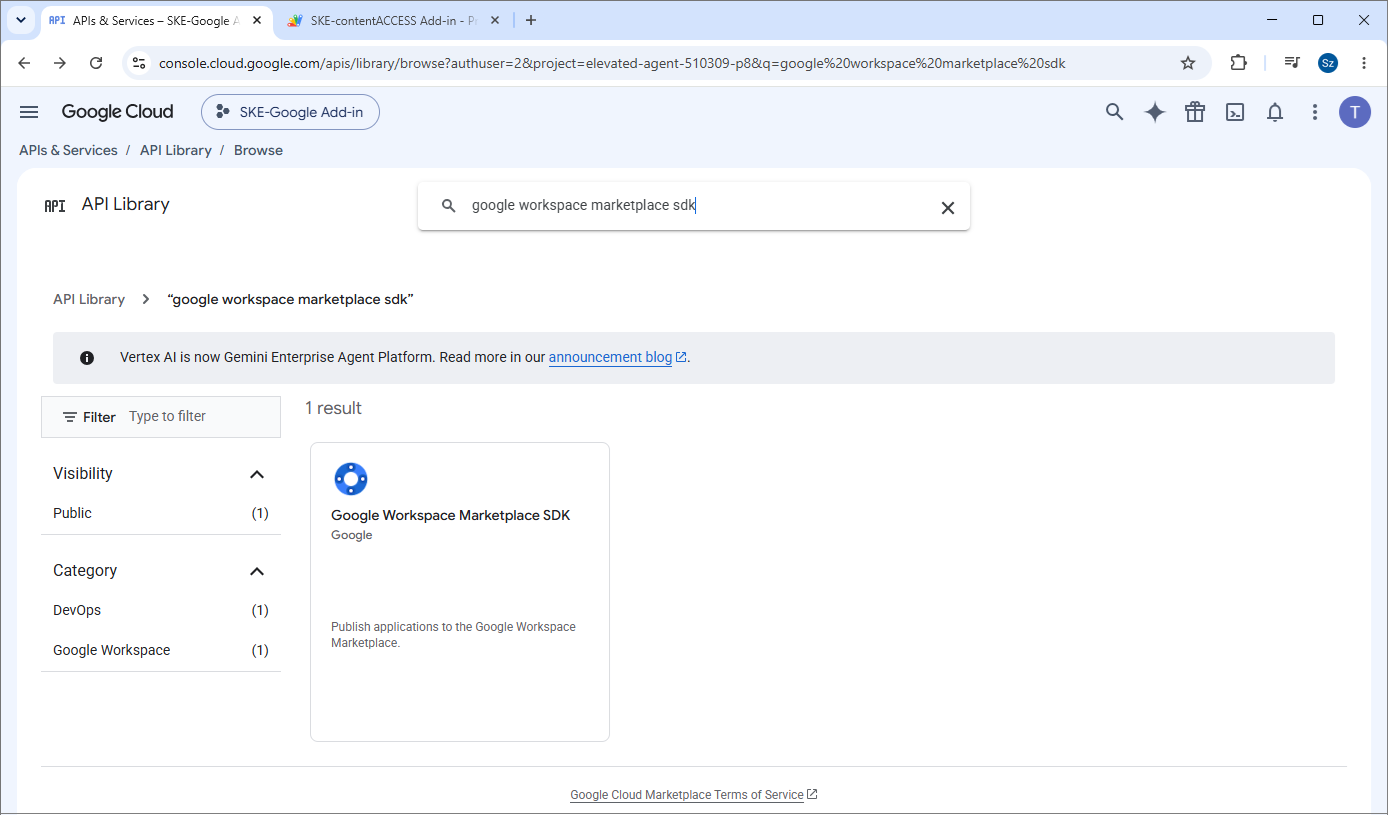
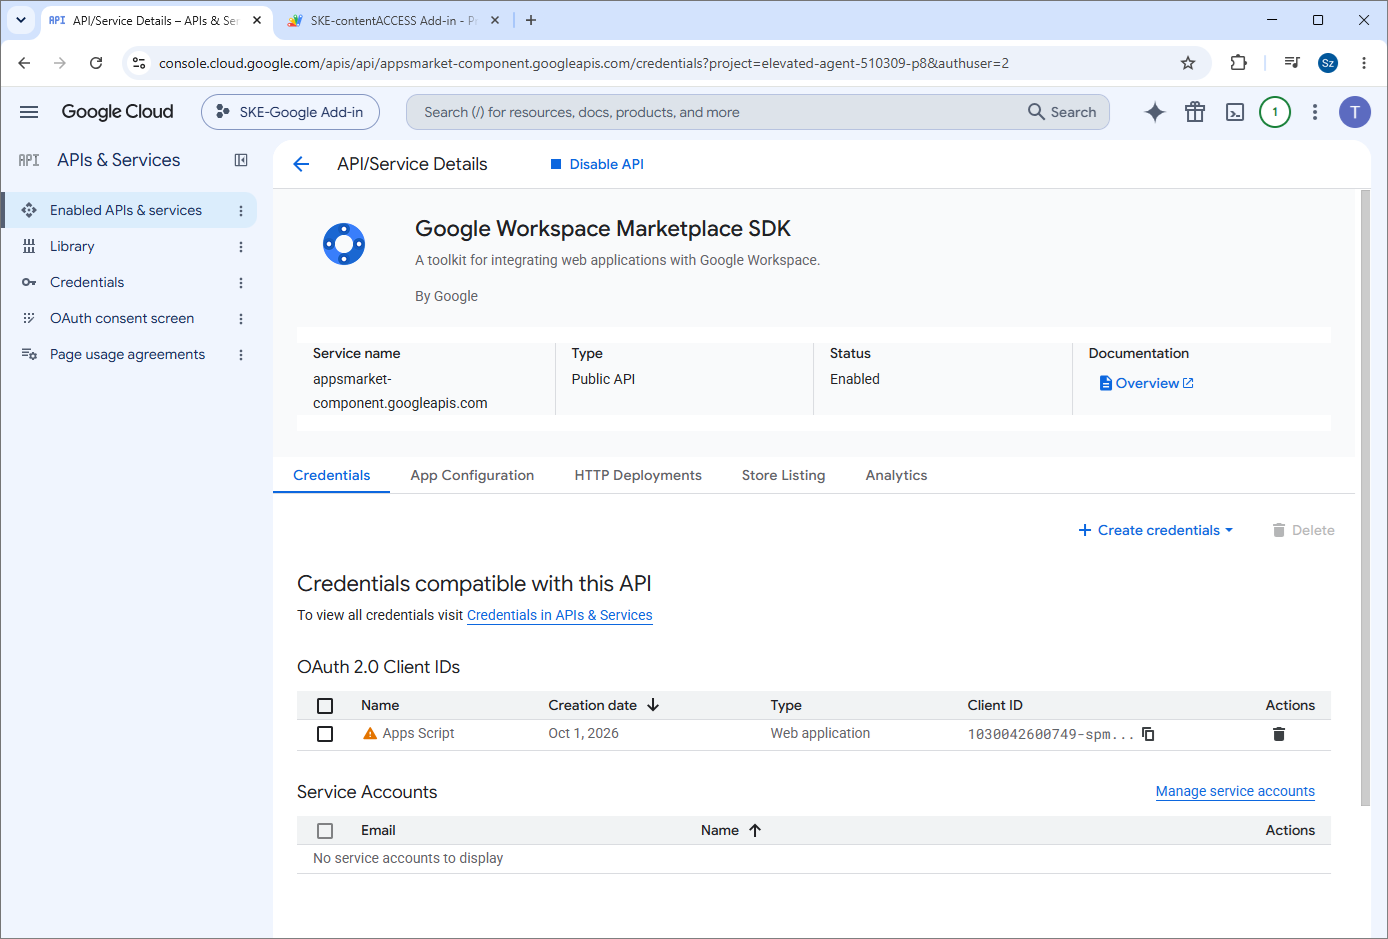
- Select Google Workspace Marketplace SDK and click Enable.
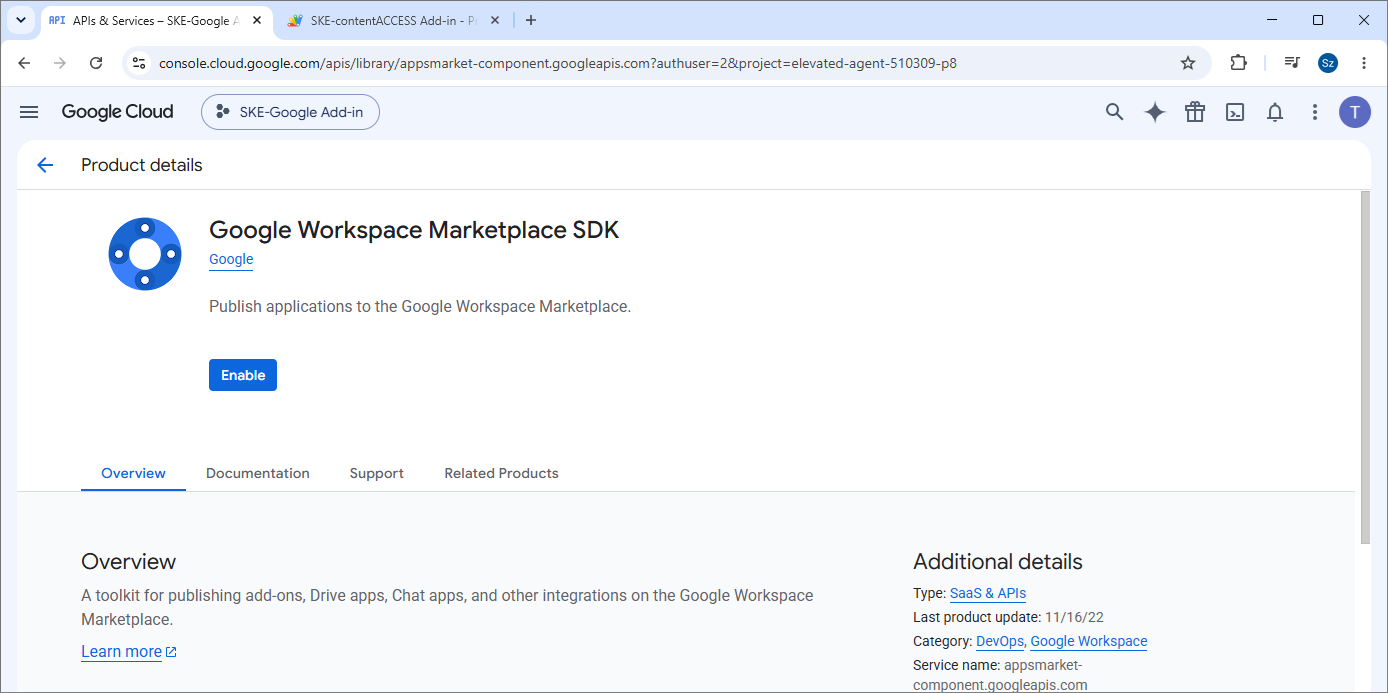
- Review the enabled Workspace Marketplace SDK overview:
Create a customer Apps Script deployment
- Open the customer Apps Script project.
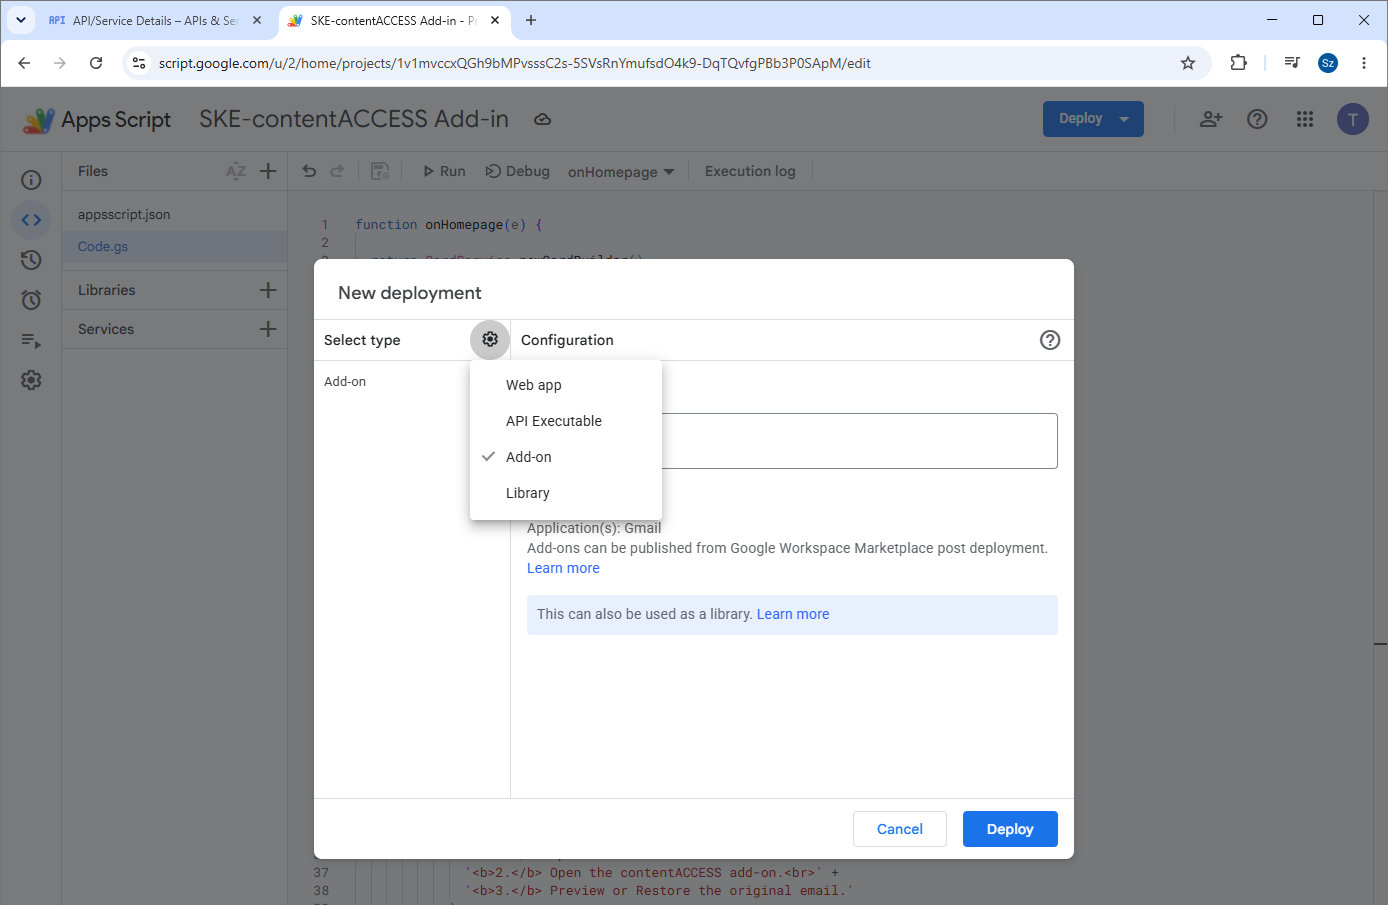
- Click Deploy > New deployment.
- For Select type, choose Google Workspace Add-on.
- Enter a release description.
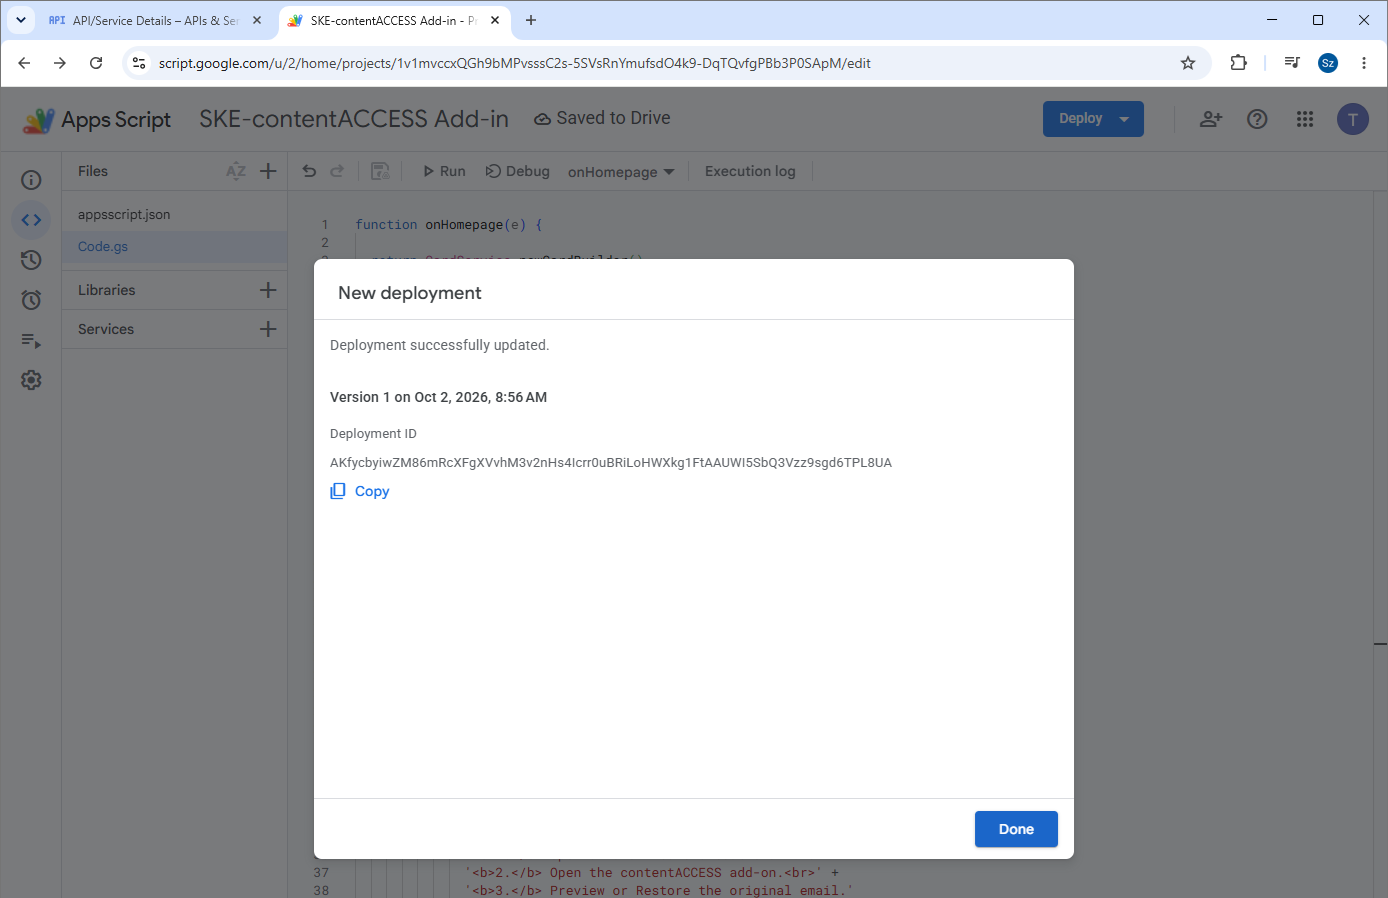
- Click Deploy.
- Click Copy to copy the Deployment ID. We highly recommend saving this ID in a secure location, because it is required for the Marketplace app configuration.
Configure the Marketplace app
- Open Google Cloud Console with the customer project selected.
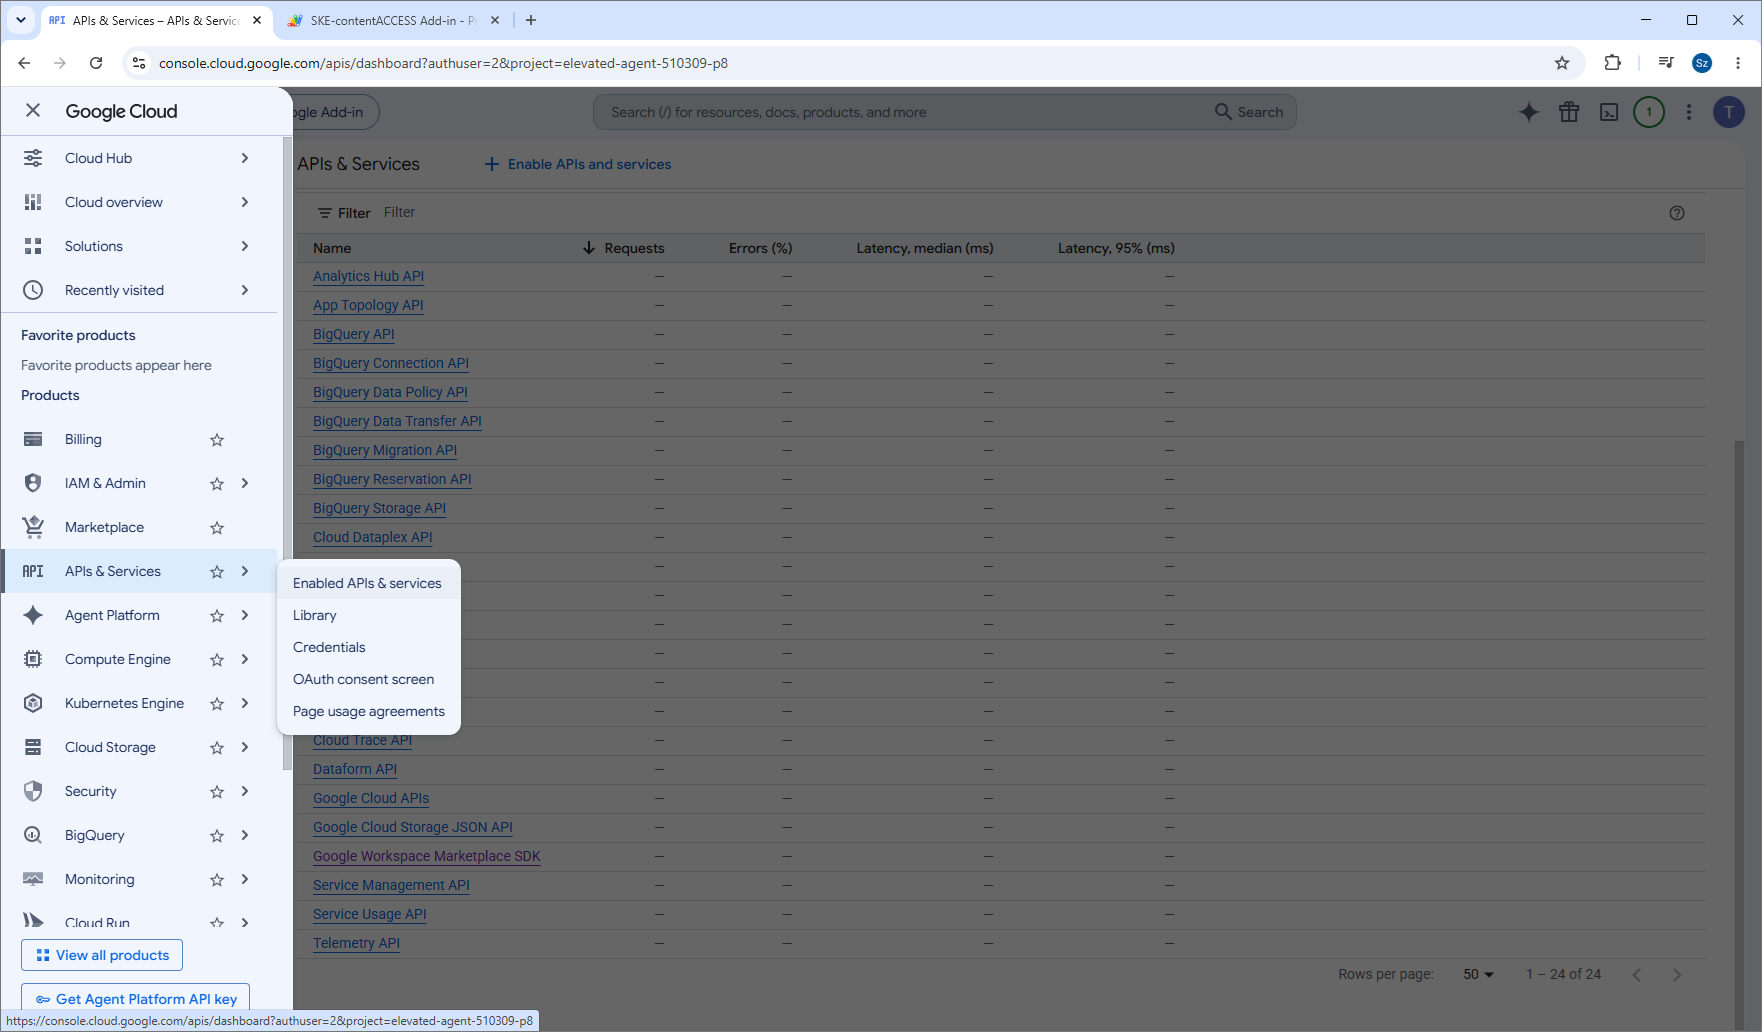
- Go to Navigation menu > APIs & Services > Enable APIs and Services > select the Google Workspace Marketplace SDK option.
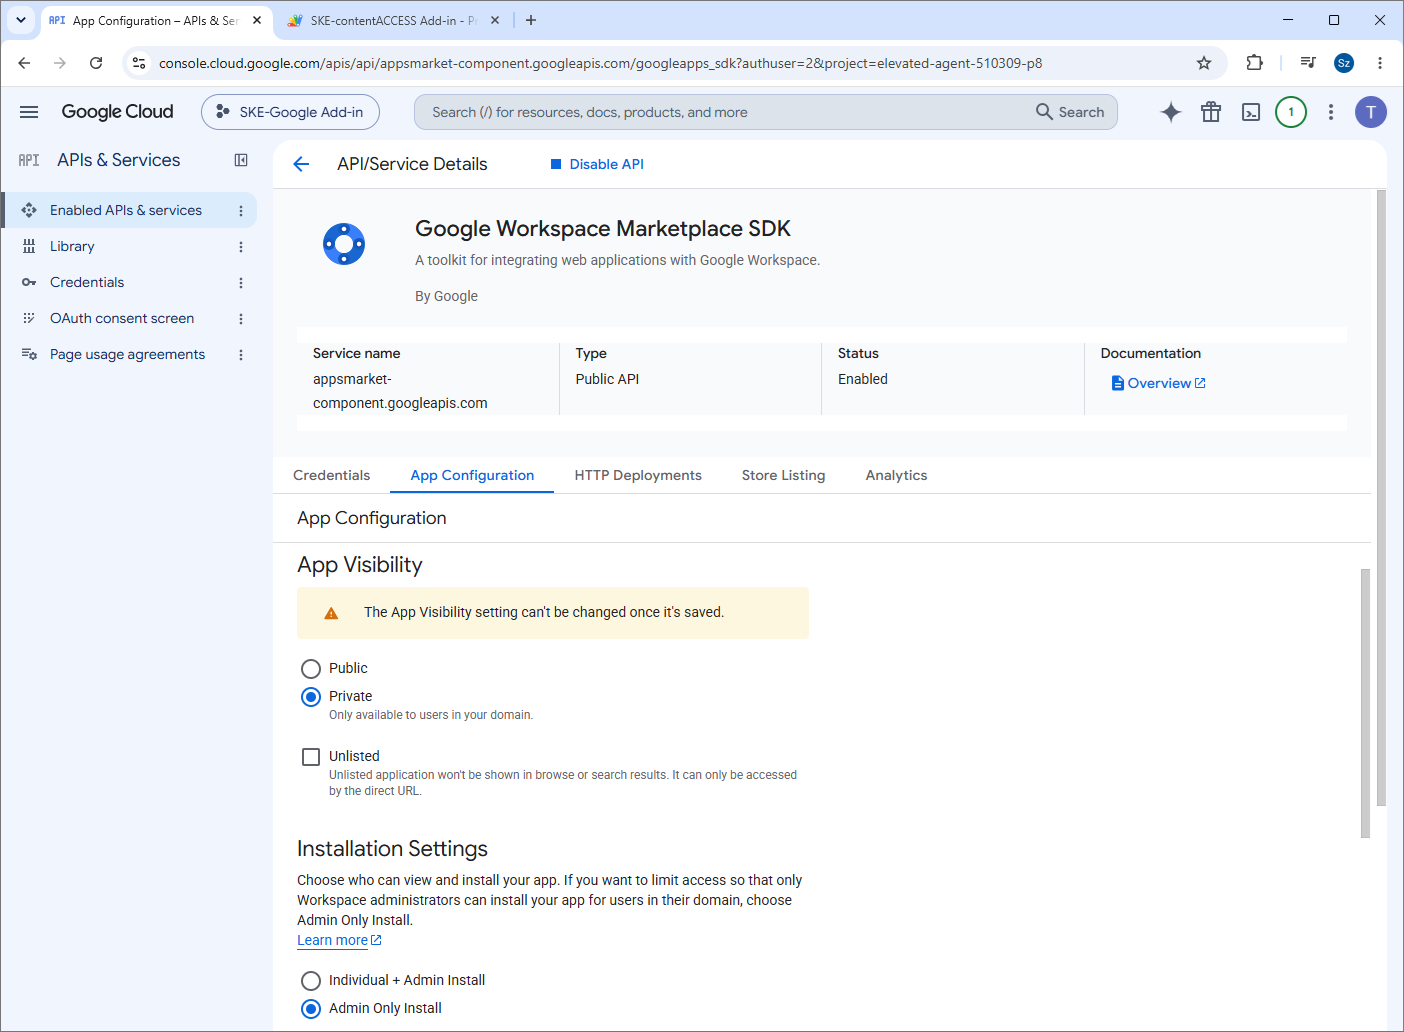
- Once it opens, go to the App configuration tab. Under App visibility, select Private, then choose the installation setting: Individual + Admin Install, or Admin Only Install if the customer wants administrator-controlled installation. We recommend the Admin Only Install option.
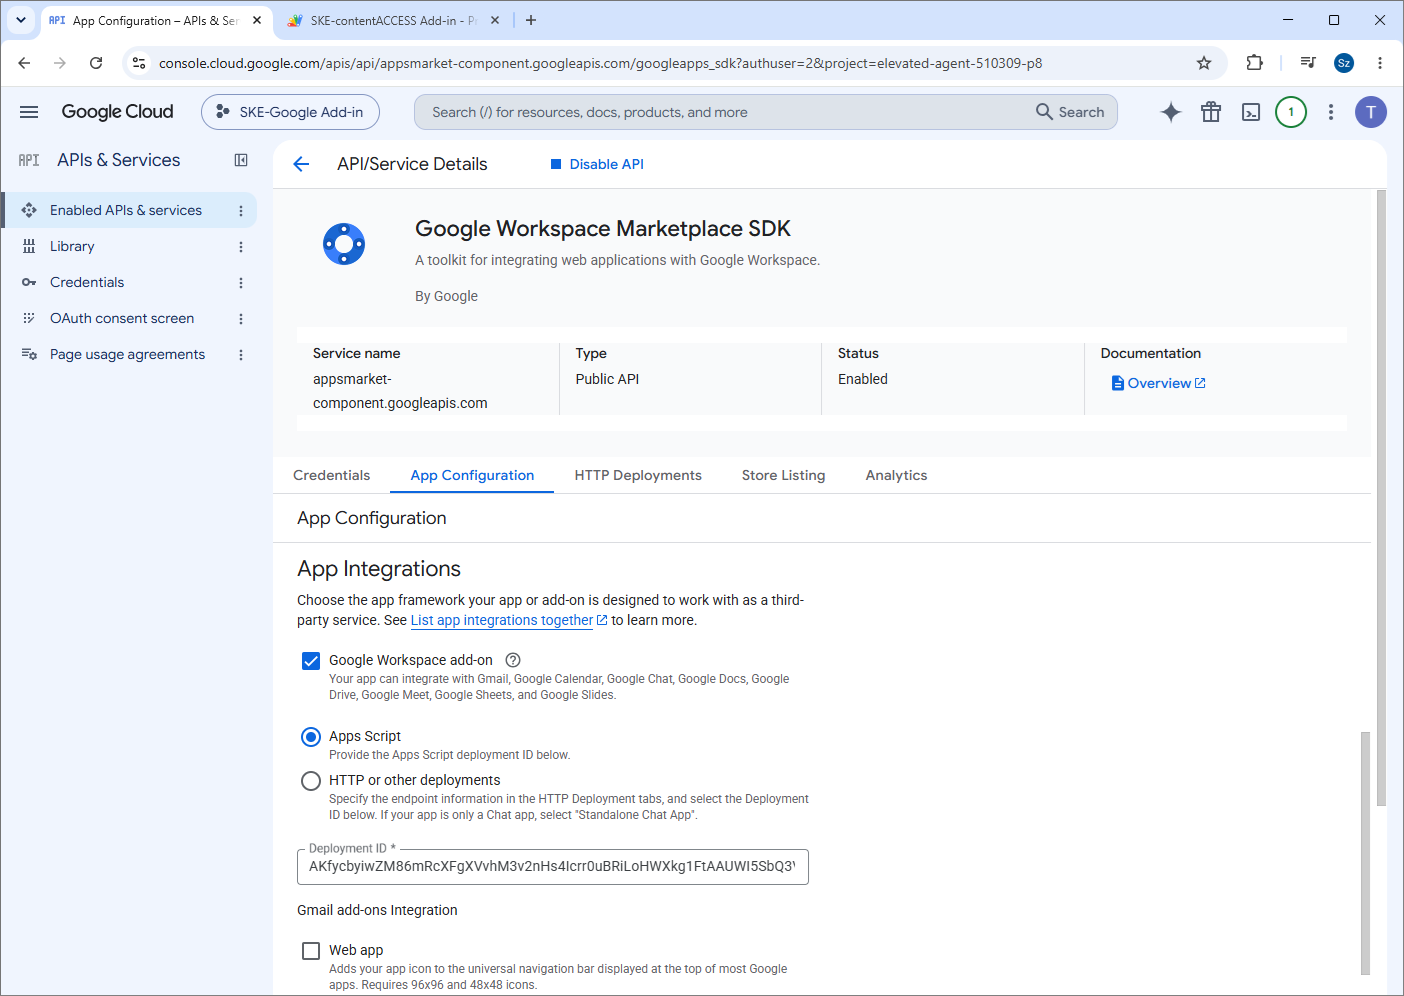
- Scroll down to the App integrations section, select Google Workspace add-on, and then select App Script. Enter or select the Apps Script Deployment ID.
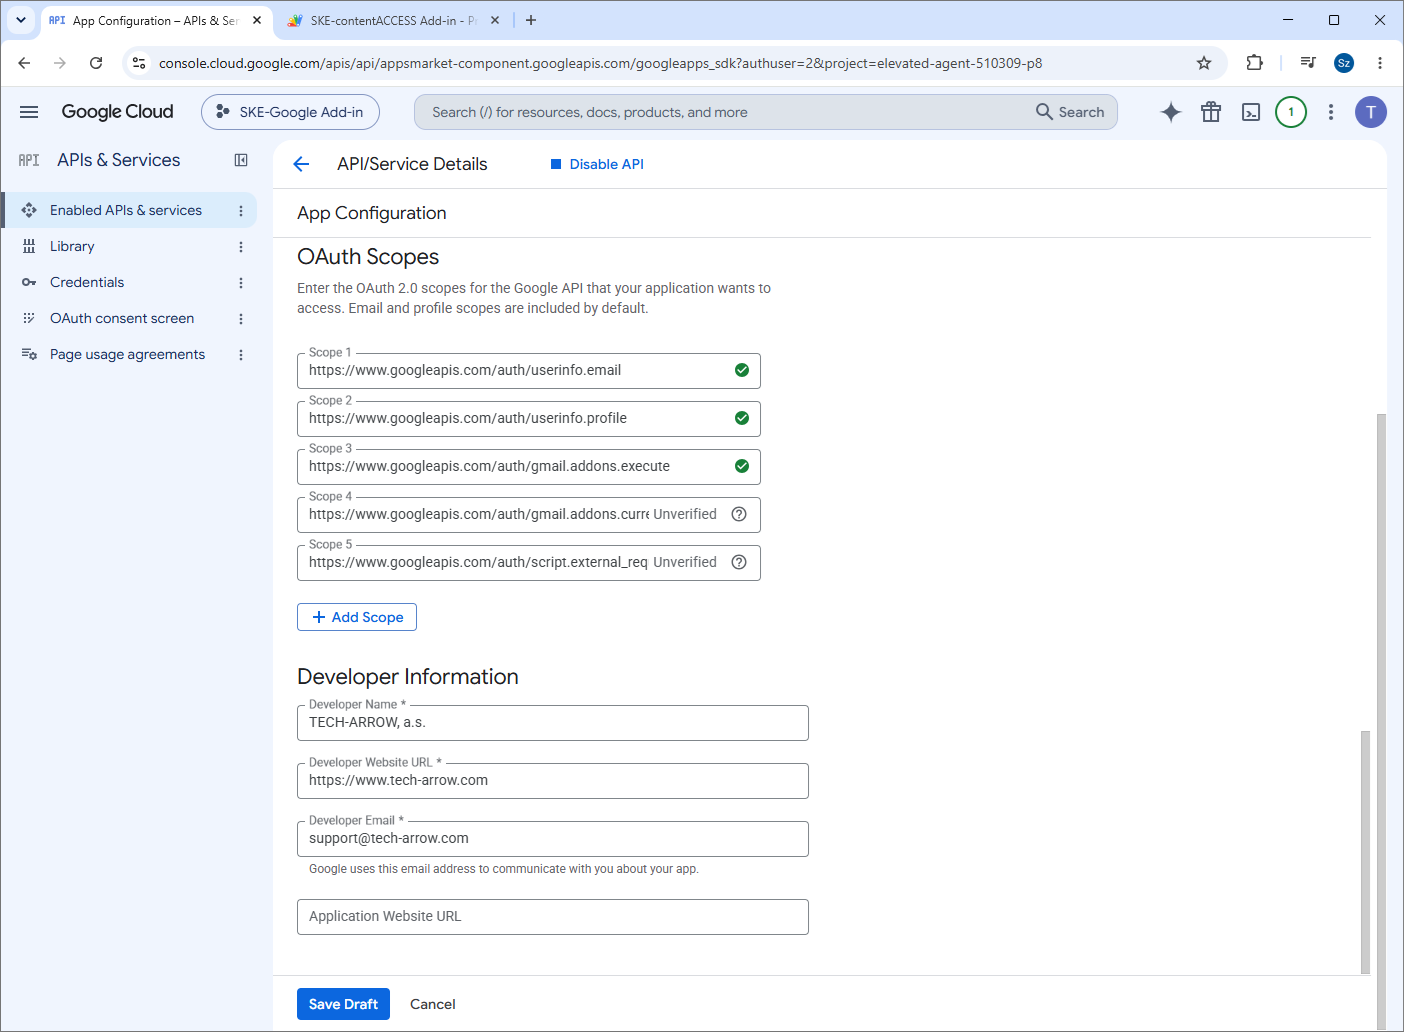
- Enter the OAuth scopes used by the add-on further down on the same tab. These scopes are the same as those configured in Google Auth Platform. It may also happen that the scopes are already pre-filled from the previous configuration steps in this section. If not, copy the following values into the table text box:
- Complete the developer information (this is TECH-ARROW, and all necessary information can be found on our website).
- Click Save Draft.
Create the store listing and publish the add-on
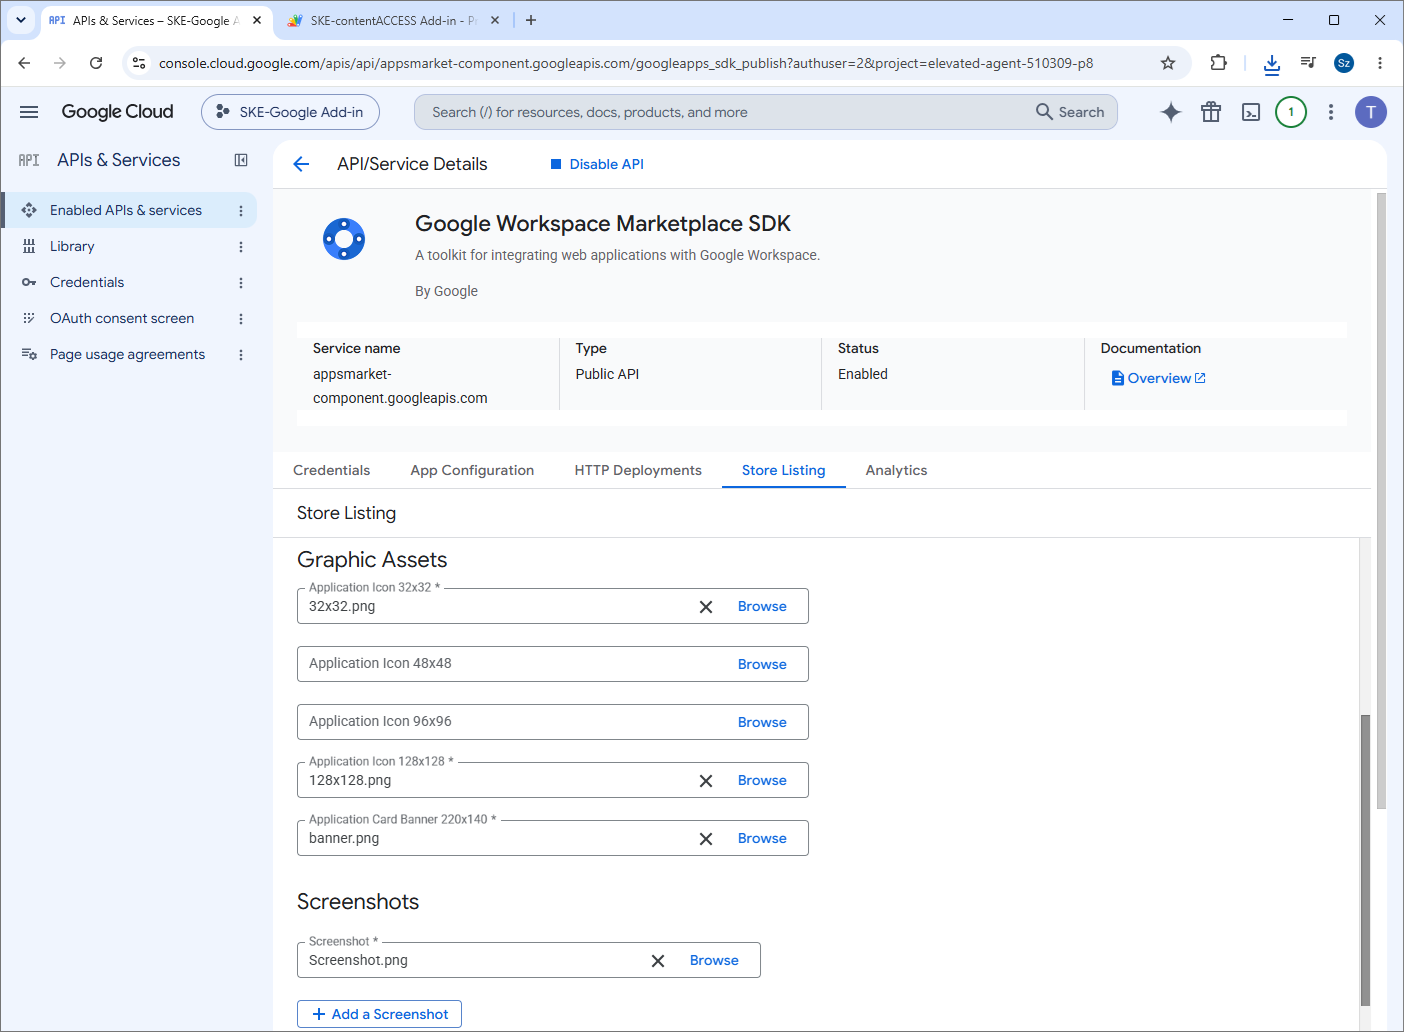
- In Google Cloud Console, go to Navigation menu > APIs & Services > Enable APIs and Services > Google Workspace Marketplace SDK > Store Listing tab.
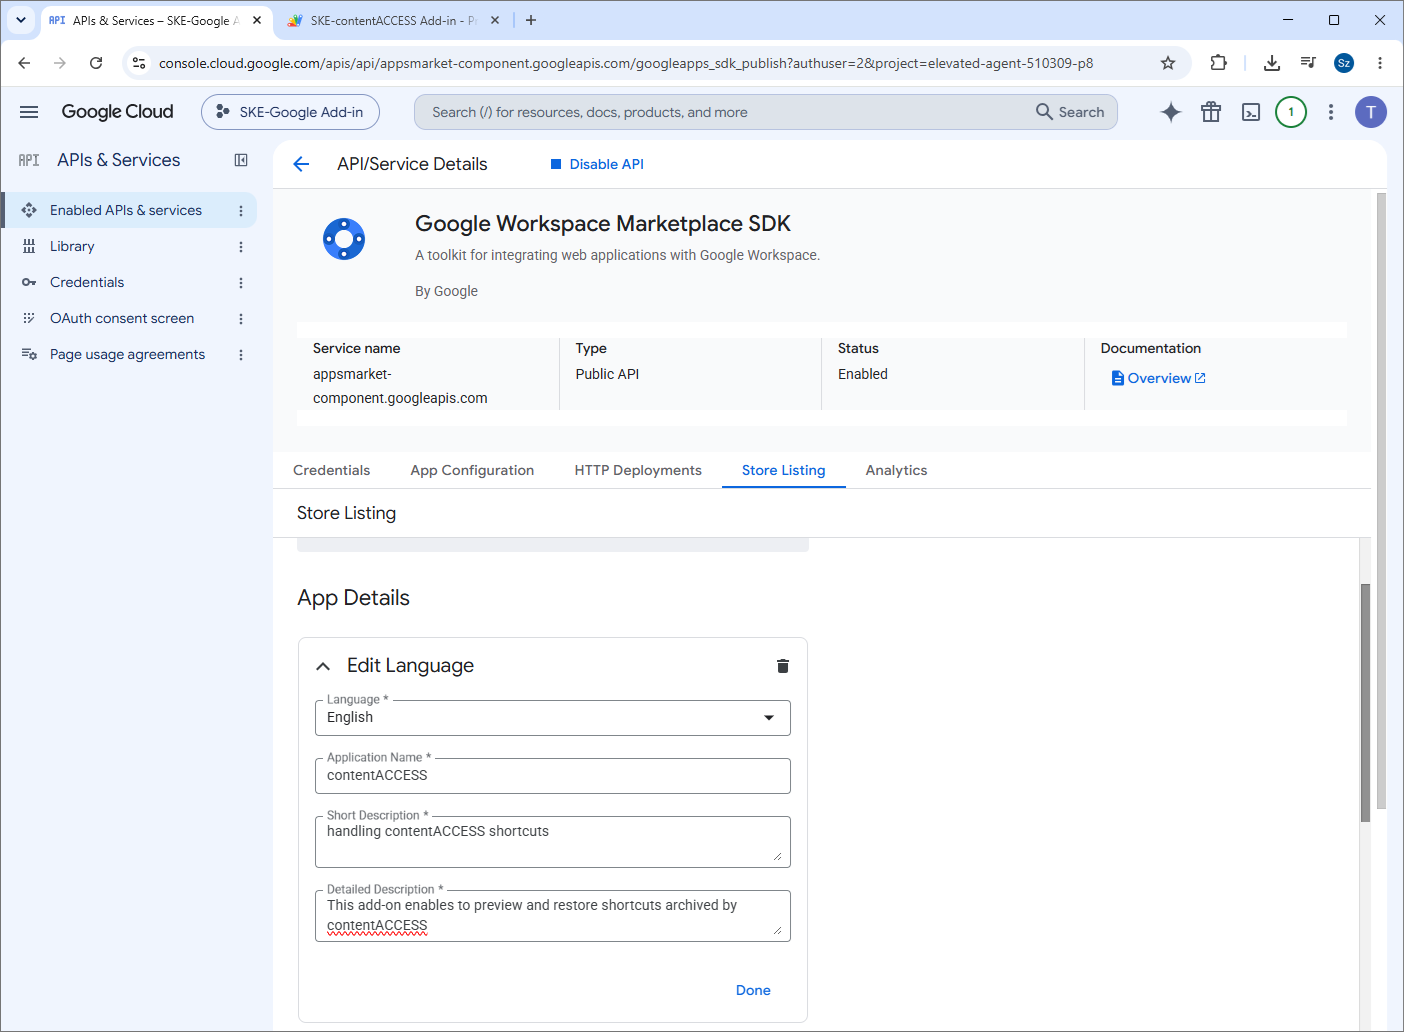
- Complete App Details based on your preferences. Click the dropdown arrow in the language column to open the list, and then enter the application name, a short description, and a detailed description.
- Upload the required application icons and banner in the Graphic Assets section. The required sizes are 32x32 and 128x128 for the application icons, and 220x140 for the application card banner. Also add at least one screenshot showing the add-on integrated with Google Workspace.
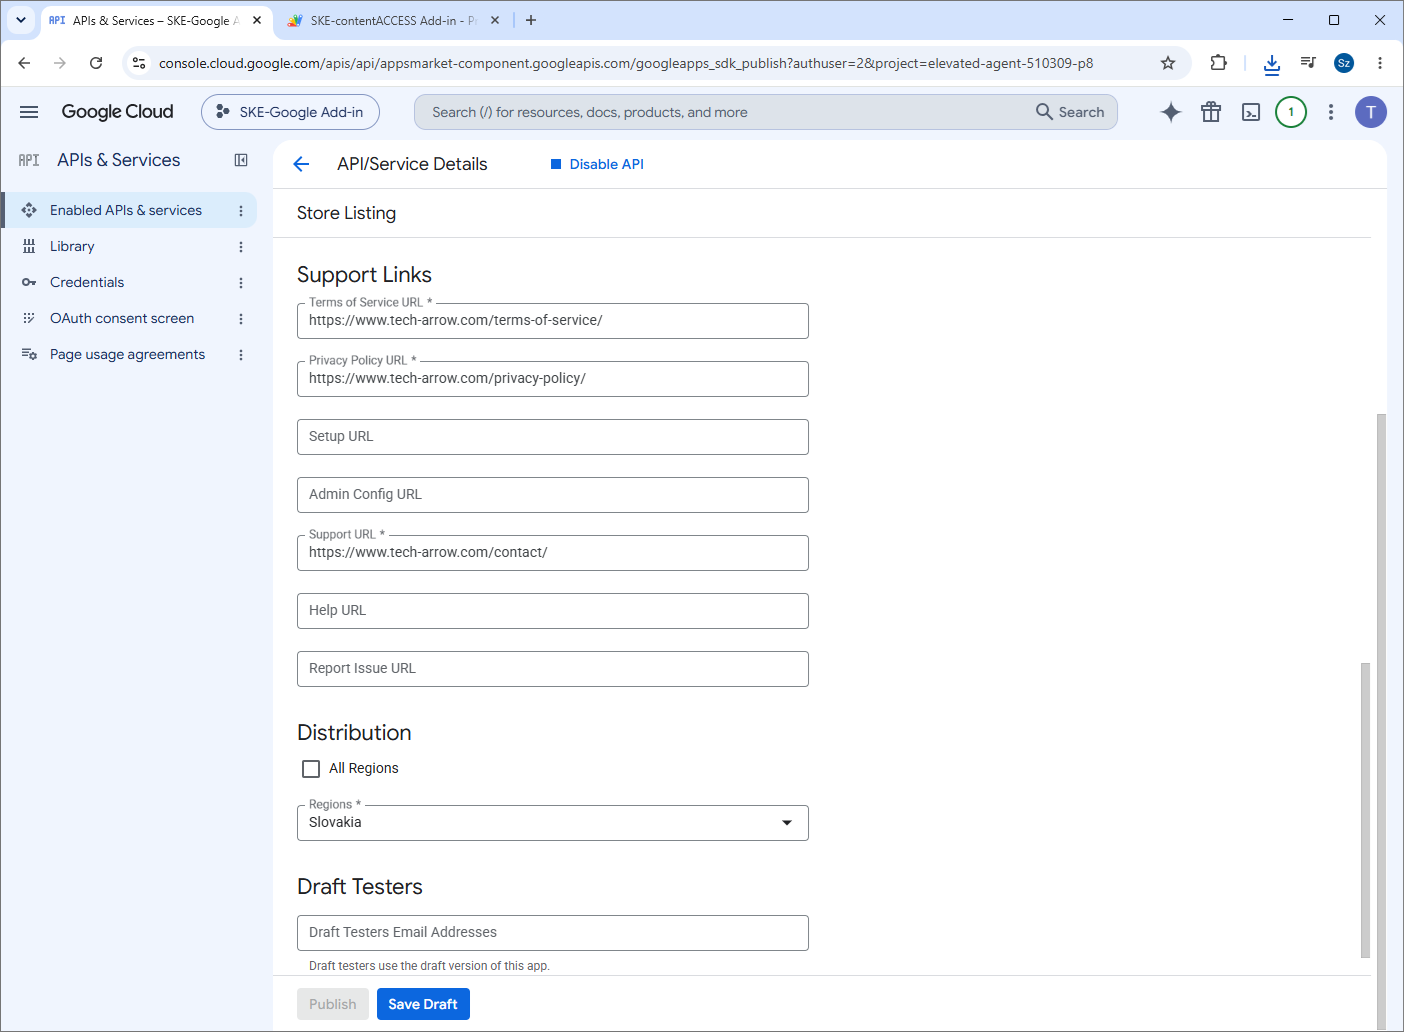
- Complete Support Links and other required fields. The Distribution region is also required. All necessary information can be found on our website.
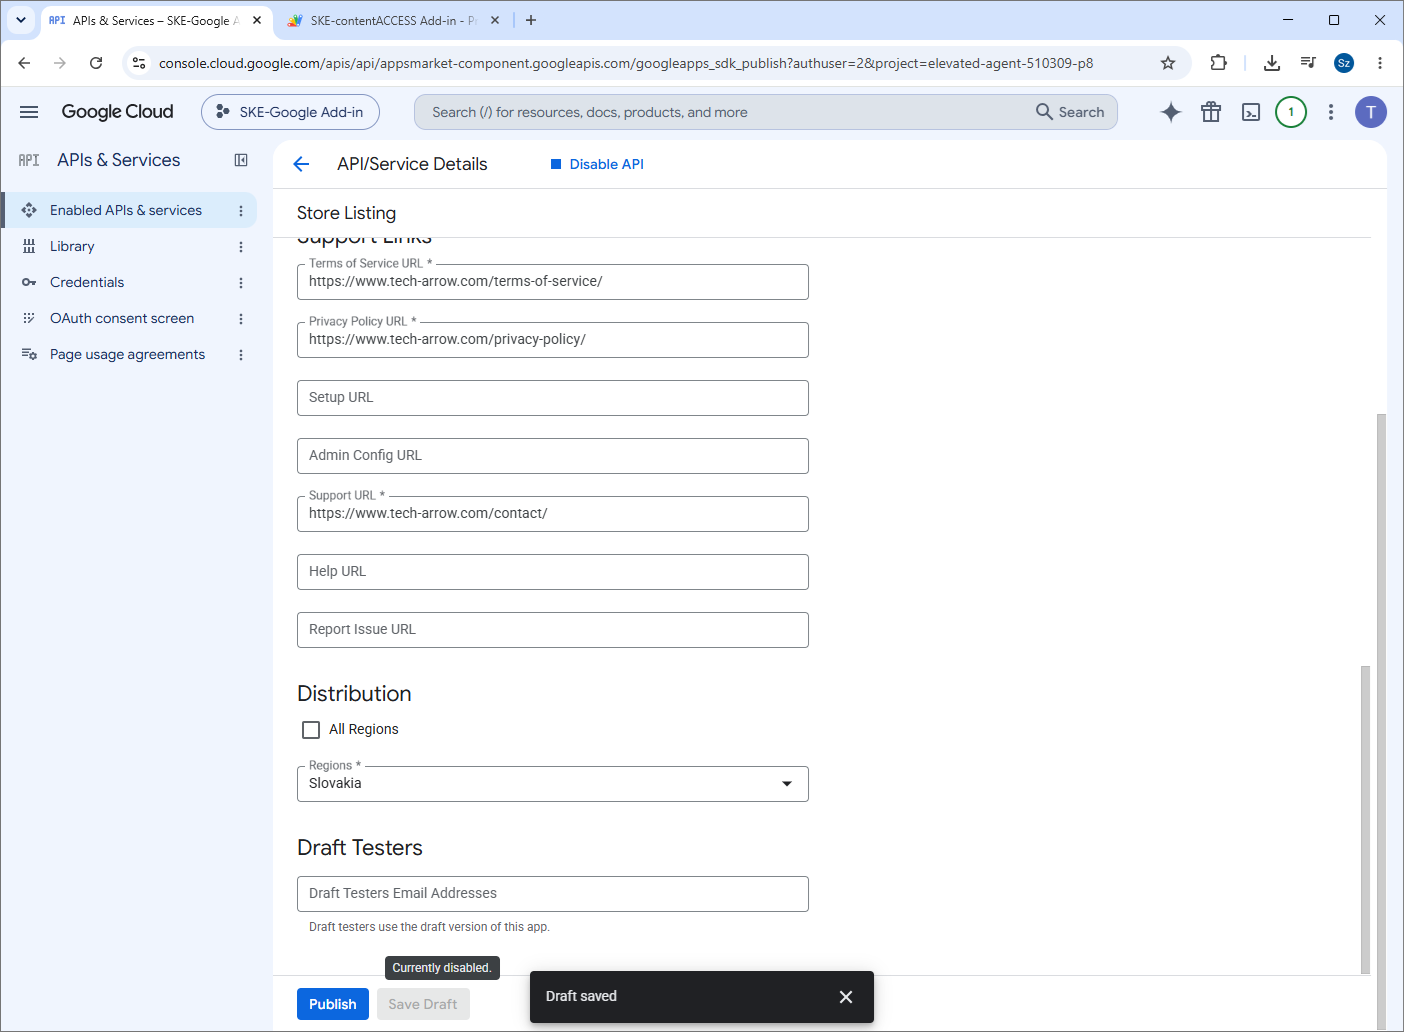
- Save the listing. Once the draft is saved, the Publish button appears. Click it to publish the add-on to the Google Workspace Marketplace. The add-on will then be available for installation in the customer’s Google Workspace environment.
Install the application
- Sign in as the customer’s Google Workspace administrator if administrator installation is being used.
- Open Google Workspace Marketplace: https://workspace.google.com/marketplace/
- Open the customer’s private contentACCESS listing by selecting Internal apps in the left-side menu.
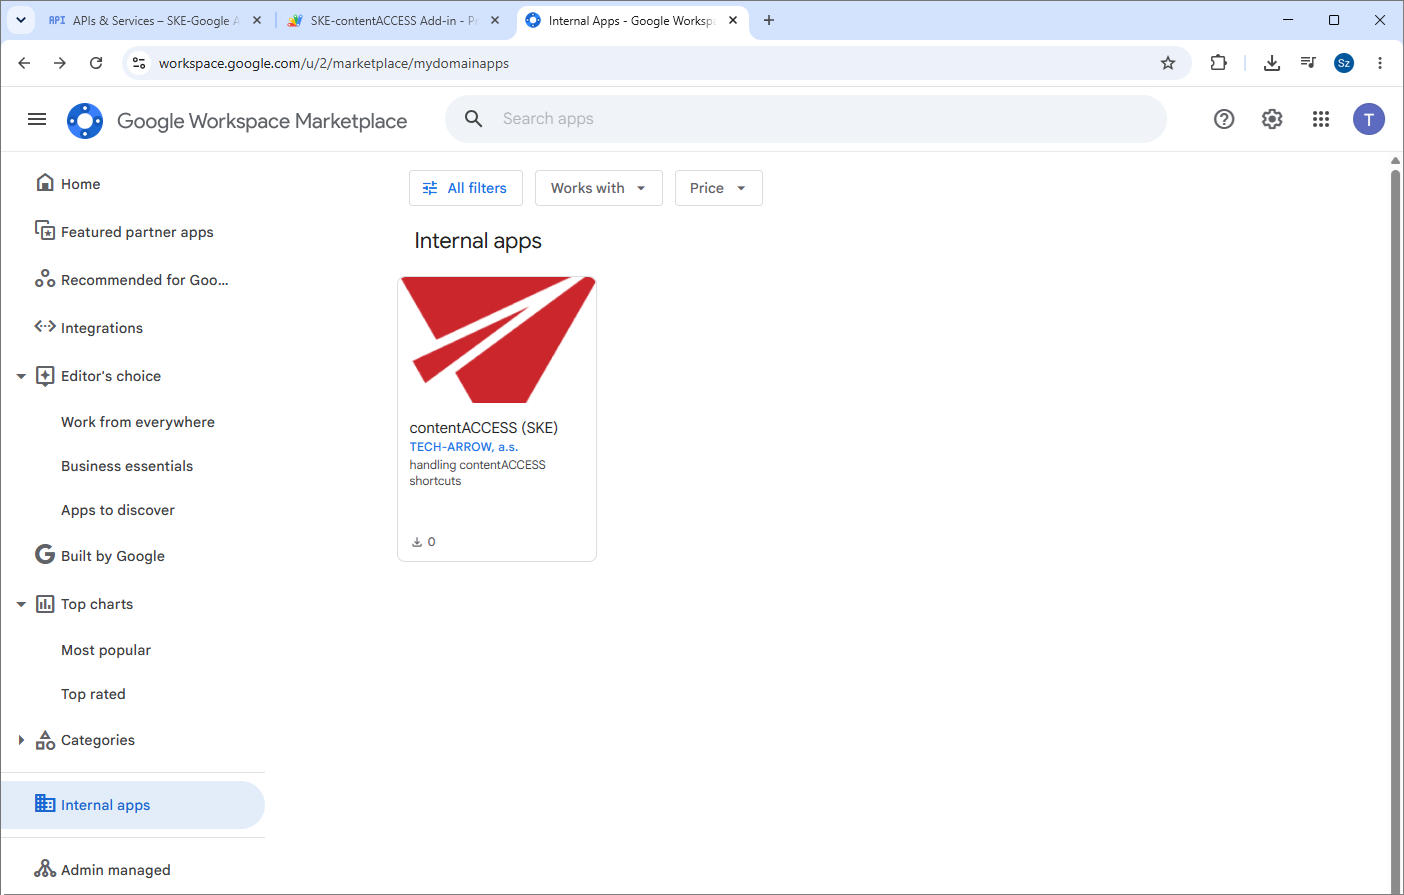
- Click Admin install or Install, depending on the configured installation setting.
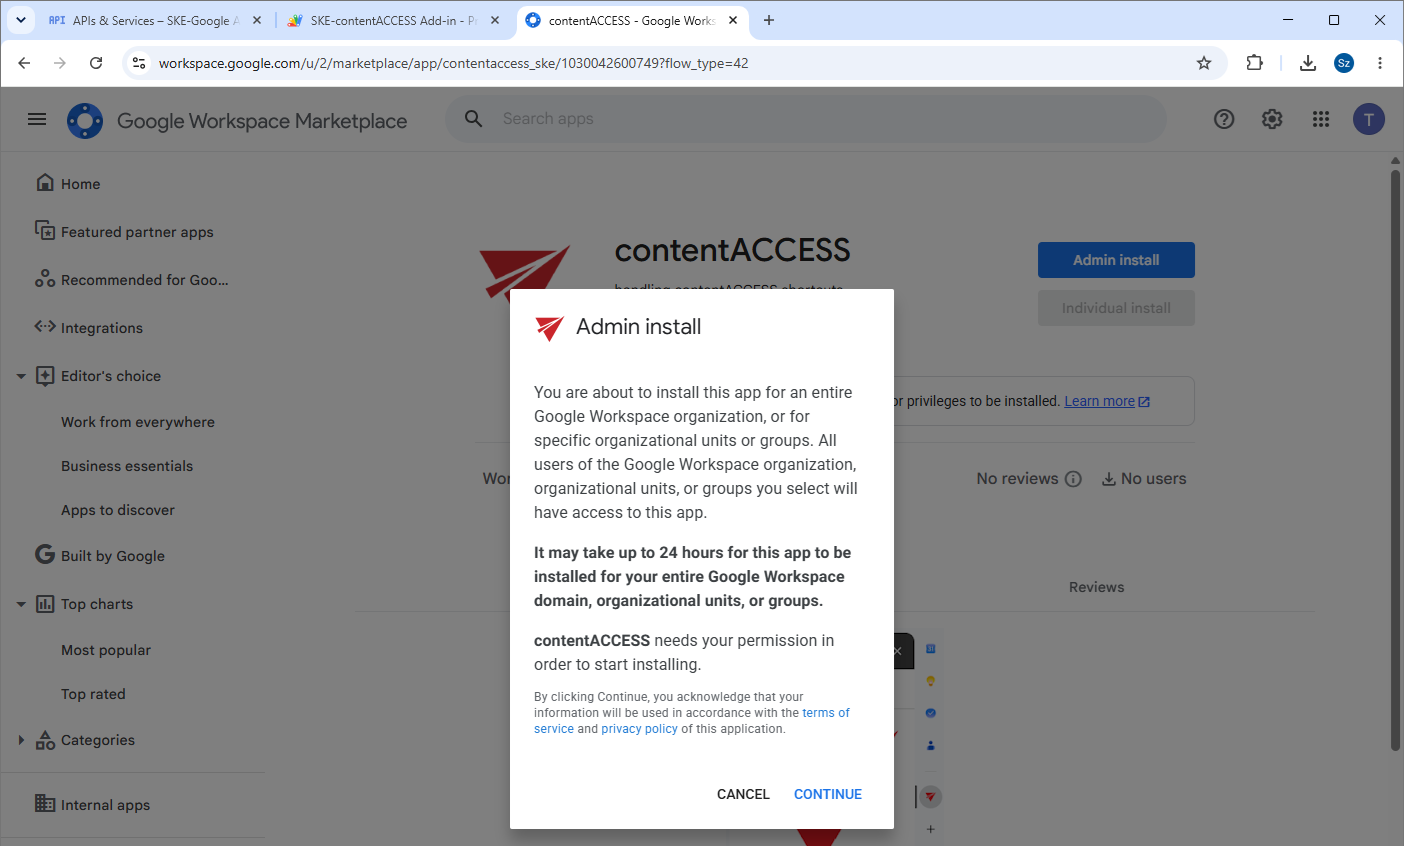
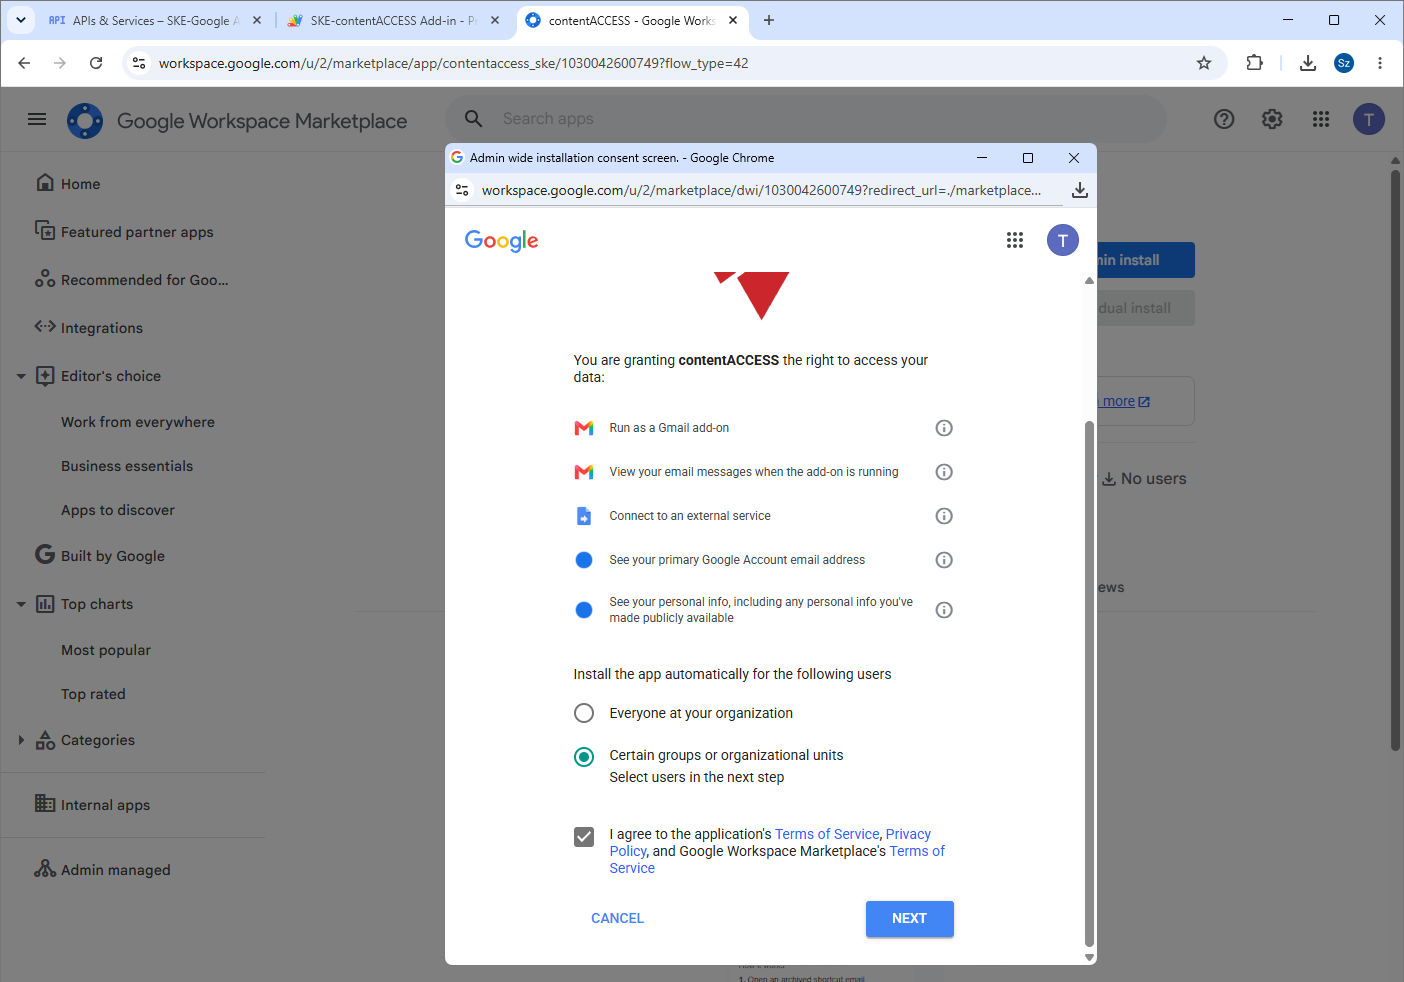
- Complete the authorization and installation flow:
- Step 1: Allow data access — install the application for certain groups or organizational units and agree to the policy. Then click Next.
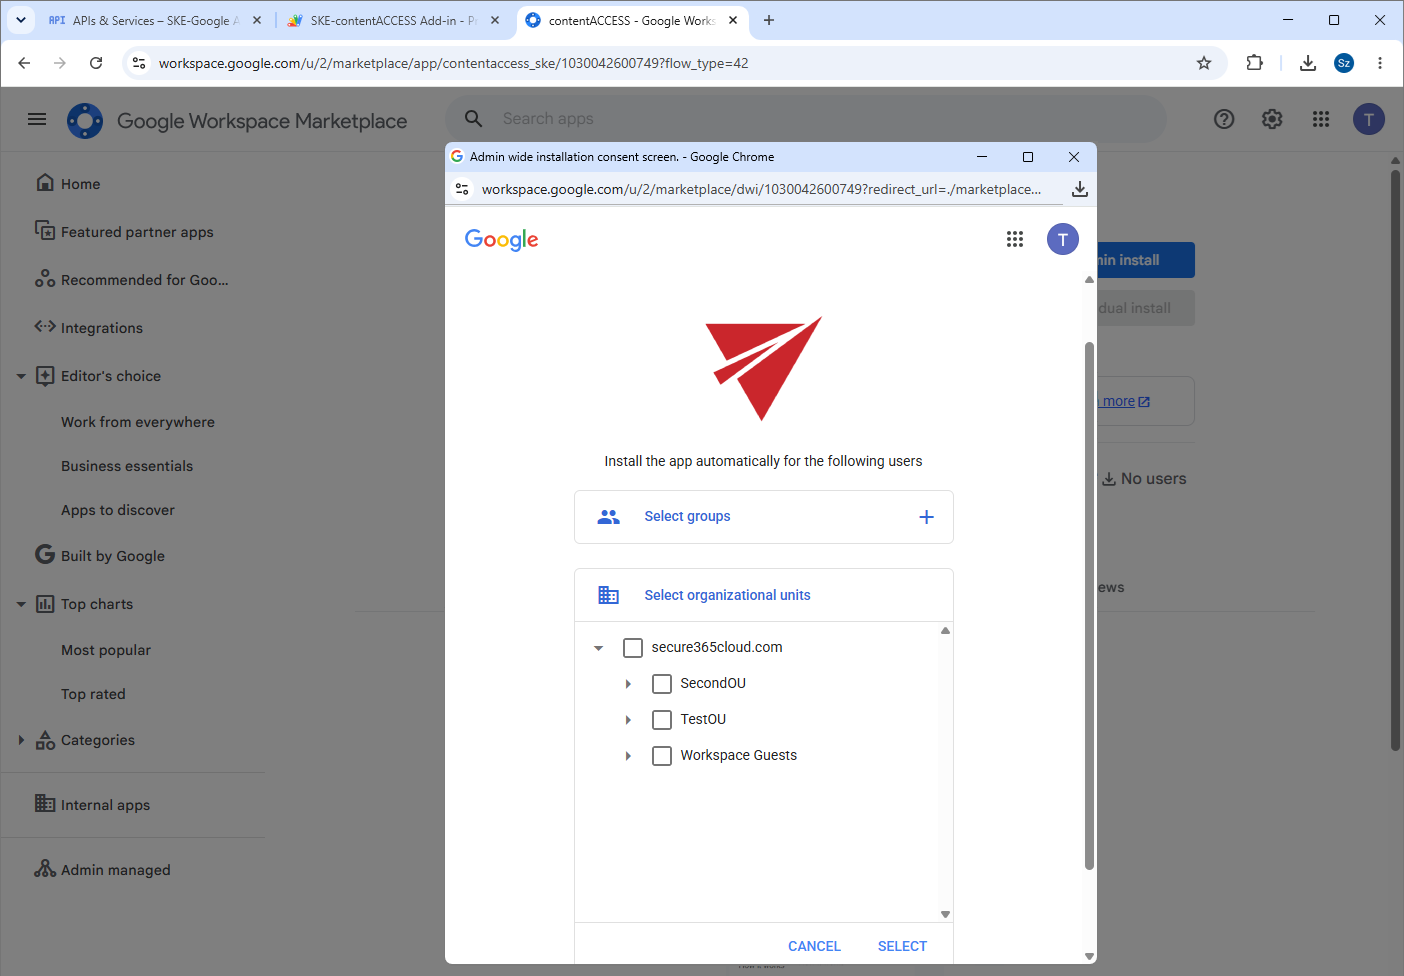
- Step 2: Select users (optional) — select the required group(s) or organizational unit(s), or skip this step. Then click Finish.
If the organization uses an app allowlist, the administrator may need to allow the app first.
- After installation, the add-on appears in Gmail for the selected users.
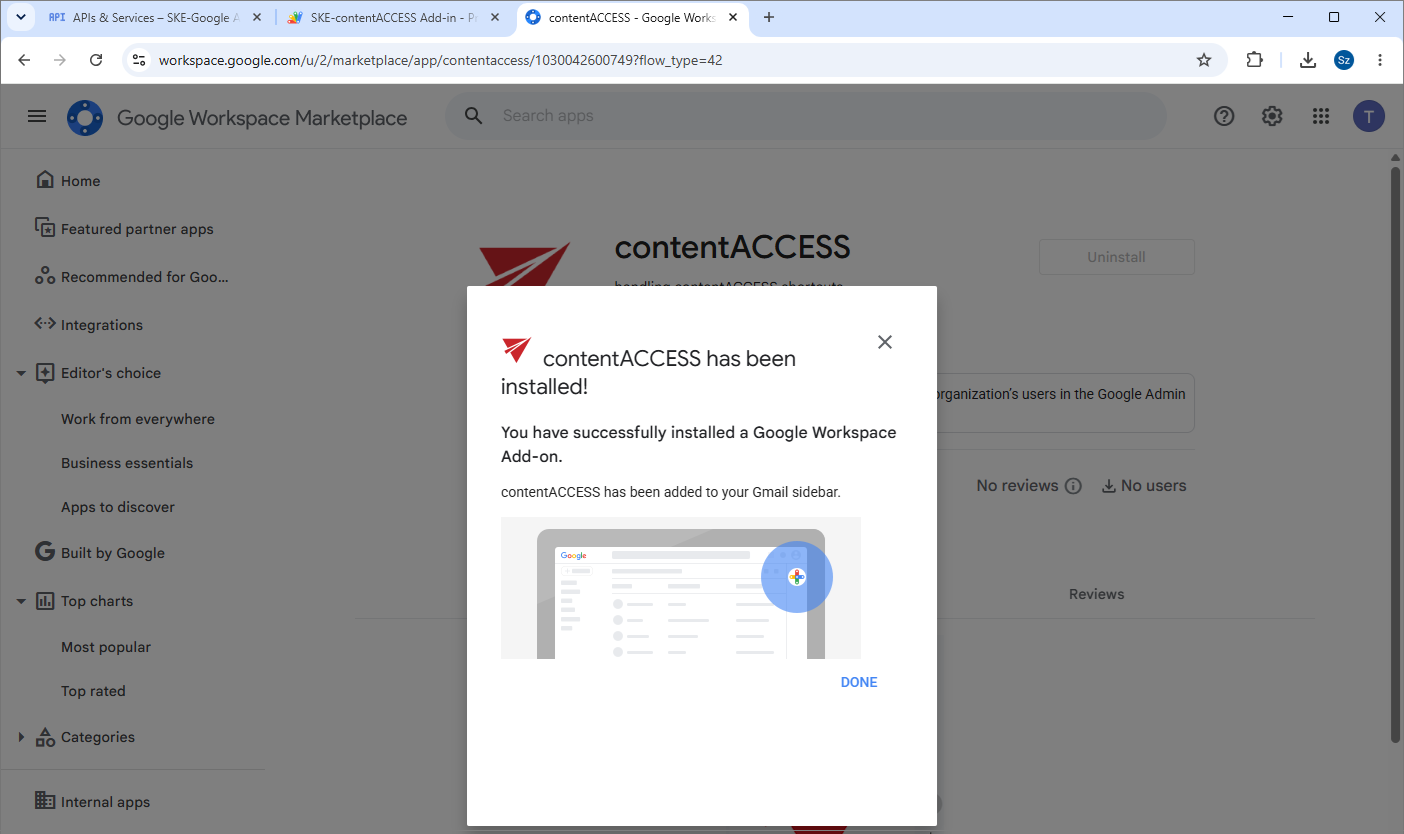
The add-on can be accessed from the right-side menu in Gmail.
Change app access for another group or organization unit
If you need to make the app available to another Google Workspace group or organizational unit, you can update the existing installation without repeating the full installation flow.
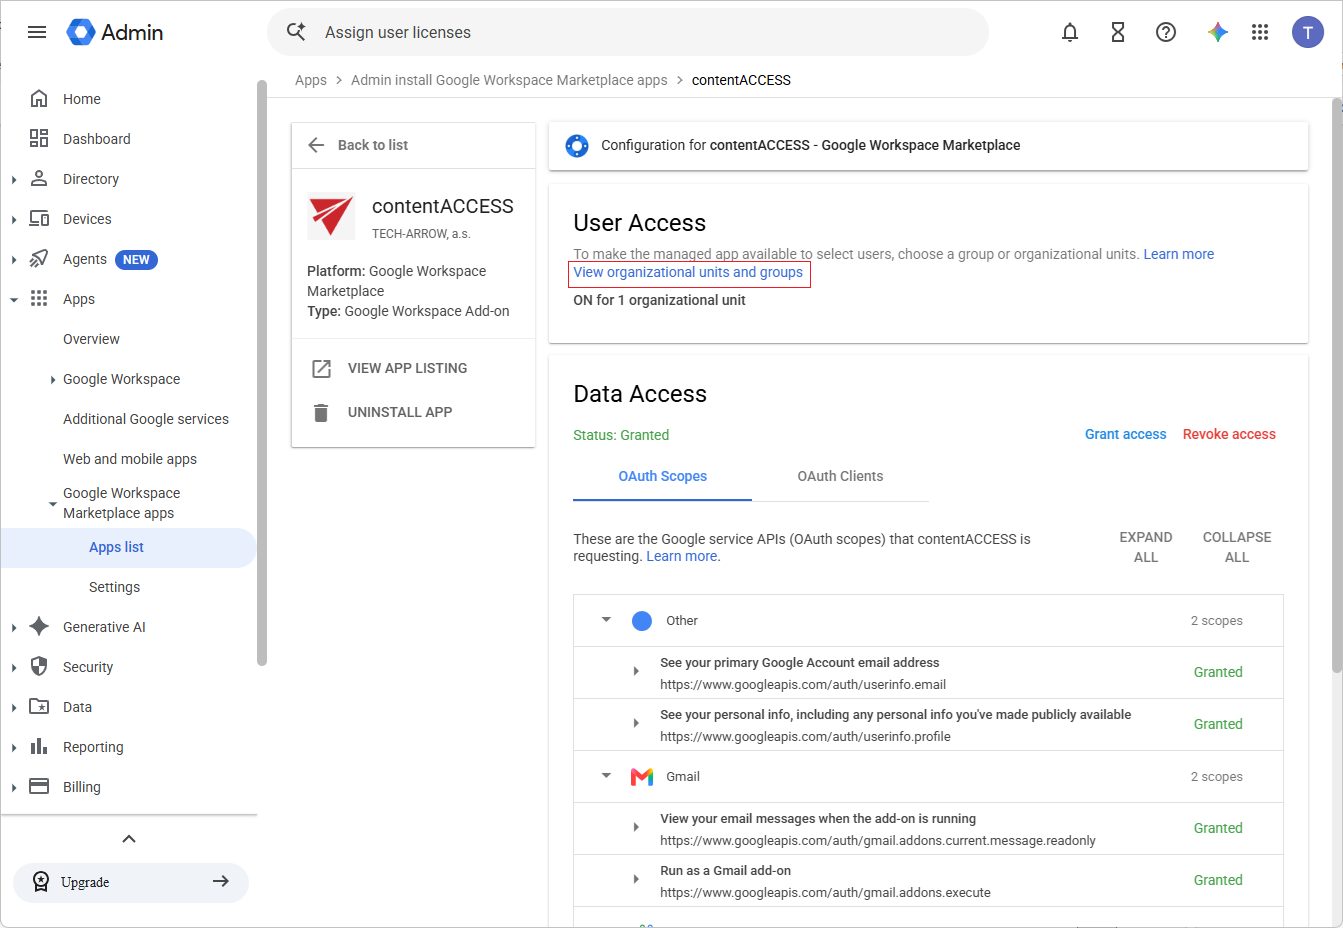
- Sign in to admin.google.com.
- In the left-side menu, go to Apps > Google Workspace Marketplace apps > Apps list.
- Select the contentACCESS app.
- Open the User access section.
- Click View organizational units and groups.
- In the Search for... field, find the required group or organization unit and set the app distribution to On or Off as needed.
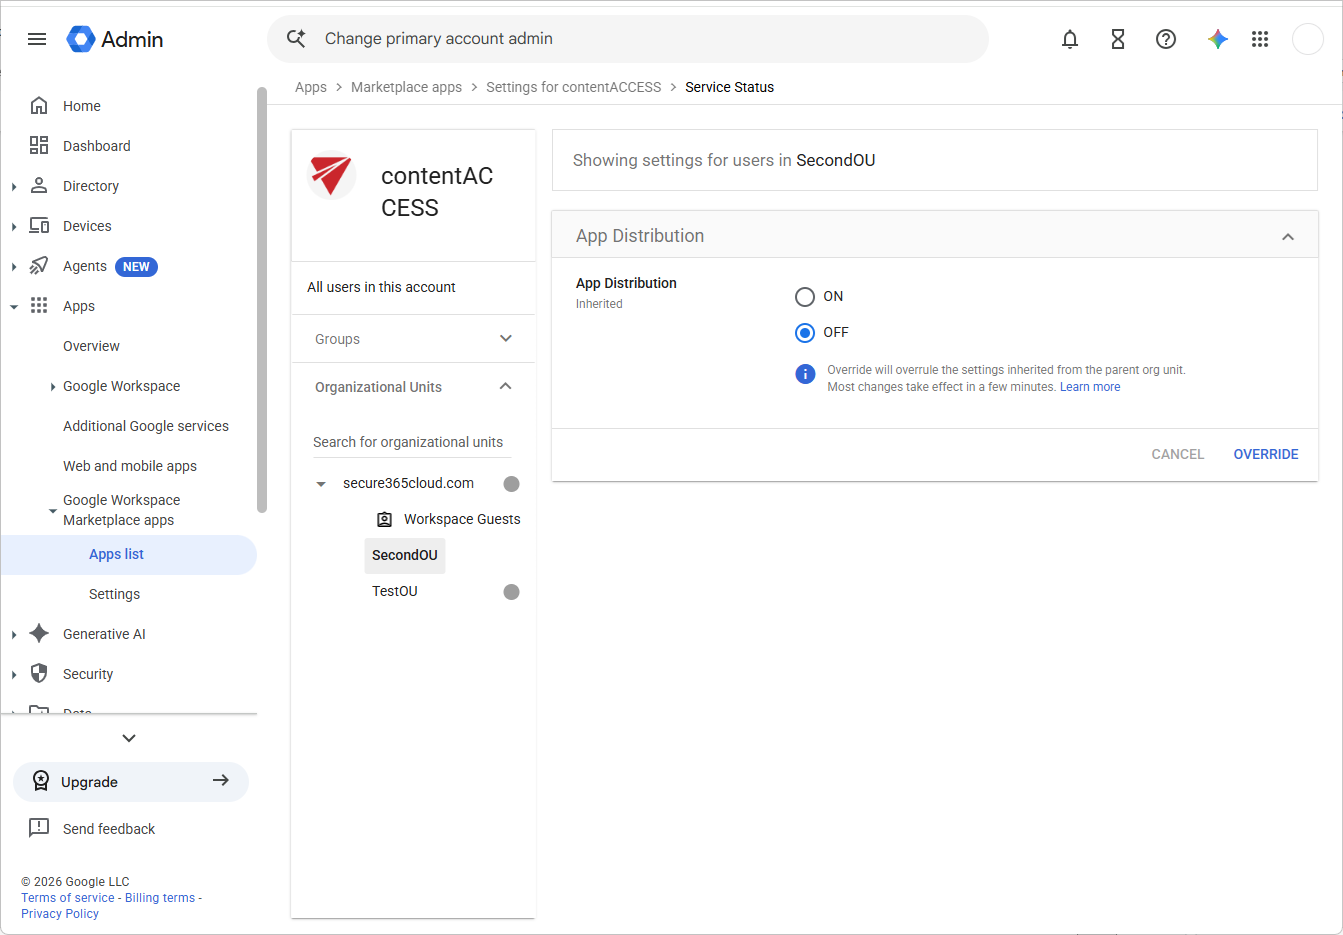
This allows the administrator to manage app availability for additional groups or organization units without repeating the full installation process.