Microsoft 365 journaling
Introduction
Microsoft 365 journaling allows Exchange Online to send copies of email messages to a specified journaling mailbox, enabling contentACCESS to archive the incoming and outgoing emails of a Microsoft 365 tenant. This page explains how to configure journaling in Exchange Online so that mail traffic is properly routed to the contentACCESS archive.
Configuring Microsoft 365 journaling for contentACCESS involves two main steps:
- Configuring the undeliverable journal reports address.
- Creating a journal rule that routes mail traffic to the contentACCESS archive.
For more background information about this feature, see Journaling in Exchange Online.
Prerequisites
Before setting up Microsoft 365 journaling, make sure the following requirements are met:
- You need to be assigned the appropriate permissions before you can perform the setup procedures. To see what permissions are required, see the "Journaling" entry in Feature permissions in Exchange Online.
- You need to have a journaling mailbox and an alternate journaling mailbox configured. For more details, see Configure Journaling in Exchange Online.
- There is a limit to the number of journal rules that you can create in Exchange Online. For details, see Journal, Transport, and Inbox rule limits.
- Journaling in Exchange Online is managed through the Microsoft Purview compliance portal. For more information, see Manage journaling in Exchange Online.
Configure the undeliverable journal reports address
-
Log in to the Microsoft Purview compliance portal.
-
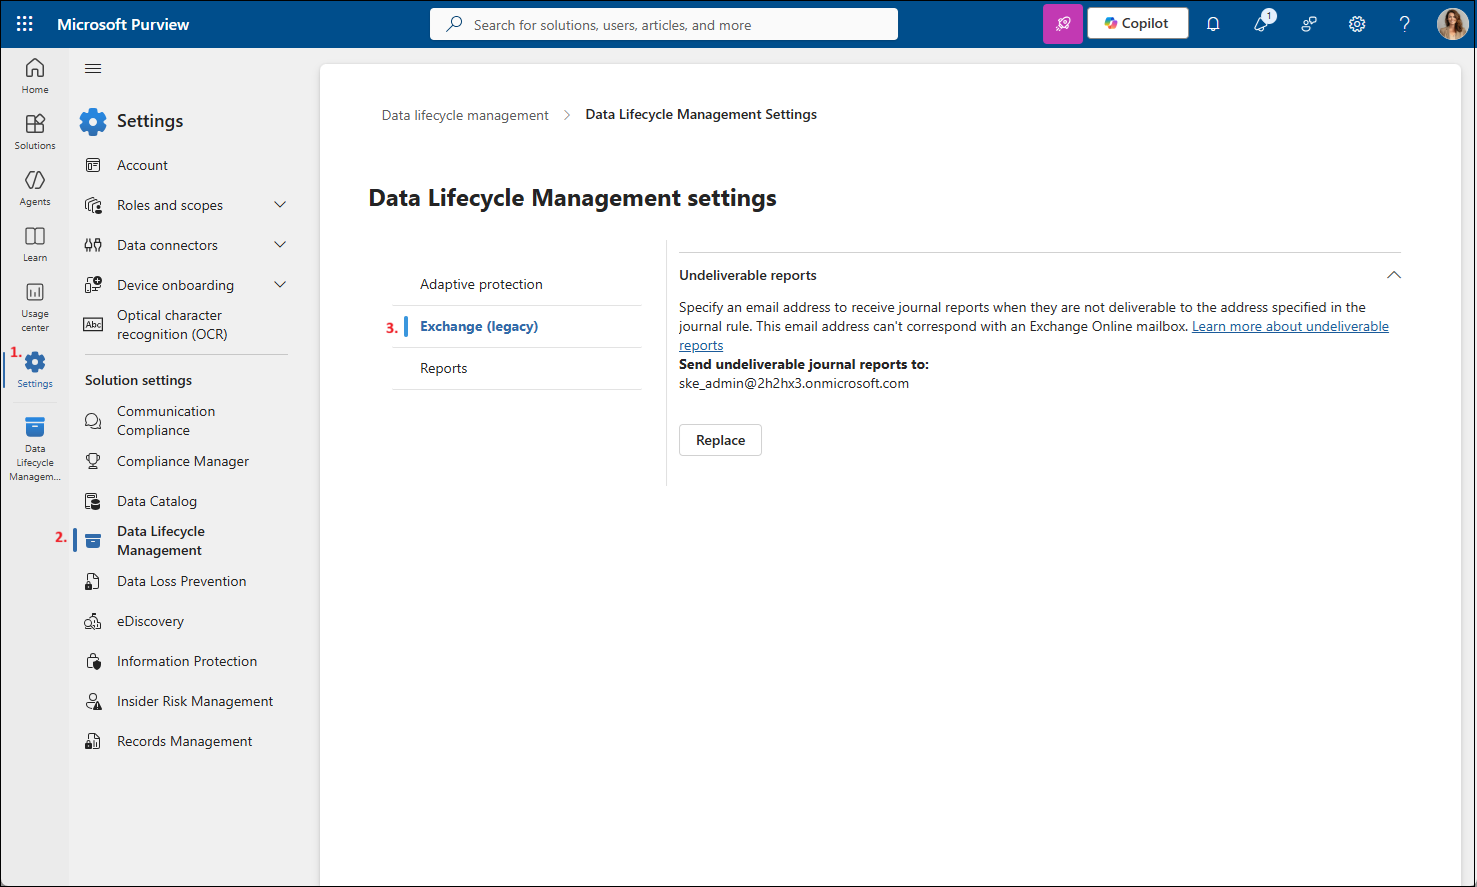
From the left navigation menu, go to Settings > Data Lifecycle Management > Exchange (legacy).
-
In Send undeliverable journal reports to, enter the email address of a valid user account.
This email address is used to receive Undeliverable journal reports when journal reports cannot be delivered to the addresses specified in the journal rule. It cannot be a team or group address, and it cannot correspond to an Exchange Online mailbox that must be archived.
infoNote: Emails sent to the email address configured to receive undeliverable journal reports are not sent to the journal. If you configure a production mailbox to receive undeliverable reports, any email sent to that mailbox is not forwarded to the journal and therefore is not archived by contentACCESS. For this reason, a production mailbox that must be archived SHALL NOT be set as the undeliverable report receiver.
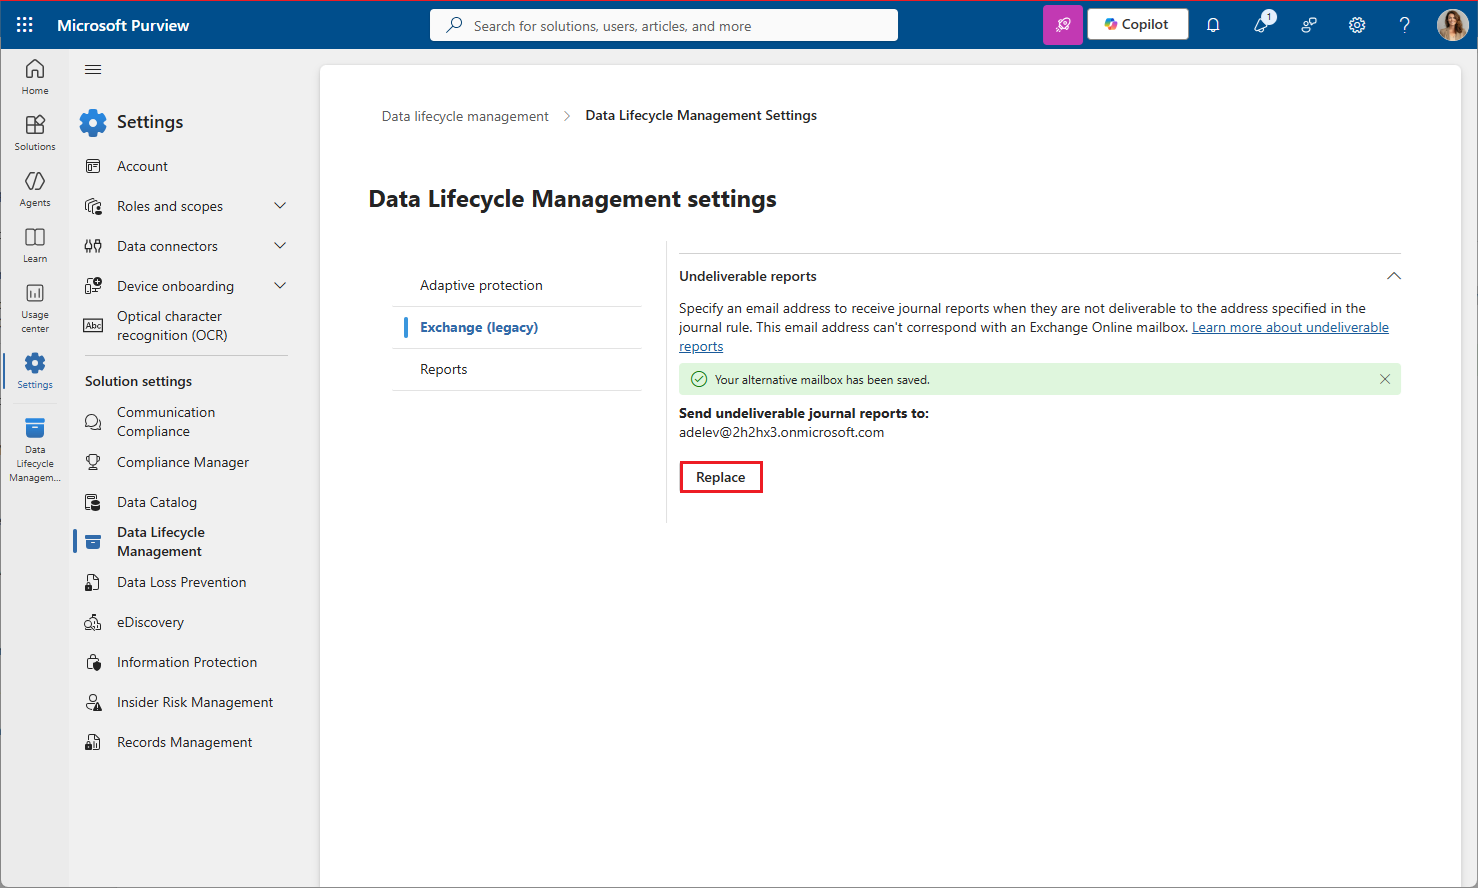
You can also replace this alternate mailbox at any time by clicking Replace on the same tab:
-
Select Save.
Create a journal rule
-
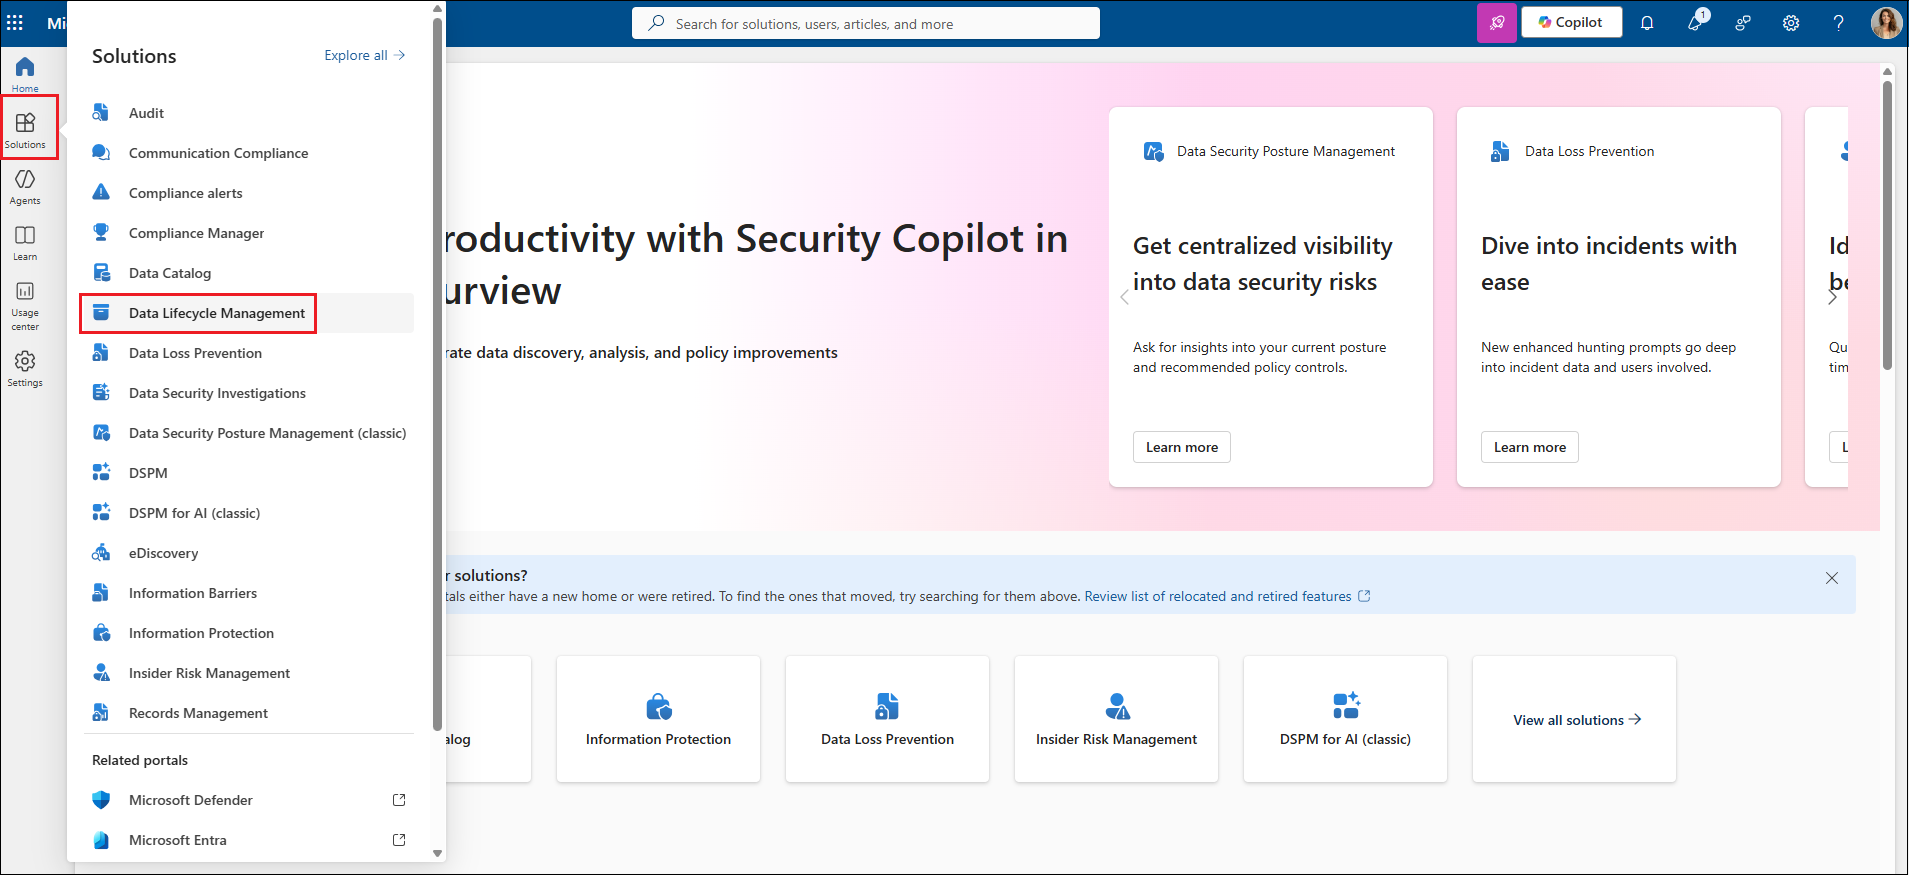
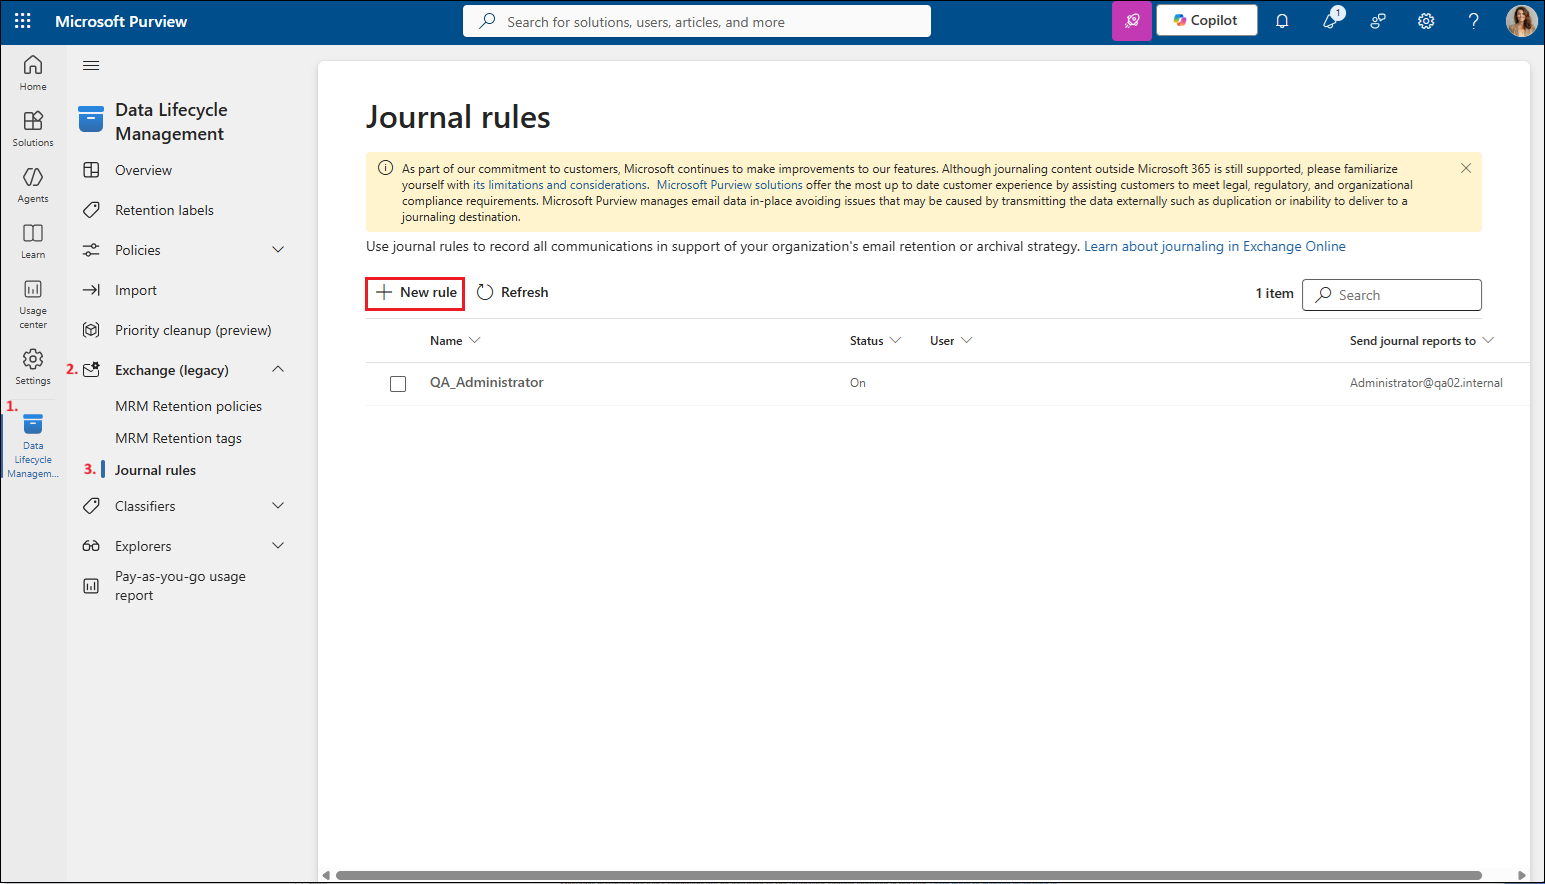
Open the Solutions menu and select Data Lifecycle Management. This adds Data Lifecycle Management to the left navigation menu, under Settings.
-
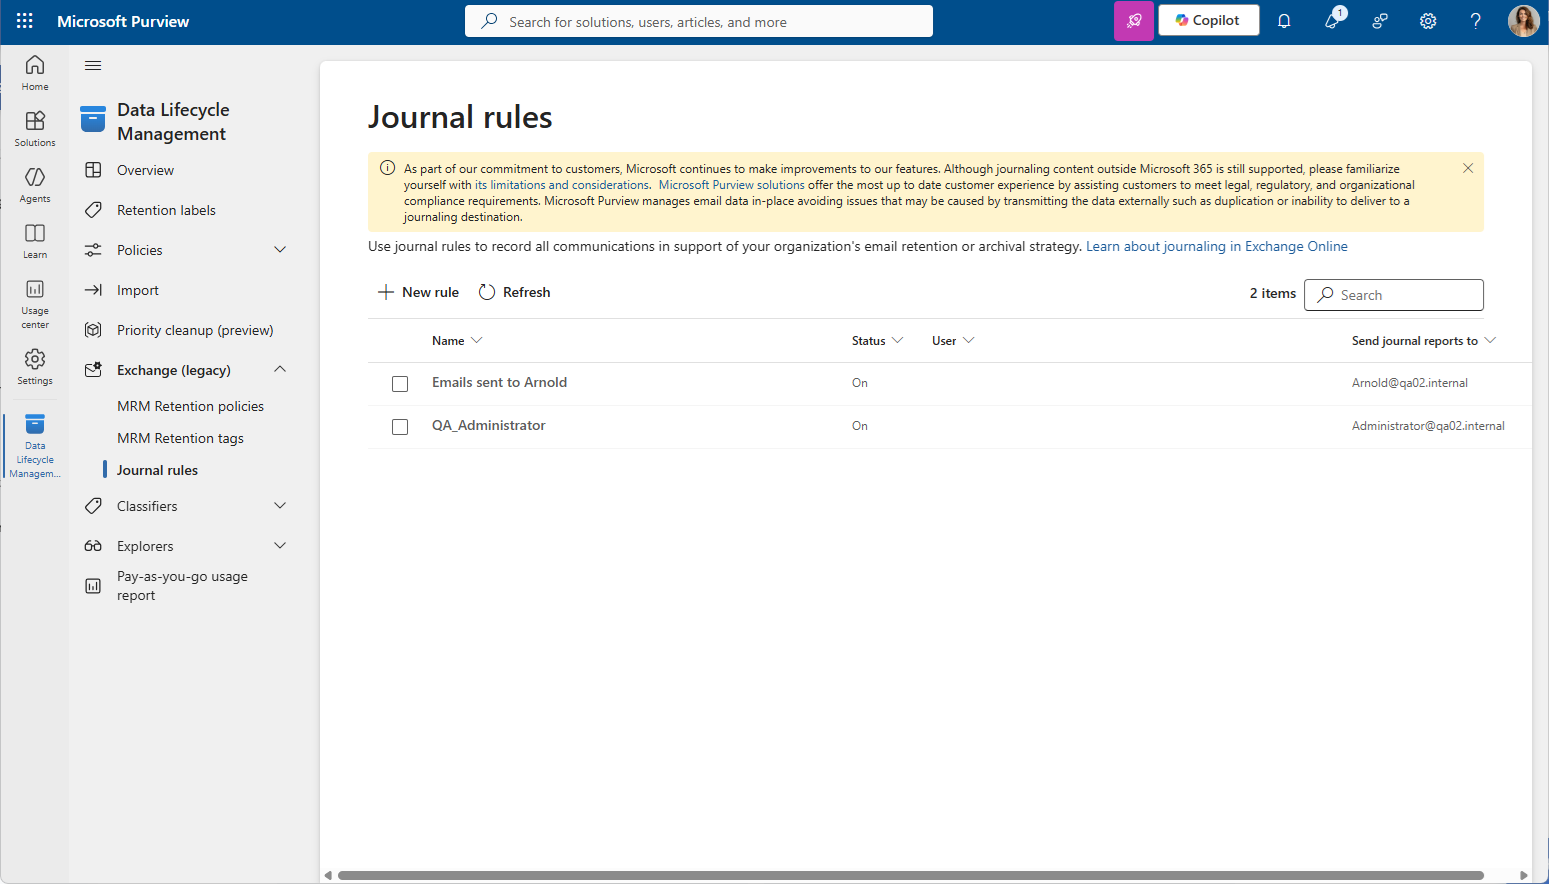
Click Data Lifecycle Management, then select Exchange (legacy). Its dropdown menu also contains Journal Rules.
-
In Exchange (legacy), open the dropdown menu and select Journal Rules.
-
Click + New rule.
-
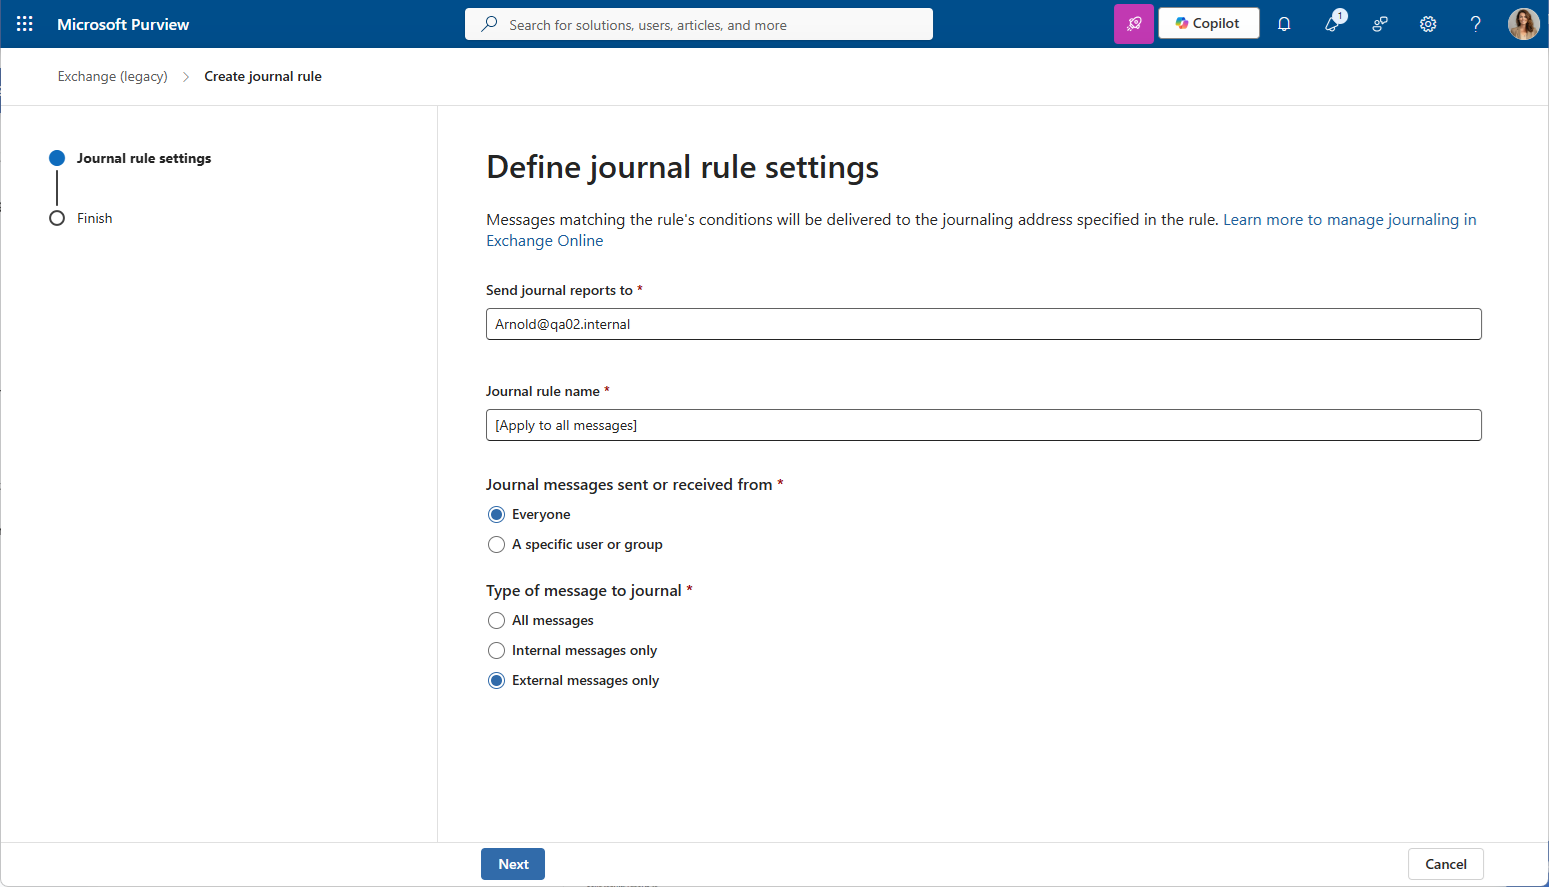
On the Define journal rule settings page, provide the following values:
- Send journal reports to: Specify an email address for an on-premises archiving system or third-party archiving service. When using the contentACCESS cloud, the journal mailbox domain is
@smtp.contentACCESS.cloud. - Journal Rule Name: Enter a name for the rule. It is recommended to use a descriptive name such as "contentACCESS journaling rule".
- Journal messages sent or received from: Select Everyone.
- Type of messages to journal: Select External messages only.
- Send journal reports to: Specify an email address for an on-premises archiving system or third-party archiving service. When using the contentACCESS cloud, the journal mailbox domain is
-
Click Next.
-
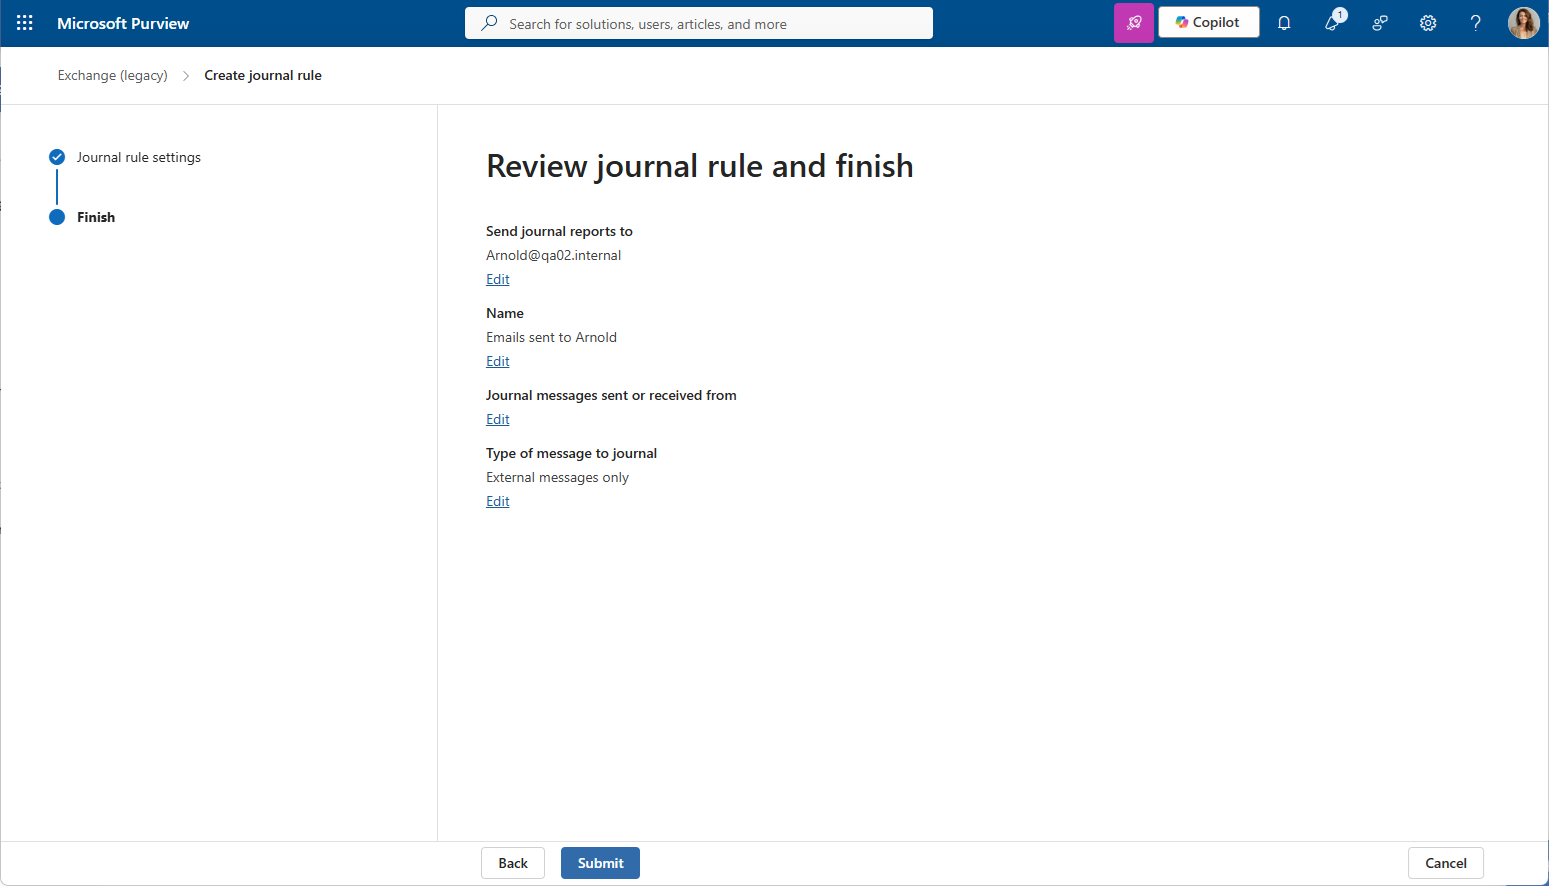
On the Review journal rule and finish page, check the configured values (recipient, rule name, scope, and message type).
-
If everything is correct, select Submit.
Once saved, the rule becomes active automatically. Incoming and outgoing emails of the configured Microsoft 365 tenant are then sent to the contentACCESS archive and archived.