Invitations
Invitation is another way of how to invite
- new users (with certain roles/permissions) and
- already existing users (with certain roles/permissions) to contentACCESS.
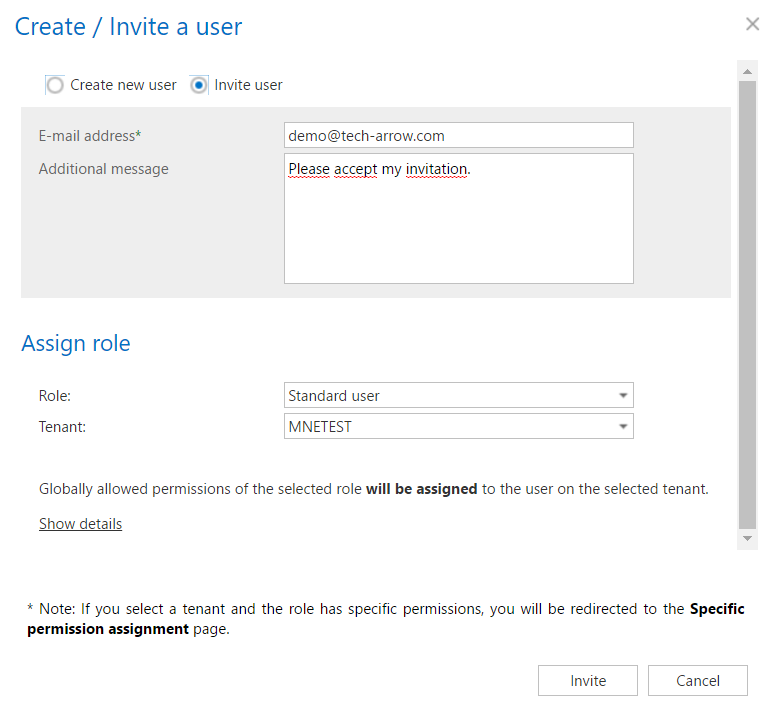
To send an invitation for an already existing or potential contentACCESS user, click the "Invite user" option in the Create/Invite user dialog. Further fill the email address, where the invitation will be sent and select the role that should be assigned to this user.
When a user is created with invitation:
a) If the role does not contain specific permissions, the invitation is sent when the user clicks the Invite button
b) If the role contains specific permissions (read more in section Defining specific permissions of a role assignment), the Save button is not active, but is replaced by the Invite button. The invitation is sent when the user clicks the Send invitation button.
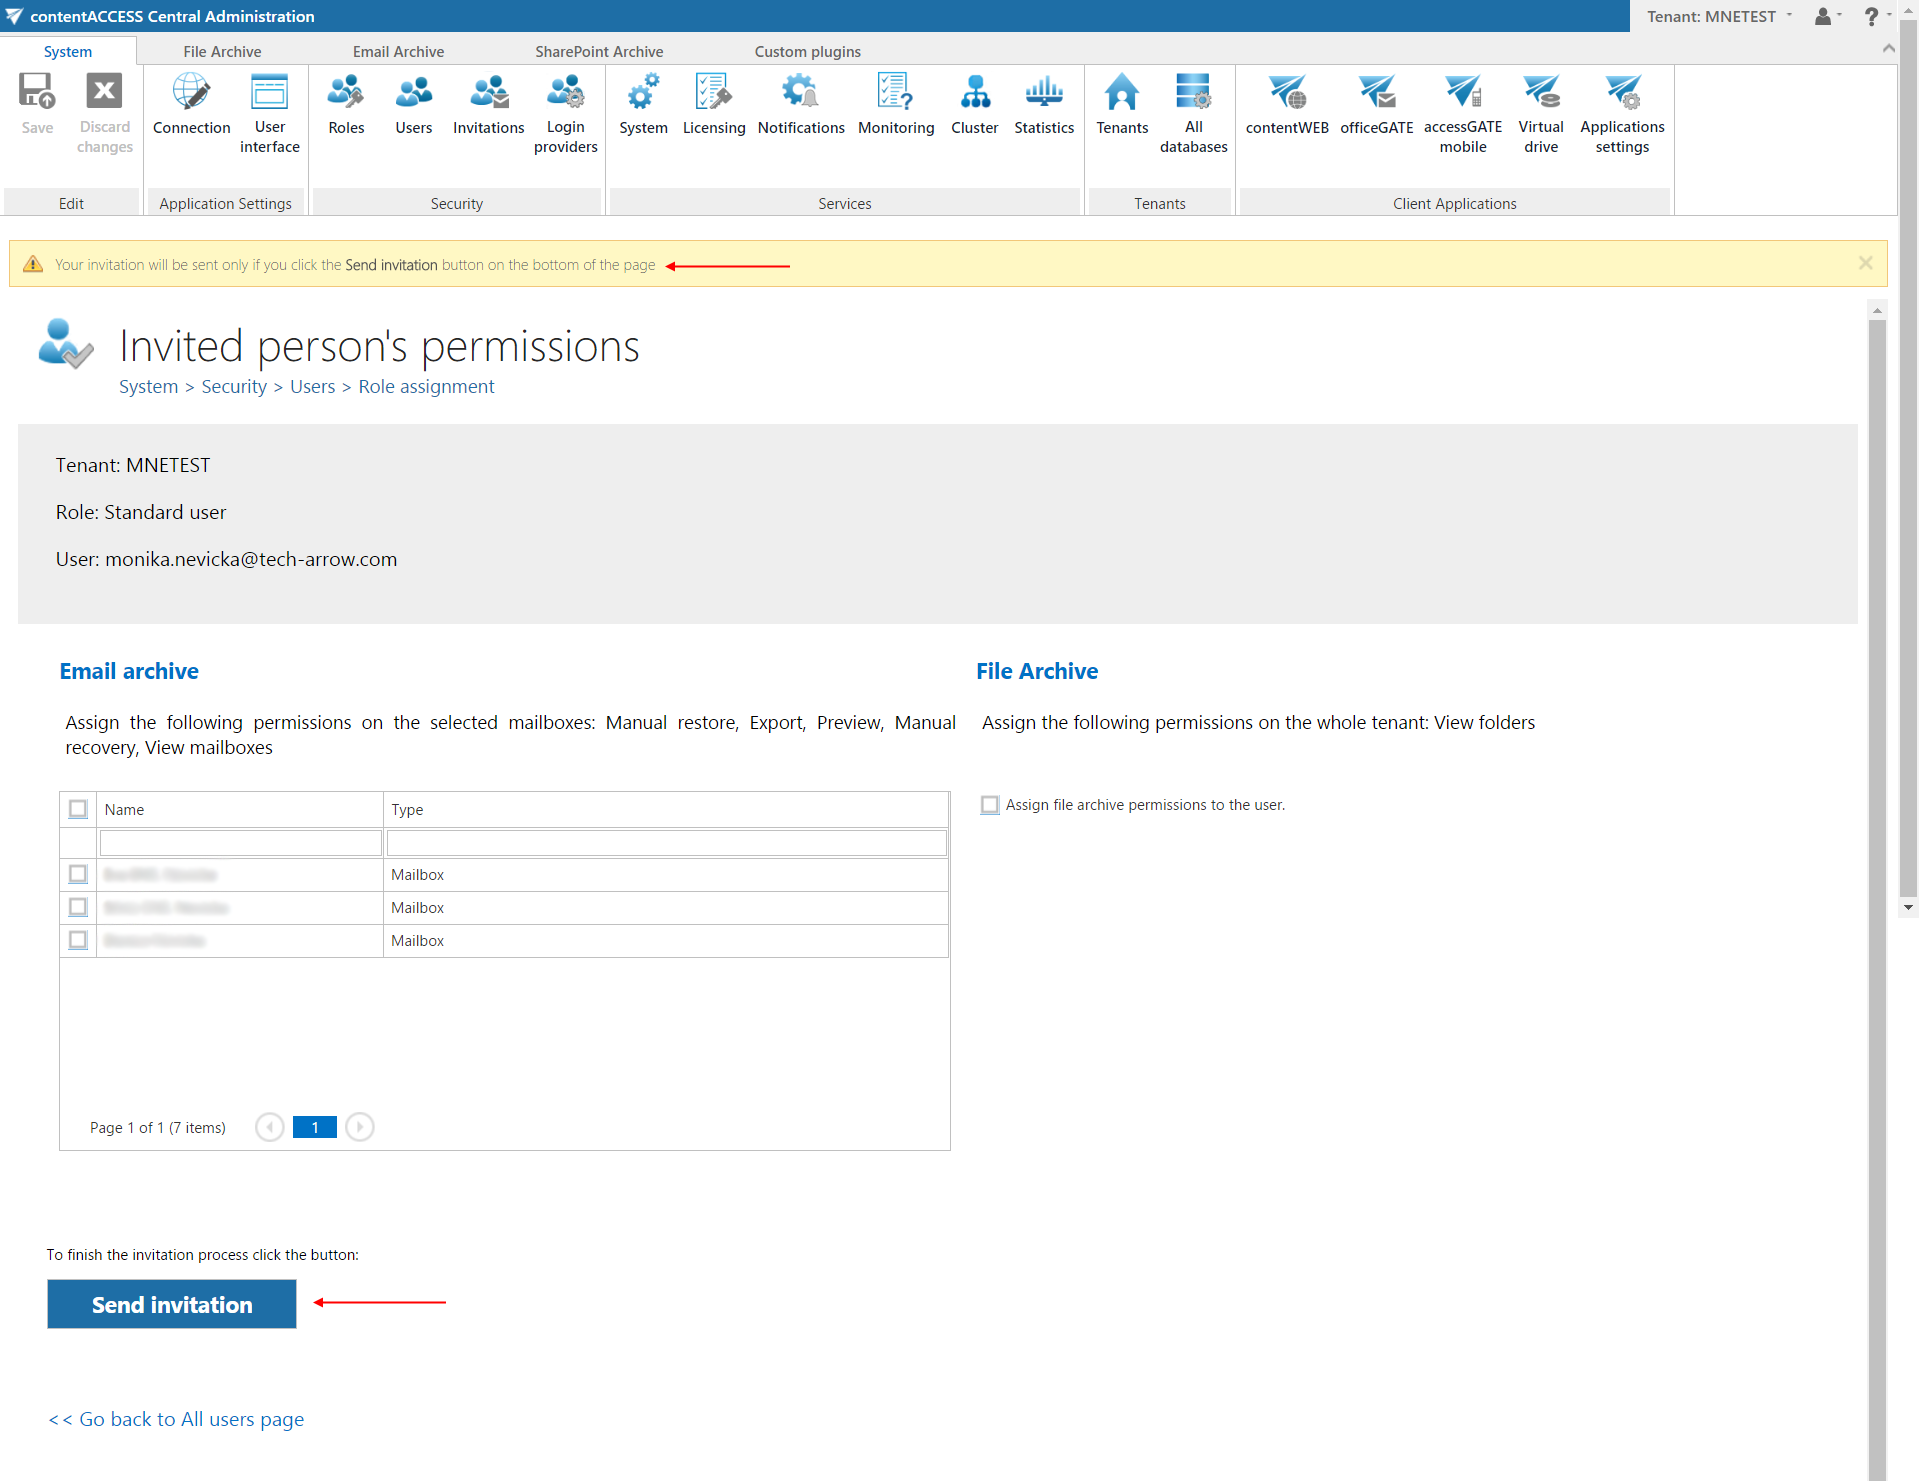
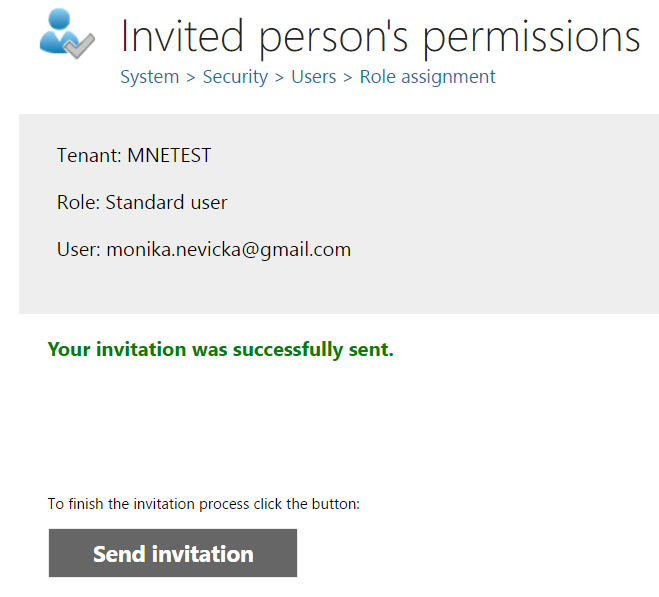
After clicking the Send invitation button, the user is notified that his invitation was successfully sent.
After the notification job has run, the invited user gets an invitation message, that he was invited to contentACCESS. To accept this invitation, he clicks “Finish your invitation”.

He is now redirected to the webpage where he can finish the invitation process. Depending on if the invited user already exists/doesn't exist in contentACCESS, or if the user is already signed in to contentACCESS, he has multiple options how to finish the invitation process. He can
- use already signed in user – as the user is already logged in, he is not required to log in again
- sign in with the existing user, with the existing contentACCESS account, if he has a contentACCESS account already, but currently he is not signed in to contentACCESS (option “Use another contentACCESS account”)
- sign up for a contentACCESS account, if he’s not a contentACCESS user yet (option “Sign up for contentACCESS account”) – the user logs in with any login provider to contentACCESS. He can either create his own contentACCESS account (Forms authentication) and sign in with it, or he can use any of his available authentication providers to sign in. After successful login the new user will be created and role will be assigned. The user login that he used at first will be saved in the User details

Screenshot: Finishing the invitation process as an already signed in user
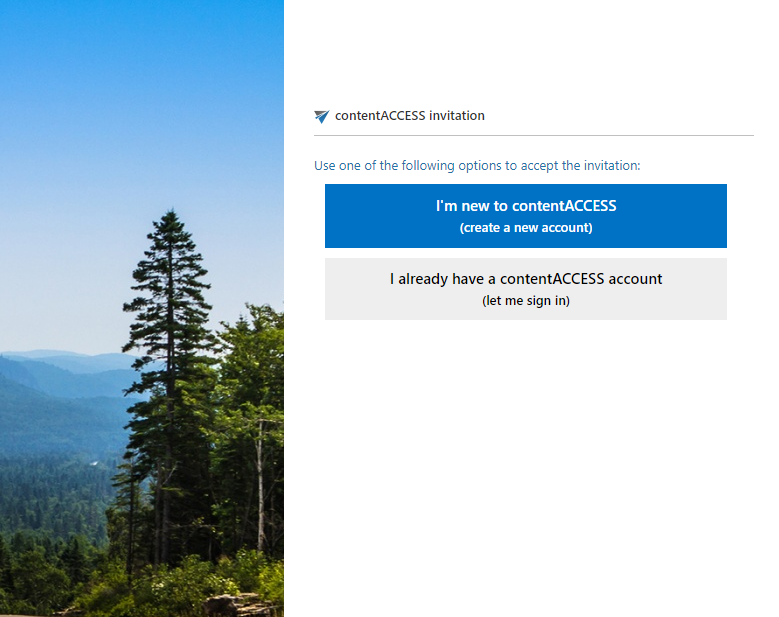
Screenshot: Finishing the invitation process as a new user or when not signed in
After successful login, the new user is created / the respective role defined in the invitation will be automatically assigned for the new/existing user.
The list of invitations, so the list of already invited users can be viewed on the Invitations page accessible at: System => Security => Invitations. The following columns are displayed in the grid:
- Email: the email address where the invitation was sent
- Created: the date when the invitation was sent to the user
- Is accepted: here can be viewed if the invited user has accepted the invitation, or it is still a pending invitation
- Assigned user: the user with the assigned role(s)
- Accepted at: the date when the invitation was accepted by the user
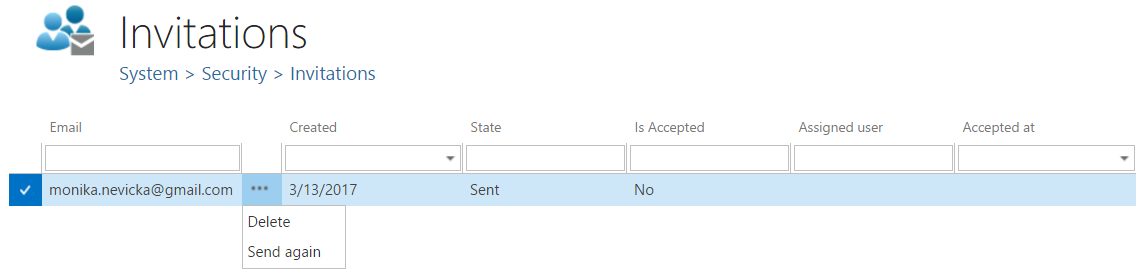
The context menu option of the respective invitation allows to delete it from the list or to resend it, if it was not accepted yet.