Users in contentACCESS
All users of the current tenant are listed on the Users page (open it with navigating to System => Security => Users button).
This list is visible for users, who have manage users and roles permission on the selected tenant. Tenant administrator is able see all current tenant users (default tenant of the user is the current tenant) and linked users – the users who have roles associated with the current tenant. System administrator can also see the list of global administrators – administrators who have roles associated on all tenants, and also list of users without default tenant. For more information about user filtering on the Users page, please check this section.
Note: If you remove a tenant, the users with roles only on this tenant will also be removed.
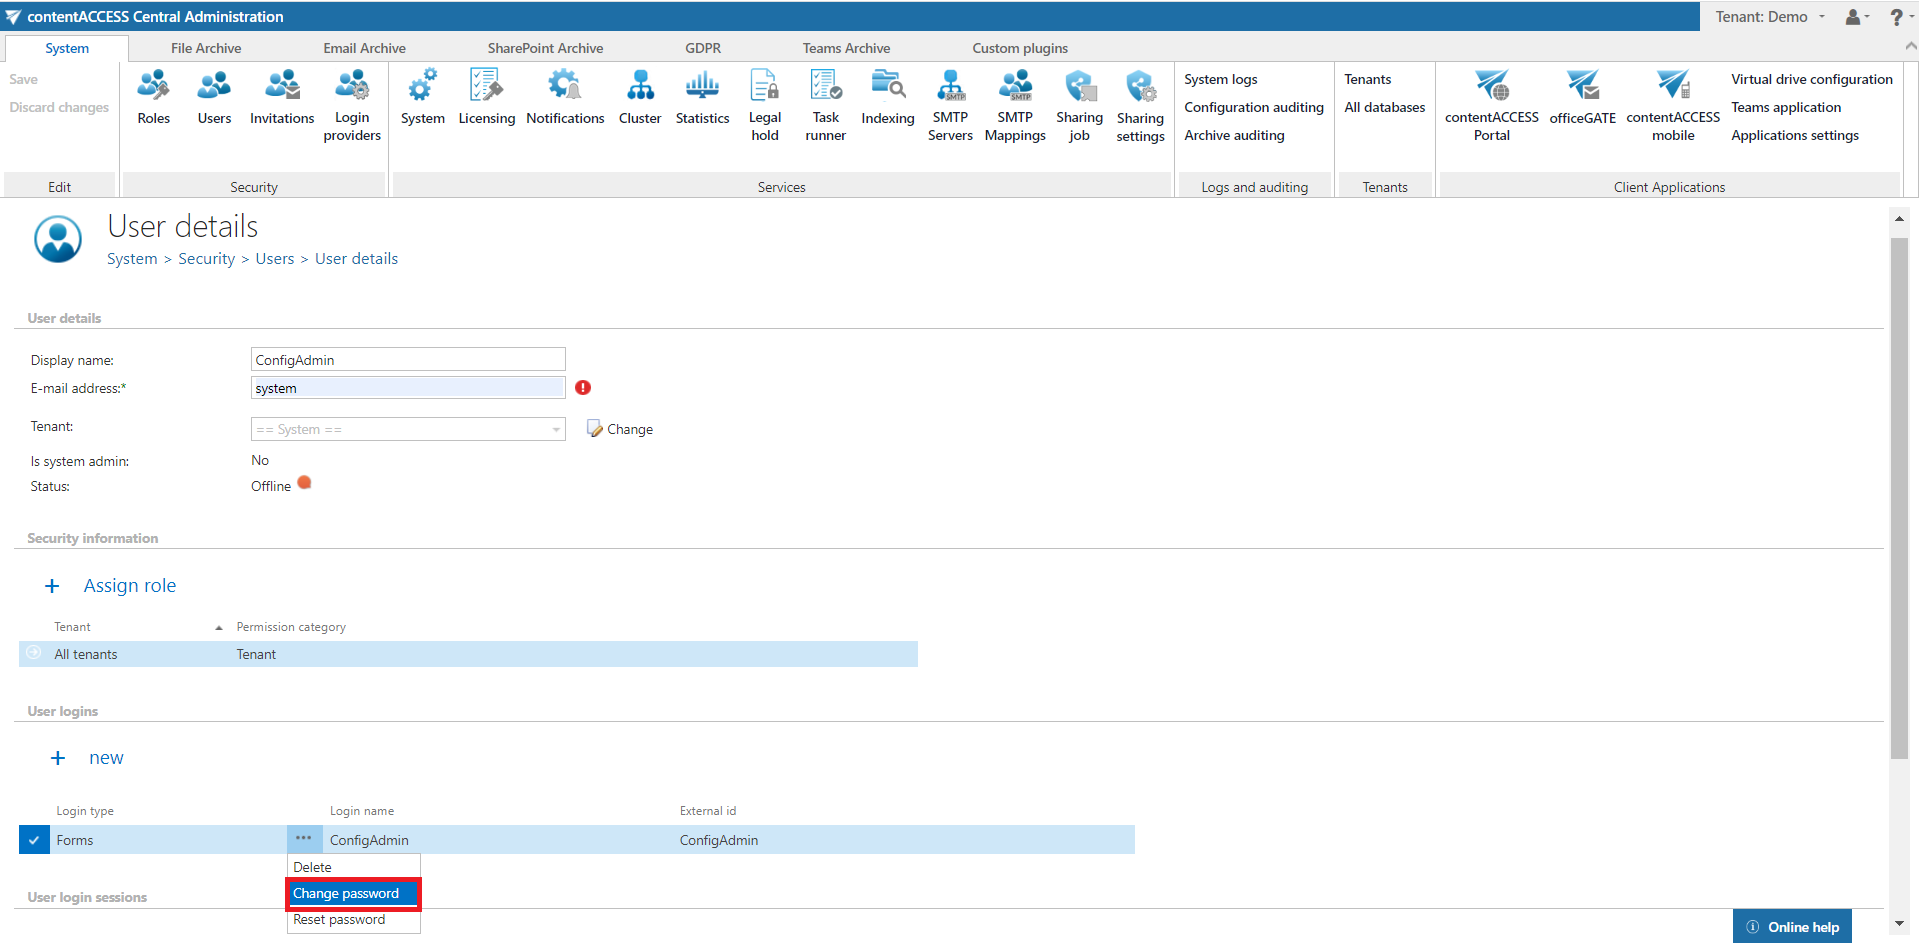
Note: Because of security reasons, it is highly recommended to change the above mentioned default system administrator's login password after the very first login to the Central Administration. This can be done on the User details page of the Administrator user, in section User logins, Forms login provider’s context menu:
Users’ context menu
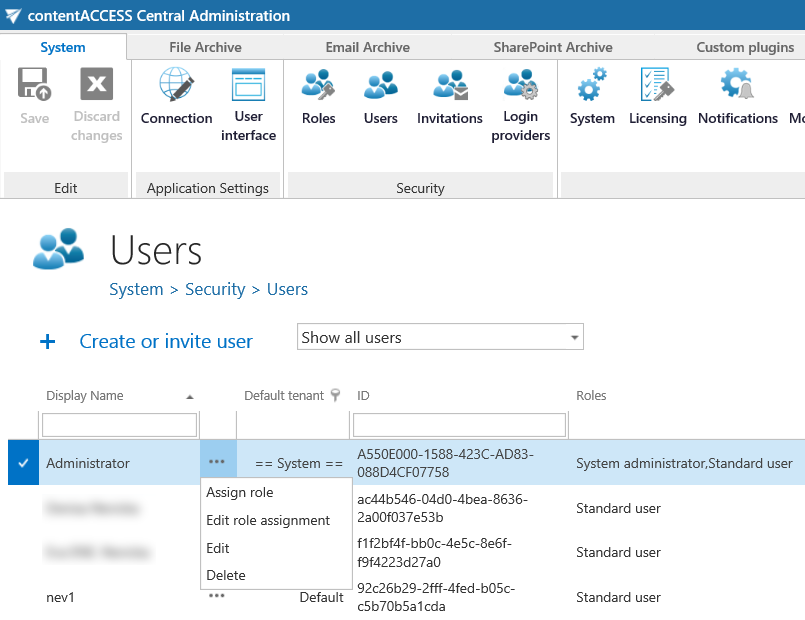
The users’ context menu allows the following operations:
- Assign role – assign a role to an already existing user; read more in section "Roles"
Note: If the logged on administrator has specific permissions on schedulers, repository items, jobs and/or to view the archive, he cannot assign roles containing these permissions for second users. E.g. If the logged user has specific permission to Edit job, then he cannot assign a role which contains Edit job permission. Read more about roles and permissions in chapter “Roles”.
- Edit role assignment – edit permissions of the user’s assigned role
- Edit – view the user details; add user logins; view user’s login session(s); log off the user
- Delete – delete the user from the system
Note: It is good to know that for security reasons it is impossible to delete all system administrators from the list of users. It is possible to delete users with system admin permissions except of the default system administrator.
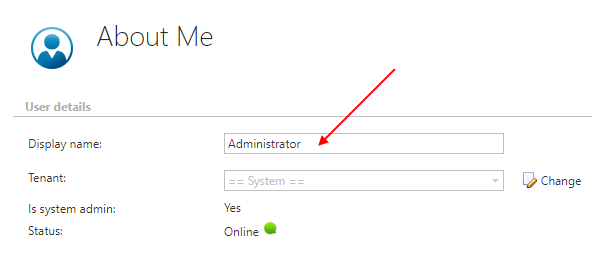
User details
The detailed user information can be accessed by selecting option “Edit” in the user’s context menu (the logged on user can access his own user details by clicking “About me” in the upper right user menu). With this option the User details (or About me) page opens.
Screenshot A: Details of the selected contentACCESS user
Screenshot B: Details of the logged in user
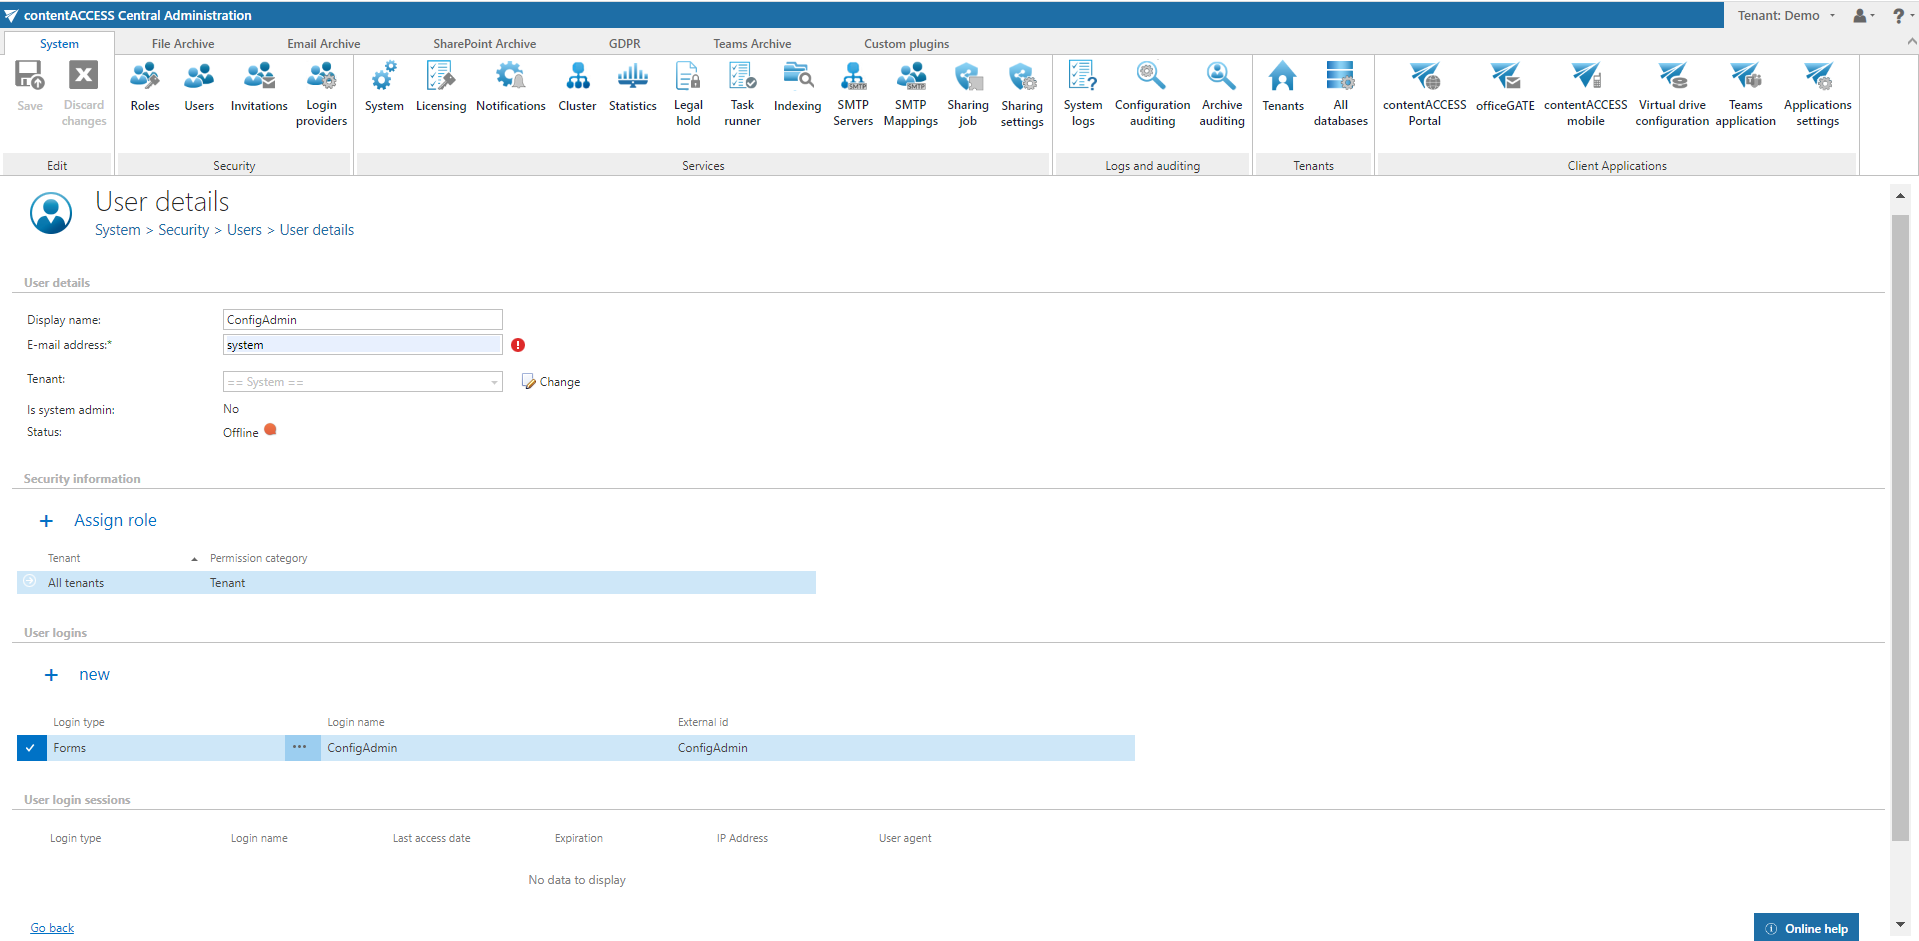
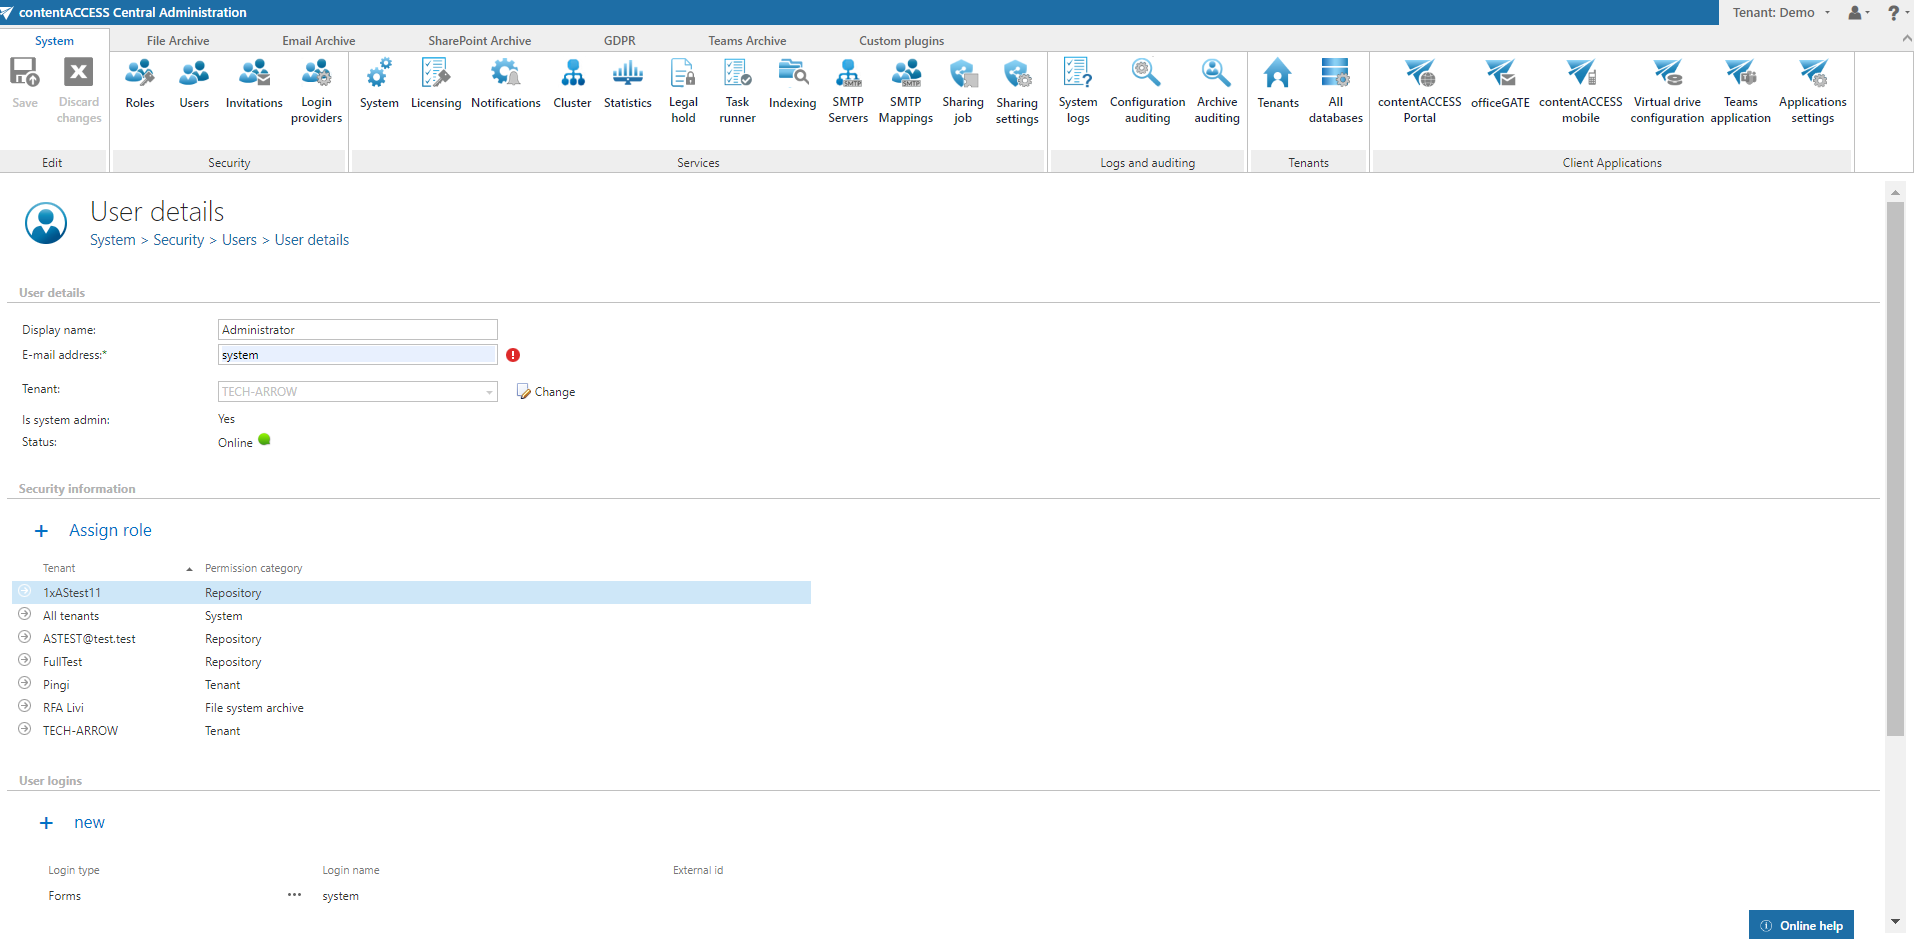
Section “User details”
In this section you can find the given user’s display name (i.e. his name in contentACCESS), and the information about the user’s status. To change the display name, rewrite the current display name and save your settings.
It is also possible to change the tenant of the selected user. To do so, click on the Change button.
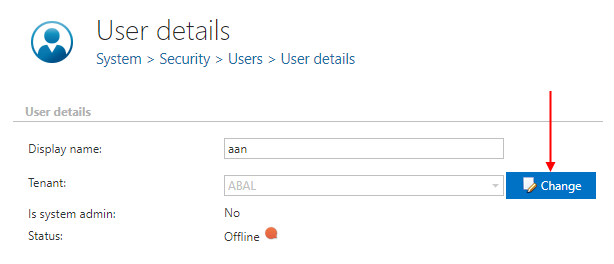
A warning window will pop-up. After you confirm the warning by clicking on the OK button, you will be able to change the tenant. The retrieve problems mentioned in this pop-up mean that you will not see your previously shared items in contentACCESS Portal.

The user’s status signalizes if the user is:
- Online (green): means there was an interaction in the last 5 minutes
- Away (yellow): the user is logged in, but inactive in the last 5 minutes. If the user has clicked the Remember me when logging in, then he will be displayed as Away until his token expires
- Offline (red): the user does not have any login session
Section “Security information”
Here you find the user’s display name, the role(s) assigned to the given user and a description about the user’s rights. It is possible to assign a previously configured role for the user from here. After clicking on + Assign role, a pop-up window, where the role can be specified, appears.
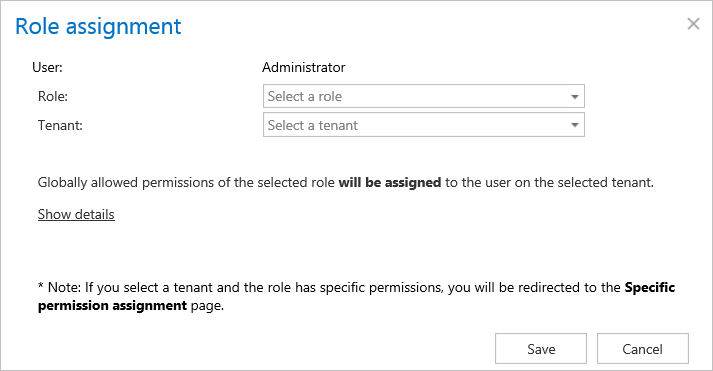
Each role assignment has a flag. Manual flag means that the given role was assigned manually. Manual permissions are not changed/removed by the automatism. Automatic flag means that the role was assigned by the provisioning job. Automatic flag is marked with “(100)”.
Section “User logins”
New user logins can be assigned to a user in the User logins section. By clicking “+new” in this section the “Add new login” window opens.

In the Add new login window, select a provider configuration that the given user will use when logging into the given application. The providers, that where configured on the Login providers page (for more information check “Login providers”) can be selected here. Windows and Forms authentications are enabled by default. Multiple user logins are not enabled for Forms and Windows login providers.
Change password, Reset password context menu options:
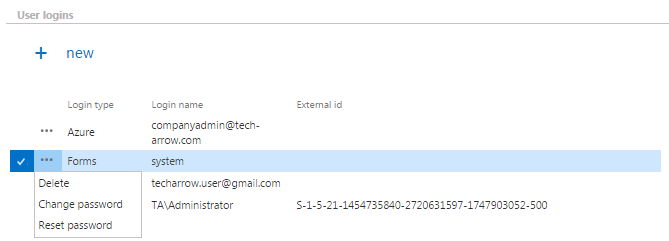
The administrator can change the user’s password for the Forms type login. The administrator must have Manage tenant permissions to change, and/ or to reset the password of a user.
To change the password, just select this option and enter the old, new, and confirm the new, desired password in the pop-up window:

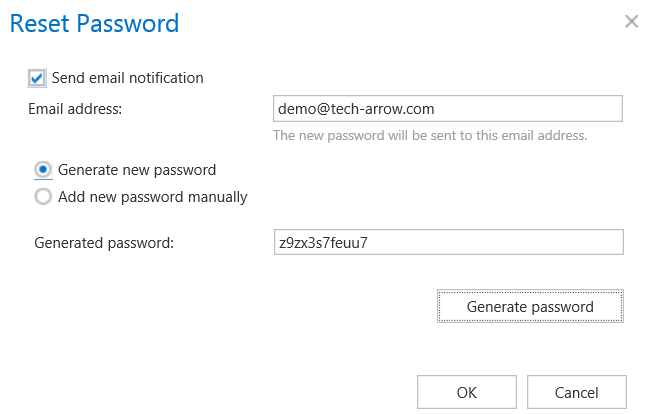
If the password has been lost or forgotten, use the Reset password option to create a new one. Enter the email address where the password should be sent.
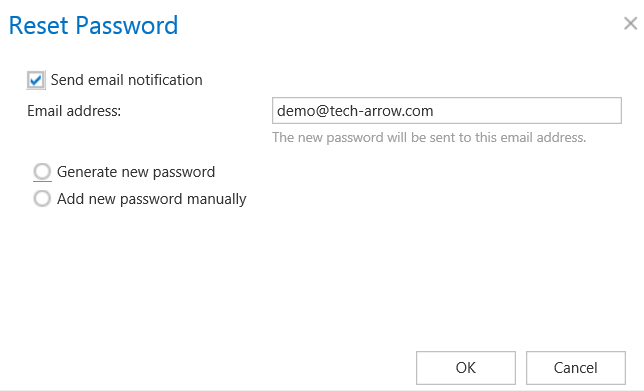
The user has now two options: to generate the password or to add the password manually. If the user selects Generate new password, he first needs to click on the Generate password button, then he will see the generated password in the textbox.
If the user selects Add new password manually, he needs to type in two times his new password.
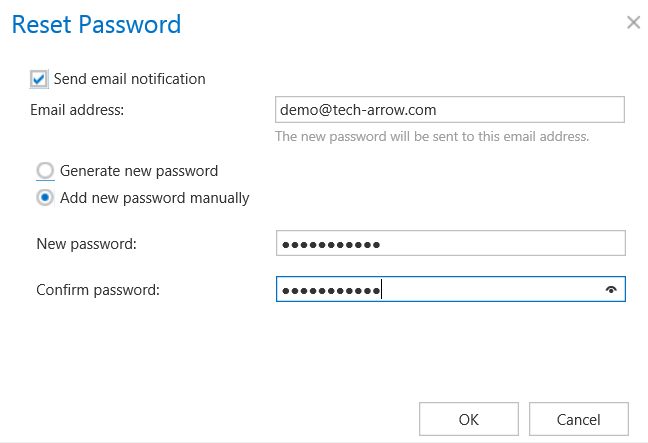
At the next notification job run the new password will be sent to the email address specified in the dialog.
**
Section “User login sessions”**
At the bottom of the User details page, there is a list of active login sessions (if the user logged in in officeGATE, contentACCESS Portal etc., then all these apps will have a separate login session; if the user is logged in from different browsers, there will be separate login sessions for each browser as well). From that page, the administrator can also log off an existing user. Once the logoff is done, the user will be redirected to the login page on the next click in the given application.
Creating/inviting contentACCESS users
When you create/invite user(s) in contentACCESS, always follow these steps:
- Prepare a role with the permissions that will be assigned to the user(s) – this step can be skipped if you want to assign an already existing, default global role to the user(s); more info in section “Roles”
- Create/Invite the user(s) and assign the role in the Create/Invite a user dialog
- Edit the specific permissions of the assignment – only if specific permissions were defined in the assigned role (read more in “Roles”)
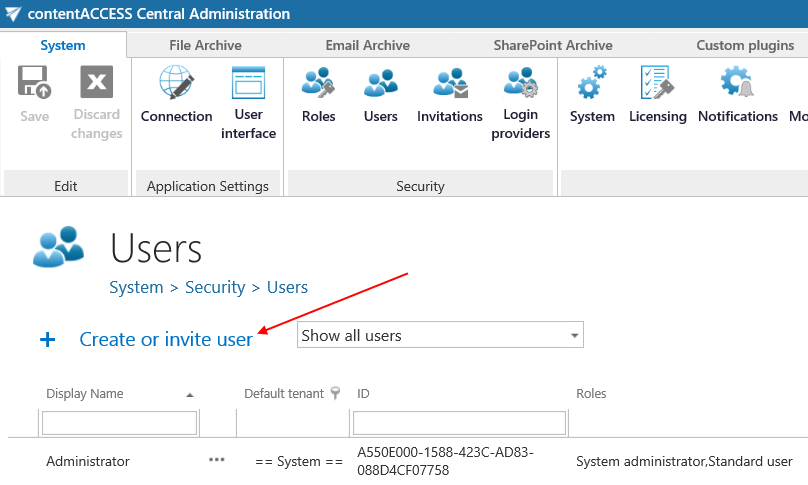
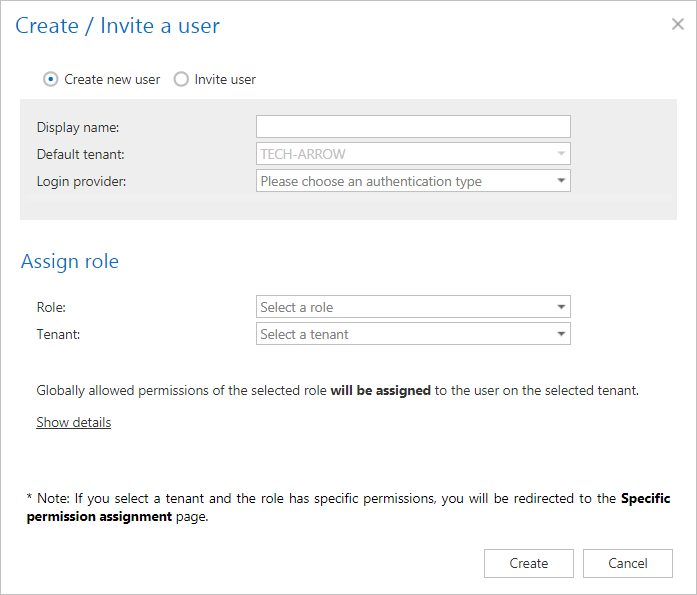
Any new users/existing users (with new roles/permissions) can be added to contentACCESS on the Users page. To create/invite a user, click “Create or invite user” on the Users page (System tab => Security group => Users page).
The Create/Invite user dialog pops up, where you need to choose one of the user adding methods (Create new user/Invite user) and fill the necessary parameters into the dialog.
-
“Create new user” – use this option to add a new user (with the necessary roles) to contentACCESS without invitation. “Without invitation” means that the newly added user will not get a notification email message, that he was invited to contentACCESS.
-
“Invite user” – with this option a new user and/or an already existing contentACCESS user with the necessary role(s) can be invited. “Will be invited” means that the new/existing user will get a notification email, that he/she was invited into contentACCESS. Notification messages are sent by the notification job in specific time slots defined in the Notification settings. Read more about invitations in section Invitations.
Note: contentACCESS Email Archive/File archive standard users (and user permissions) can be automatically added to contentACCESS by the File system archive provisioning job and/or by the Email archive provisioning job. On the provisioning settings pages of Central Administration the administrator defines the role that the provisioning job will assign for the given Exchange user/group or for the users of the entire Exchange server. The provisioning job evaluates the user rights on the Exchange, creates the contentACCESS user(s) and assigns the permissions for these newly added contentACCESS user(s). Read more in Provisioning settings and managing access to contentACCESS Portal (File Archive) and Email archive Provisioning settings (Email Archive).
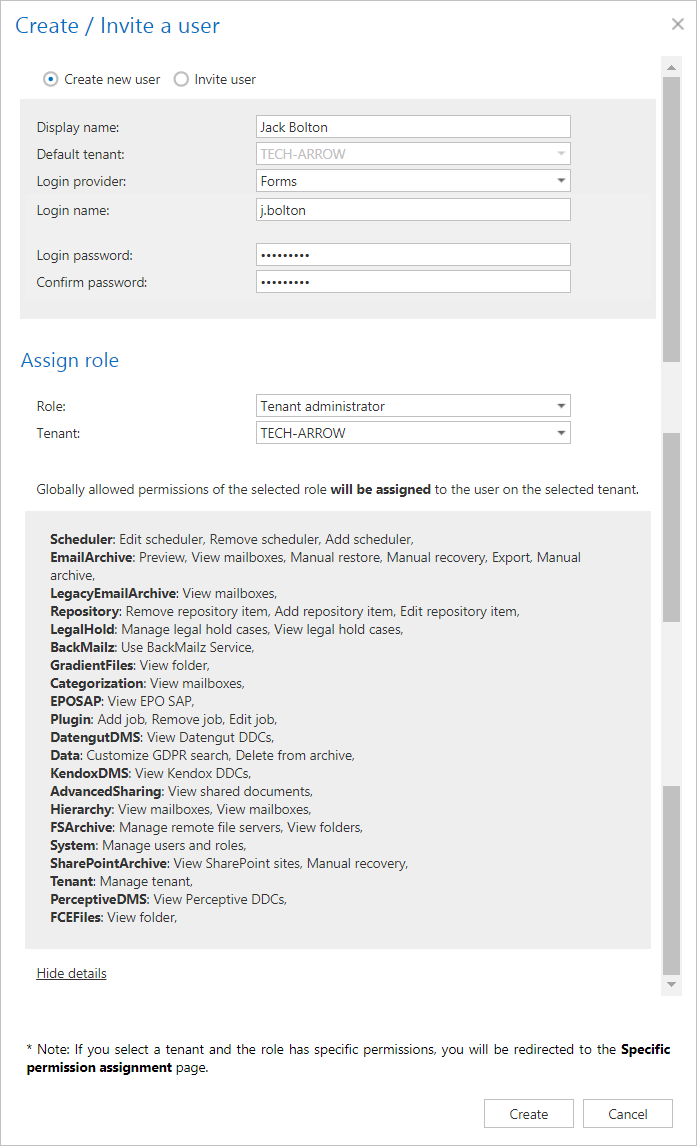
Option “Create new user”
Choose the “Create user” option in the Create/Invite user dialog and continue with the following settings:
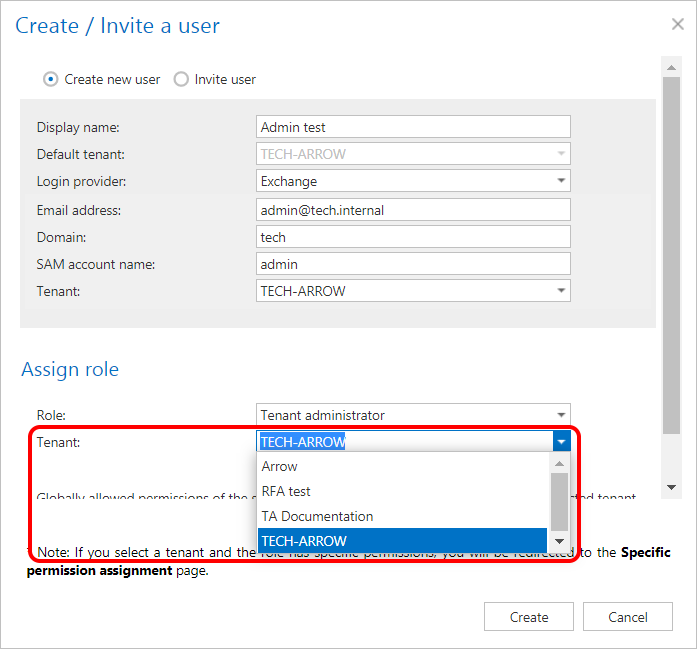
Type in the user’s name into the dialog box, and choose an authentication provider configuration from the Login provider dropdown list. Forms and Windows providers can be selected by default. (Other provider configurations need to be set on the Login providers page first.) If you select the Forms provider (as in this use case), then the login credentials must be also entered into the dialog. The current tenant will be selected as the default tenant for the user.
Further select a (default or predefined) role that will be assigned to the given user – in this use case we are creating a tenant administrator, so we select this role from the list. The globally allowed permissions of the selected role get displayed in the window. These can be shown/hidden.
Save your settings. In case that you have assigned a role containing at least one “Specific” permission, you will be automatically redirected to the Assign specific permissions page, where you can further specify these specific permissions of the role assignment. This will be described later in section “Roles”.
Note: If you Create new user login with Microsoft Exchange login provider, only tenants with licensed Email archive are listed.
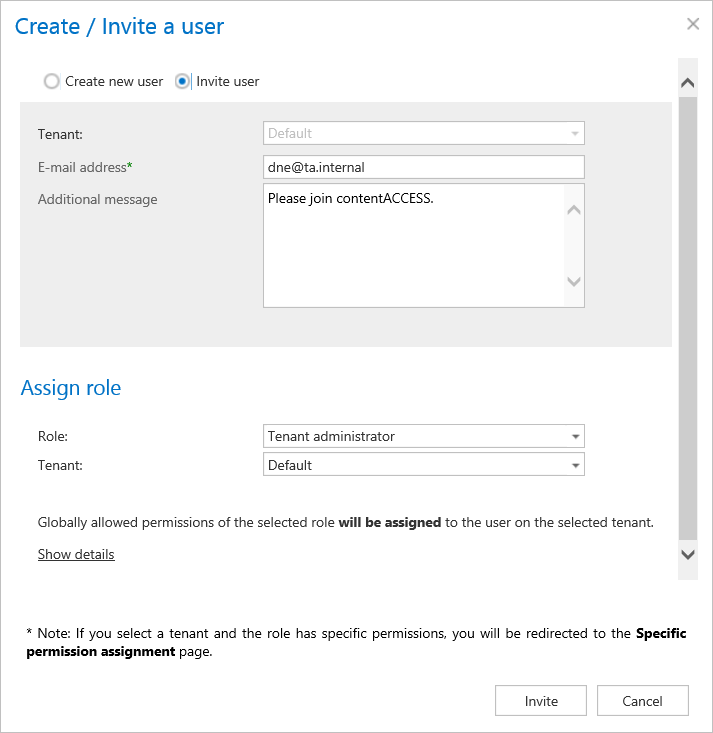
Option “Invite user”
Invitation is another way of how to
- create new users with a given role or
- assign role to an existing user
To send an invitation for an already existing or potential contentACCESS user, click the “Invite user” option.
The pop up dialog requires to fill the email address, where the invitation will be sent and the role that should be assigned to this user. The tenant of the user is automatically filled in with the current tenant. If you are ready with the necessary configurations, click “Save”. In case that you have assigned a role having at least one “Specific” permission, you will be automatically redirected to the Assign specific permissions page, where you can further specify these specific permissions of the role assignment. This will be described later in section “Roles”.
The next running notification job (must be configured in System => Services => Notifications) will send the invitation for the respective user. You can start this job manually as well.