Jobs’ page, jobs’ context menu
The Jobs page is accessible with a click on the Jobs button of the respective tab in the contentACCESS Central Administration ribbon (Email Archive ⇒ Archive ⇒ Jobs; File Archive ⇒ Archive ⇒ Jobs; Custom plugins ⇒ General ⇒ Jobs). Here you can view the list of all jobs created from a particular plugin type.
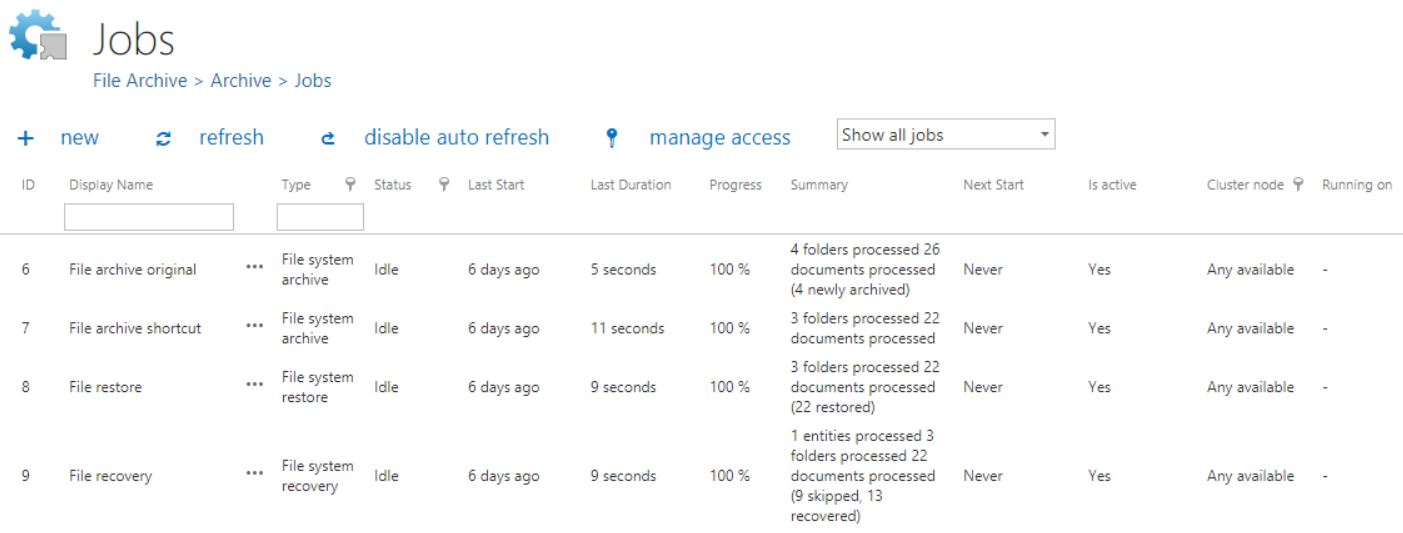
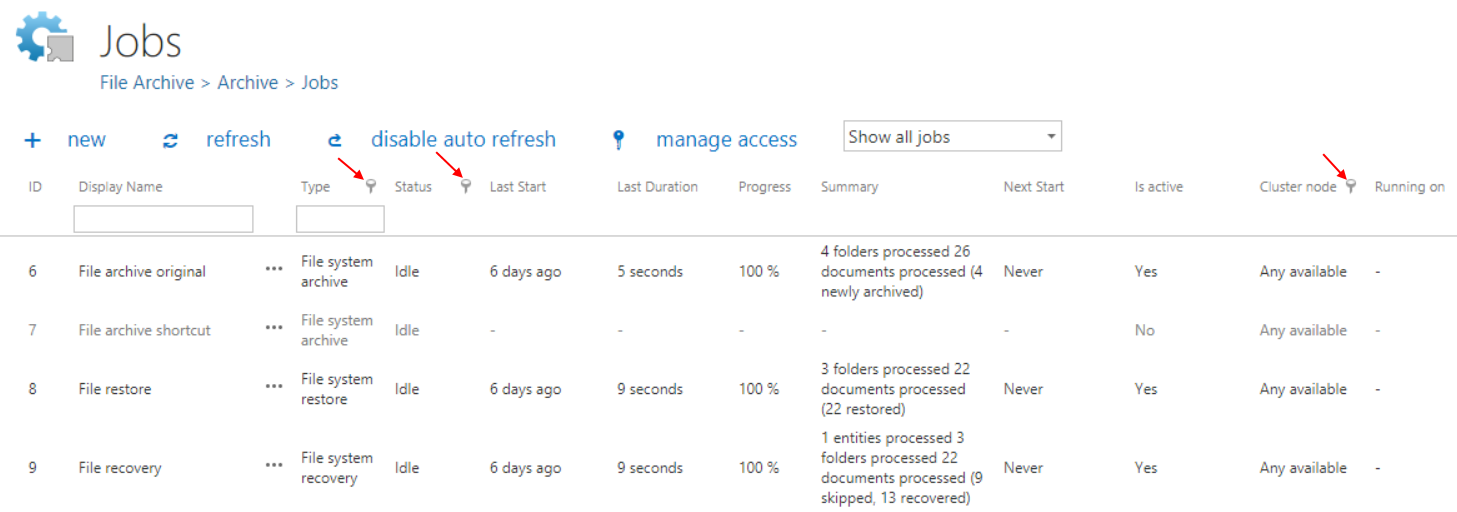
The grid contains the following columns. Each instance has an ID number, a Display name a Type and a Status. If the job is in Idle status, this means that it has completed the task and it is not running.
Next columns hold certain information about the Last start, Last duration and Next start of the job. The Progress column informs about the volume of the already processed items, while Summary gives a general overview about the processed/skipped/failed items. In Is active column it is possible to see if a job is active or if it is has been deactivated. Active jobs will run based on the schedule; the data that they are processing are accessible. Inactive (deactivated) jobs are not running (nor can be manually started); the data that they have processed are still accessible. In the Cluster node column we can check the node, where the selected job can run. The Running on column informs the user about the node, where the job is currently running. On the screenshot above we can see that EBA's mailbox archive_shortcutting job can be run on any available node, and is currently running on TANEWS.

Any changes to a job can be done from the job context menu by selecting the corresponding job from the list and left clicking on the ellipses (…). Now we select EBA’s mailbox archive_shortcutting job from the list. With the help of this job we will demonstrate how to handle jobs from the context menu.

The context menu of a job contains the following options:
-
Clone: use this option to create a clone of an already configured job. A cloned job has the same configurations as the original job that it was created from. With clicking the "Clone" option the “Clone job instance” window opens, which requires to name the job:

If a job with the same name already exists, an error message warns the user about this.
-
Start: with a click on “Start” the administrator can start the job run manually;
-
Stop: with a click on “Stop” the administrator stops the run of the selected job;
-
Configure: required values can be configured for the job on its configuration page, which can be opened using this option.
-
Show last logs: by selecting this option the user will be redirected to the System logs page, where the last run of the selected job will be preselected and the corresponding events will be displayed in the table of events;

-
Edit: with a click on this option the Edit job dialog opens, where the user can:
✓ rename the job;
✓ change the node, where the job can be run.
-
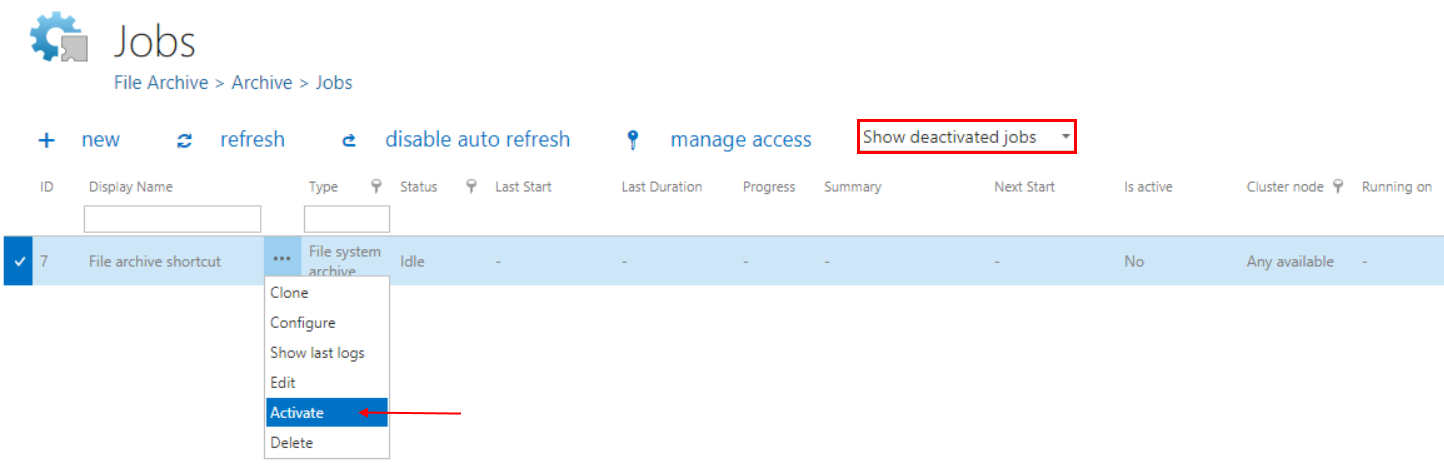
Deactivate: it is recommended to deactivate jobs which are not in use for a longer time, but very probably will be used in the future (e.g. restore or recovery jobs). By selecting this option, the administrator does not permanently delete the job from the list. The deactivated job will be only hidden and it will not run according to the schedule (nor can be manually started). Running and waiting jobs cannot be deactivated.
-
Delete: with this option the administrator can permanently delete selected jobs from the list; the processed data by some plugin types will not be accessible through the standard interfaces (data processed by file archive jobs will not be accessible if all file archive jobs wrote the data into the same database and all of them were deleted; if only one job, which wrote data into this particular database remained, then all data processed by all file archive jobs will be accessible. In case of email archive jobs the data will be still accessible, even if the jobs have been deleted). Running and waiting jobs cannot be deleted.
Filtration between active/inactive jobs
A job can be either active (an active job will be started according to the configured schedule, or can be started manually), or its status may be set to deactivated (if the administrated sets a job to deactivated, it cannot be started neither by the scheduler, nor manually). On the page of Jobs the user can filter among Active/Deactivated jobs, or he can also choose to display all jobs in the list (Show all jobs).
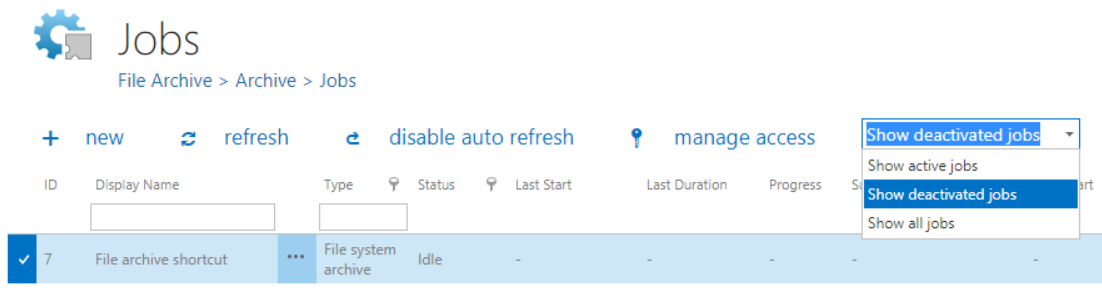
If a job has been deactivated, it can be restored to the list of active jobs again. Select the job, open its context menu and choose Activate from the list:
Searching in name and type
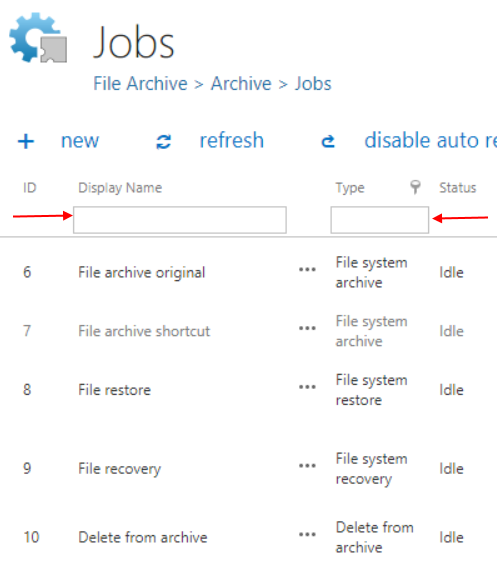
It is possible to search in the name and type of jobs. Type the phrase you are looking for to the corresponding field.
Sorting between jobs
The jobs can be also sorted based on the type, status or cluster nodes where they are running. Click on the funnel (![]() ) icon located next to the particular column in the grid:
) icon located next to the particular column in the grid:
Available operations from the status bar of the job
With a double click on the selected job in the list of jobs you open the configuration page to the job. You will see the status bar of the job on a blue background.

With the arrows mark (![]() ) at the right side of the status bar the user may collapse or expand the progress information about the job’s run. The status bar’s last state is always stored and the last state will be opened by navigating to the page again. The status bar of a job contains the following status bar buttons:
) at the right side of the status bar the user may collapse or expand the progress information about the job’s run. The status bar’s last state is always stored and the last state will be opened by navigating to the page again. The status bar of a job contains the following status bar buttons:
- start immediately/stop: with a click on this option the administrator can start/stop the job running manually;
- refresh: click on this option and the status bar information about the progress of the job will be refreshed;
- disable/enable auto refresh: turn on/off the auto refresh of progress bar information (if enabled, the information will be refreshed every 5 seconds)
- deactivate/activate job: use “deactivate” button if you want to temporarily cancel the job; use “activate” button if you want to restore the job among the active jobs;
- logs: by selecting this option the user will be redirected to the System logs page, where the last run of the selected job will be preselected and the corresponding events will be displayed in the table of events. Use this option for troubleshooting if any failure occurred during the run of the job;
- edit control button is used to change the name of the job and to specify the node on which the job should run.
The progress bar shows the current state of the job (if it is running or done). The email archive job reports the summary in the following format:
{0} mailboxes processed ({1} failed)
{0} = number of mailboxes which were started and finished processing
{1} = only displayed if there was a failure in at least one mailbox; number of failed mailboxes
When is a mailbox failed?
– The mailbox can’t be opened
– The email address is invalid
– Missing permissions
– Some folders can’t be opened
{2} emails processed or {2} ({3}) emails processed
{2} = number of archived emails; this is a sum of items which were archived: shortcutted, keep original, journal shortcut
{3} = archived: blacklisted emails. If a mail should be shortcutted but the message class does not allow it, the mail is blacklisted. This is only displayed if at least one blacklisted message was processed.
Note: If the job is using keep original method, but the message is blacklisted, it will be counted to {3}!
In the following chapters we will learn how to configure and use the contentACCESS File Archive, Email Archive, SharePoint archive, Email management. Store replication. Sharing and Email synchronization jobs.