SharePoint Archive job configuration
After you have configured all necessary settings, you can create and configure a SharePoint Archive job. Click "+ new" on the Jobs page (SharePoint Archive tab => Archive group => Jobs), fill the required settings (Job type, Run on node, Display name) in the pop up window and click on “Add”.

To configure the job immediately, click “Yes” in the next pop up window, or configure it later on (using the “Configure” option in the job's context menu).
On the job’s configuration page go through the following sections; most of them are mandatory, filtering settings is optional:
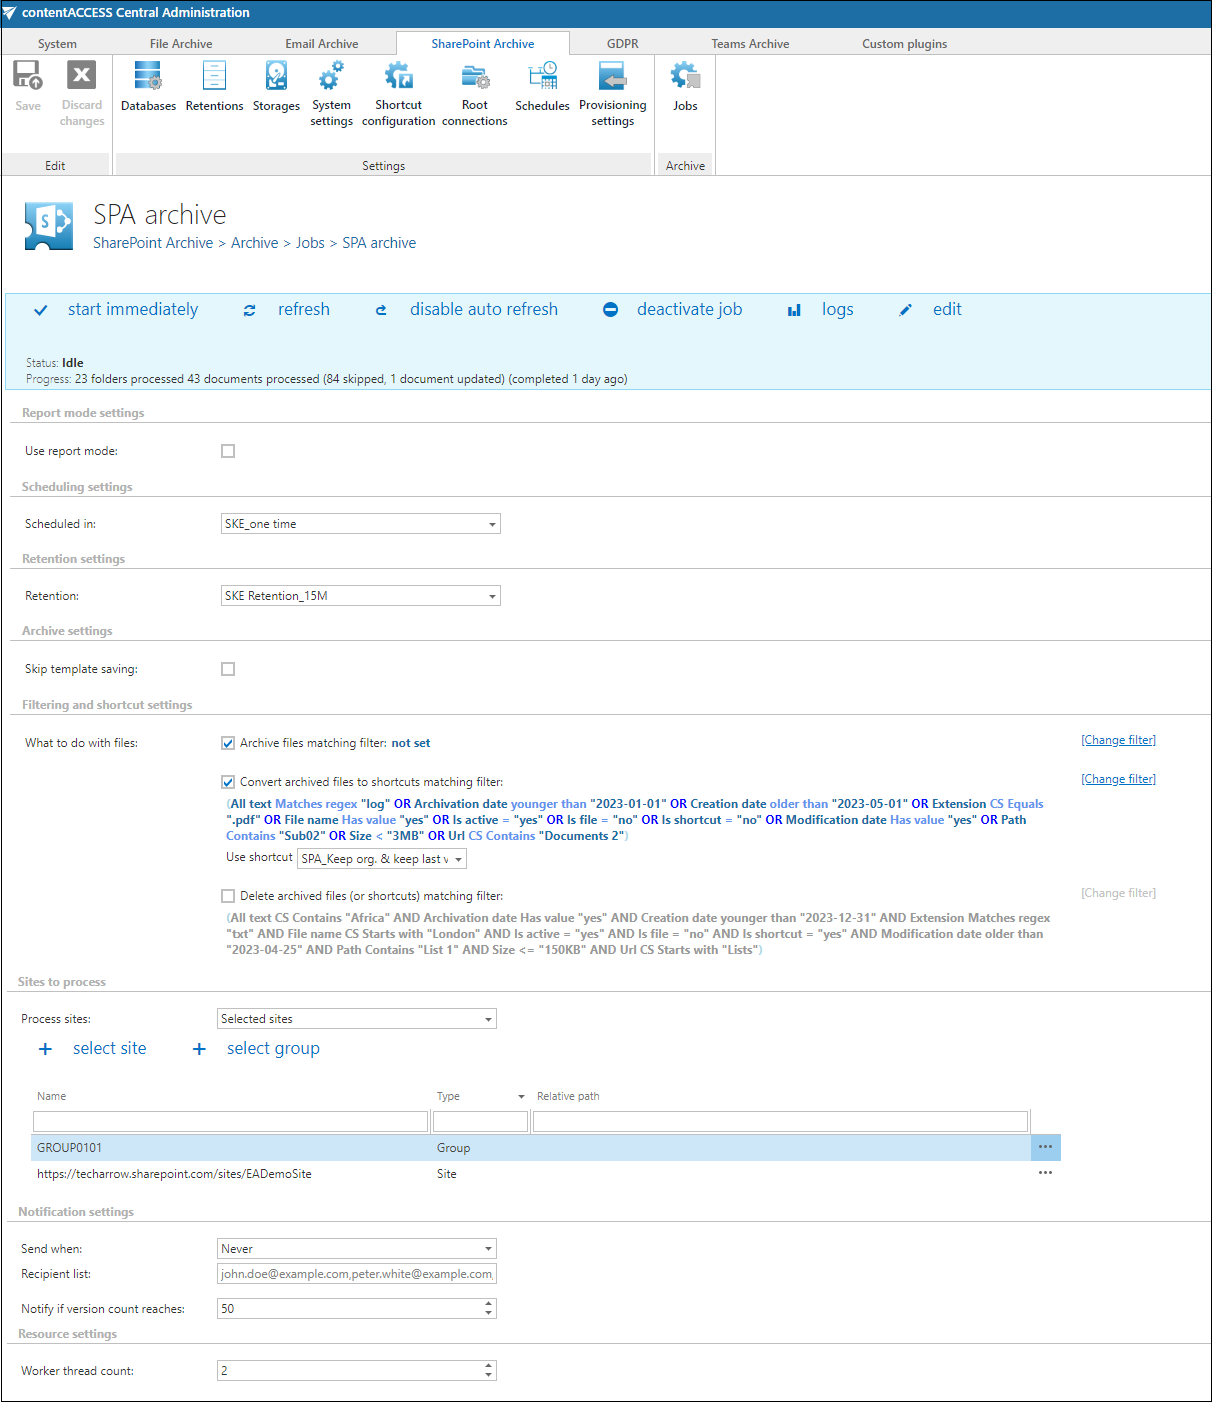
✓ Report mode settings
If the Use report mode checkbox is checked, the job will run in report mode and the user will be able to download a .csv report here in this section after the job finishes the run. This file will contain a list of items that belong to the site(s)/related path(s) that is (are) selected in section Connections to process of the job and some information about them, including whether they will be processed or not.

✓ Scheduling settings
In this step, the running times of the archive job must be selected. It is possible either to select a scheduler from the list or to create a new scheduler via creating a new option. For archiving jobs, it is recommended to set up a scheduler that will run always, or at certain times during the week. For more information about how to set schedules please refer to the section Schedules above.

✓ Retention settings
Under retention settings, the administrator may select a previously configured period. During this time, it will not be possible to delete the archived items from the storage. It is recommended to set here a time interval based on data recording regulations required either by the law of the country or by internal company policies. For more information how to set retentions check section Retentions above.

✓ Archive settings
It is possible to skip template saving by checking the checkbox in this section.

✓Filtering and shortcut settings
In this section, the user configures what will be archived and how it will be archived. It is also possible to create shortcuts from already archived items or delete them.
There are three options to select in the Filtering and shortcut settings section:
-
Archive files matching filter [not set] – with this option, the user can archive not archived/new files from the selected site(s) or create (new) versions from already archived items. This option can be used independently from the other options and does not modify the item(s) in SharePoint in any way. If the site (or libraries/lists from the site) haven’t been archived yet (are archived for the first time), check the “Archive files matching filter [not set]” checkbox. The items are archived with the whole version history (if the filter allows it), or the version history can be filled up during the next run. It is compared with the database, and it’s archived if something is missing.
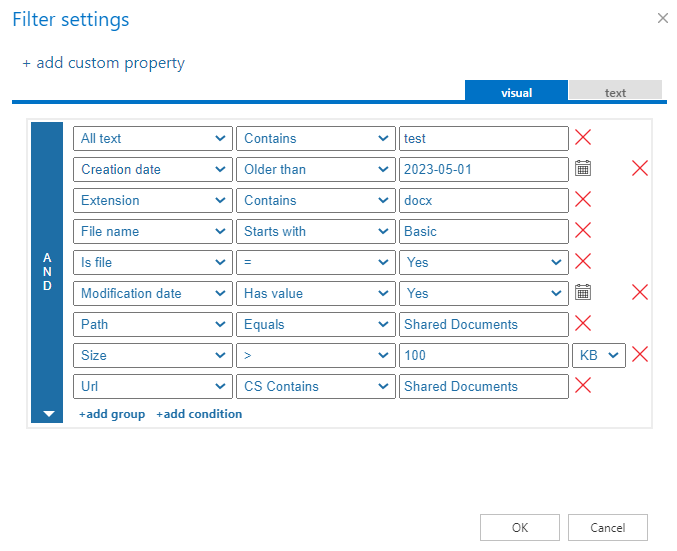
The user can set which files/items will be archived with the filtering settings by clicking on the “not set” or “Change filter” buttons. Learn more about the filtering settings here.

-
Convert files to shortcuts matching filter [not set] – if the files are already archived (with the first option), but they need to be replaced with shortcuts, check the second checkbox. This option can also be used independently or together with option 1. In this case, if the item matches both option 1 and option 2, the options are executed
sequentially in the same job run => first archived, then converted to shortcut.
Before a shortcut is created, the item(s) is (are) checked and actualized: the missing versions are archived before the shortcutting. This is to prevent losing any data before the file is modified.
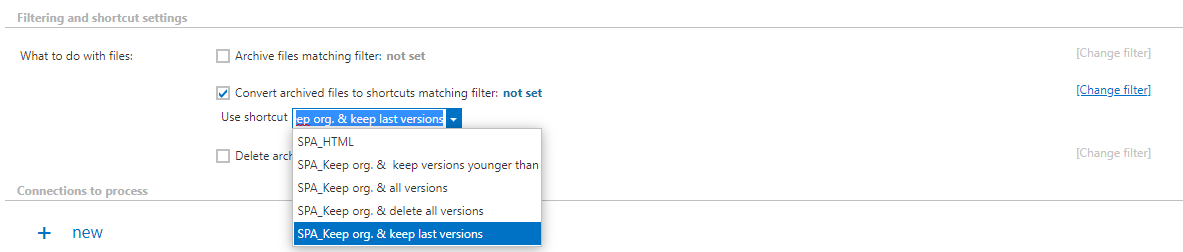
When the user selects this option, the Use shortcut dropdown menu becomes available. Here, the user can select the preferred shortcut type, which was configured on the Shortcut configuration tab.
Shortcutting works on both ListItems and files. For the files, the job manipulates the version history based on the settings, renames the file to HTML, and overwrites the contents (creates a shortcut. For the ListItems, the job does not modify the content or rename the file (does not create a shortcut).warningImportant: For ListItems, it is not possible to delete the version history!
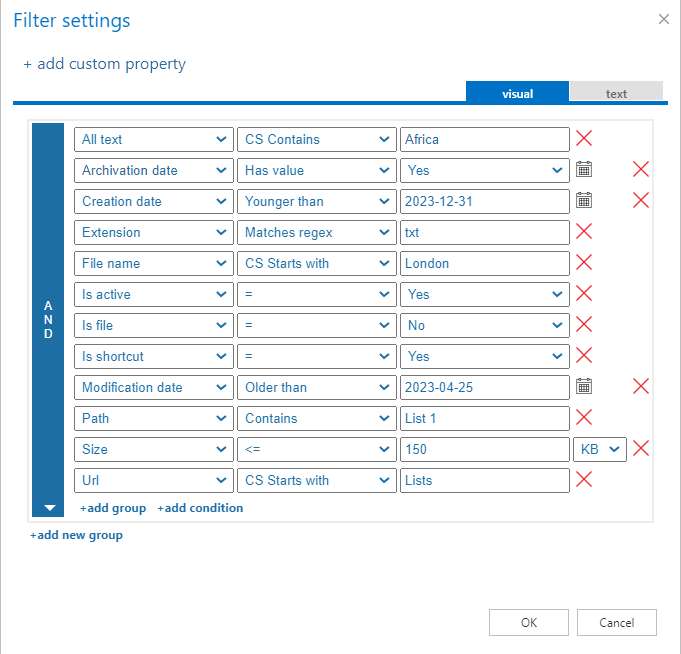
The user can set which files will be replaced with the filtering settings by clicking on the “not set” or “Change filter” buttons. For more information about how to work with the filtering settings, please, refer to this section of the documentation.
Also, the first options can be configured within one job. In this case, the job runs in two stages: at the first run of the job the items or the missing versions will be archived, at the second run on the job the archived files will be replaced by the shortcuts.
 warning
Important: The Convert files to shortcuts option is accessible if Microsoft 365 is selected on the System settings page. In On-premise mode, only the archive and delete options are available for the users.
infoNote: Please note that if you rename an HTML shortcut on the SharePoint site, the archive job or shortcutting option won’t be able to process the changes. The shortcut will keep the original name.
-
Delete files (or shortcuts) matching filter [not set] – the third option allows the user to delete already archived from the original site. The delete function can be used separately or together with the other two options. In this case, the item is immediately deleted – the shortcut won’t be created. The user can set which items will be deleted with the filtering settings by clicking on the “not set” or “Change filter” buttons. To learn more about how to work with the filtering settings, please, check this section of our documentation.

Note: When using the 'Delete files (or shortcuts) matching filter' option, the 'All text' filter cannot process shortcuts. If shortcuts are targeted, the job will not find any matching content and no files will be reported or deleted.
Important: When the user changes the file content of an already archived item, e.g. deletes a picture from the file, saves it to the original location (and thus the file size will be reduced e.g. from 110 to 85 kB) and file size filter is set on >100 kB, then SharePoint archive job will not archive the newly created item by the next processing. The newly created item will be saved in the original location. For this reason, it is recommended to always check the size filter settings first, if a file has not been archived by the archiving process.
✓ Sites to process
In this section, the user can decide which site(s) or group(s) will be processed. The options are changing based on the settings.
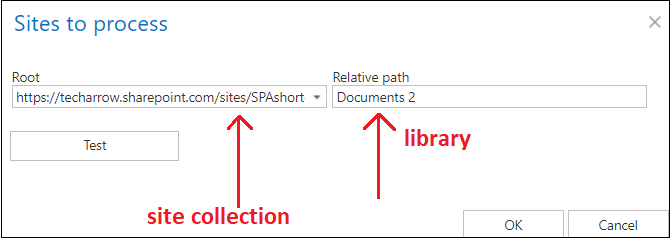
In On-premise mode, only the select site option is accessible for the users. Click on “+ select site” and specify the root connection and the relative URL in the pop-up window. A root can be a site collection, a subsite, a library or a folder already defined in the Site section.

When Microsoft 365 type is selected on the System settings page, the user can either process all sites (all provisioned sites will be archived) or selected sites, or select sites and/or groups in this section.
When the selected sites option is selected from the drop-down list, click on “+ select site” or “+ select group” and specify the root connection and the relative URL in the pop-up window. A root can be a site collection, a subsite, or a library. It is also possible to test the connection by using the Test button.

✓ Notification settings
Select here, when you will need to get notification emails from the SharePoint archive job. Into the Recipient list textbox insert the email address(es) of the person(s), who will get such notifications. It is also possible to set that the emails will be sent only when the version count reaches a certain number.

✓ Resource settings – The number of worker threads responsible for the archiving processes can be set here; by default this value is set to 2.

If the job is configured, save your changes, and wait until it starts based on the defined schedule (or start it manually from the status bar).