SharePoint archive Provisioning settings
The provisioning job
- Creates and updates contentACCESS users and assigns contentACCESS roles to them based on information gathered from SharePoint
Note: The contentACCESS technical user account performing the provisioning job reads the permissions set on the archived SharePoint objects. Therefore it needs to read the SharePoint users, groups and group membership information. To achieve this, please add the contentACCESS technical user account to the list of Site Collection Administrators.
In contentACCESS, a provisioning job is created automatically when activating SharePoint archive for the first time.
The process is similar for on-premise SharePoint and SharePoint online. The differences are as follows:
On-premises SharePoint
- Scans SharePoint groups and users, then they are snapshotted in the SharePoint archive database
- Picks users with Windows login and creates these users in contentACCESS (see more in SharePoint Archive settings, section System settings) together with Windows login
- Grants permissions to access the given SharePoint connection (archive only)
The on-premises SharePoint is working with the Active Directory and using its users and groups to grant them access to sites, folders and items.
SharePoint defines SharePoint groups, which is a collection of AD users, AD groups and other users (Azure, etc.).
The provisioning job also collects information about AD groups and their members. This is important when permissions are evaluated, because they are configured through AD groups.
Snapshot means that a copy of the user/group is created in the archive, which remains even after the user or group is deleted from SharePoint. This allows to use the last known permissions for the user when working with the archive.
At the end of the provisioning job, the archive has collected the following information:
- Collected all AD groups which are somehow related to SharePoint
- Collected all AD users which are somehow related to SharePoint
- Collected AD group memberships
- Collected SharePoint groups for the given site connection
- Collected members of the SharePoint groups
To access the folders and documents the user requires individual permissions which are synchronized by the SharePoint archive job.
Code:
Note: The user will only see those folders and items to which it really has access.
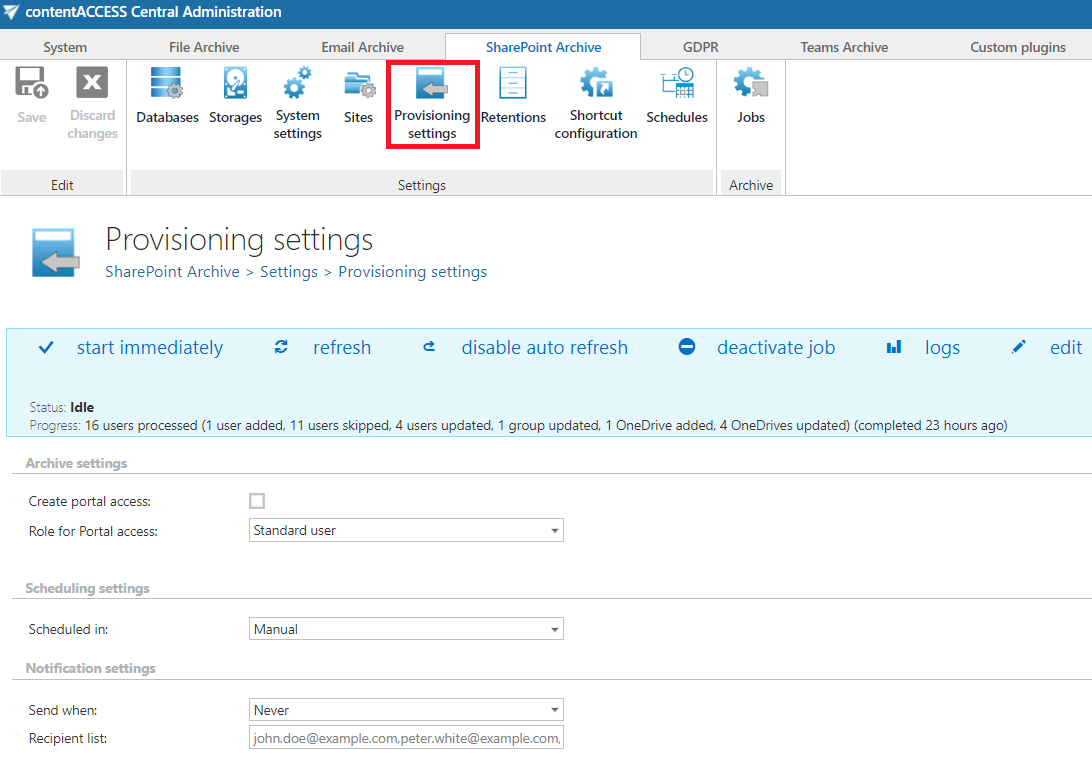
Screenshot: Provisioning settings for On-premise SharePoint
SharePoint online
The users and SharePoint groups from Microsoft 365 are also synchronized by the provisioning job.
Microsoft 365 users, together with Microsoft 365 logins, are also created automatically by the provisioning job.
Important: Please note, that the Sites to provision and OneDrive groups to provision (AAD) sections are only visible if Microsoft 365 SharePoint type is selected on the System settings page! In On-premise mode, the provisioning will process the created site connections without the Sites to provision and OneDrive AAD group sections.
SharePoint Archive provisioning settings are available on the Provisioning settings page (SharePoint Archive ⇒ Settings ⇒ Provisioning settings):
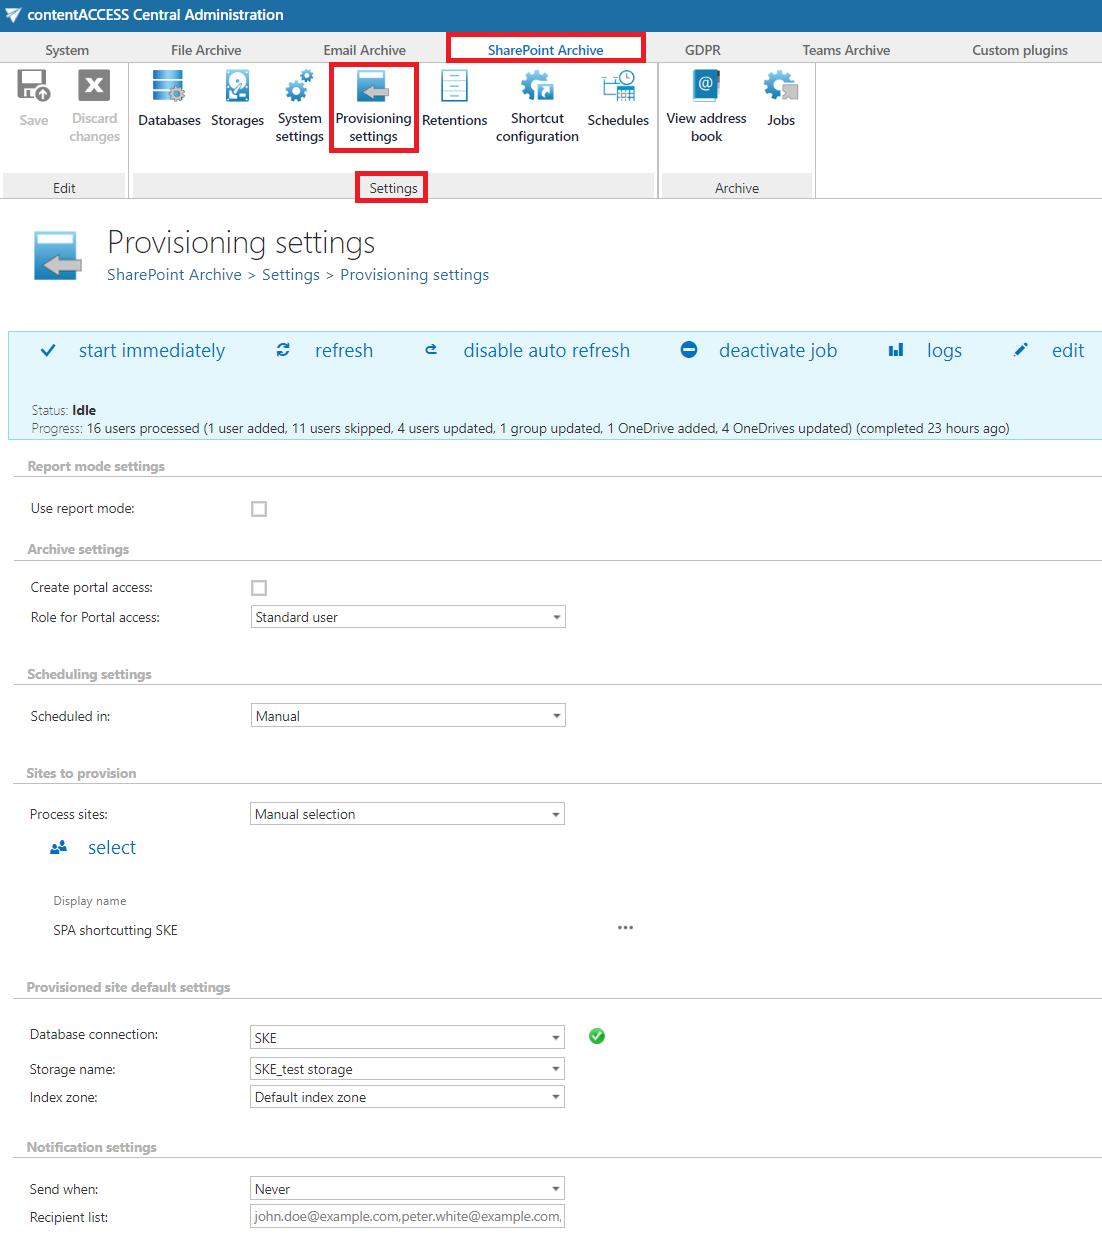
Screenshot: Provisioning settings for SharePoint online
The status bar of the provisioning job offers the following options:
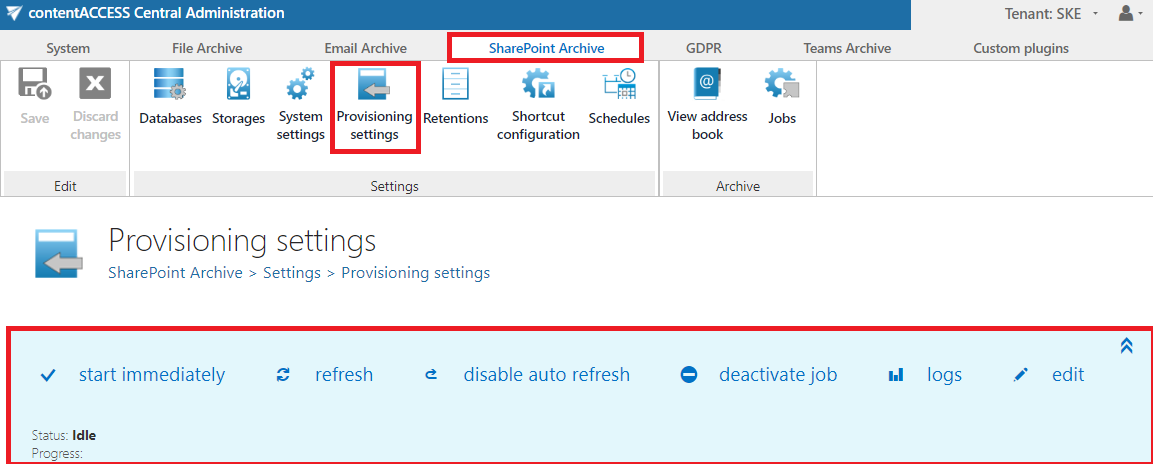
If a scheduler has not been selected, the provisioning job can be started/stopped manually with the "start immediately/stop" control button. To manually refresh the provisioning progress information, click on “refresh” button. To enable/disable auto refresh in every 5 seconds, click on “enable auto refresh”/“disable auto refresh” button. The provisioning job can be also deactivated with the “deactivate job” button. A deactivated job will not start automatically, nor can be started manually. The “edit” button is used to select the node, where provisioning job will be run. The user may also rename the provisioning job here. To view further event details of provisioning job (and also to detect any potential failures/errors in the provisioning events), click on “logs” button. This will redirect you to the System logs page, where the last run of the provisioning job will be preselected and the last events will be shown in the events table.
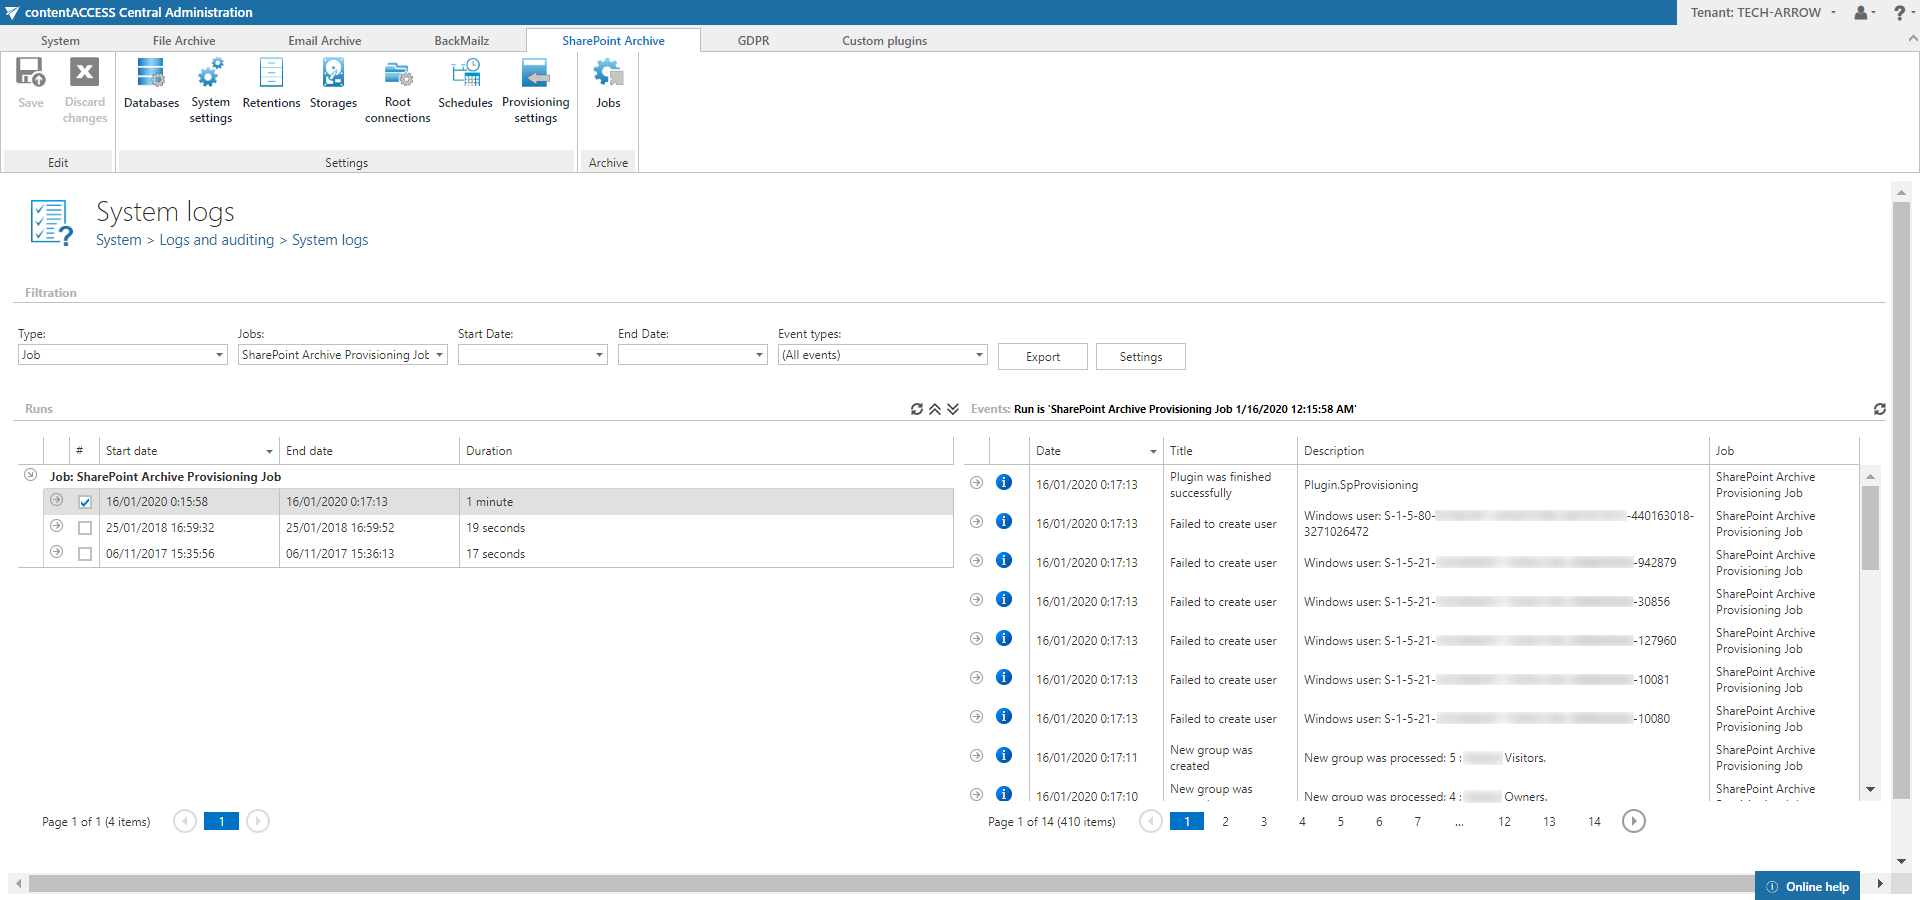
Screenshot: System logs page with logs
The following configuration sections are available on the Provisioning settings page:
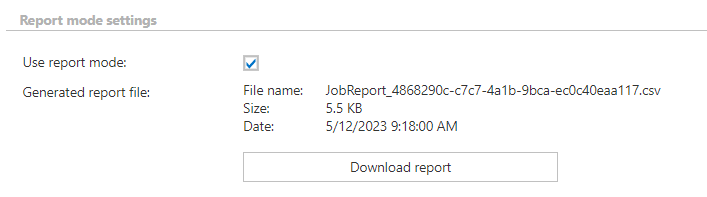
✓ Report mode settings
If the Use report mode checkbox is checked, the job will run in report mode and the user will be able to download a .csv report here in this section after the job finishes the run. This file will contain a list of teams selected in the Sites to provision section and OneDrive groups selected in the OneDrive groups to provision (AAD) section of the job and some information about them, including whether they will be processed or not.
✓ Archive settings
This configuration section allows to assign default contentACCESS Portal user roles. This rule is granted for the users on SharePoint archive site.
It is recommended to specify here a default role with less contentACCESS Portal permissions. The roles to be assigned must be created on the Roles page.
Note: Roles containing Manage system and/or Manage tenant permissions are unavailable in the default roles' dropdown list.

✓ Scheduling settings
Select the running times of the provisioning job or create a new scheduler. For more information on how to configure scheduler settings please refer to section Schedules.

✓ Sites to provision
In this section, the user can choose if he wants to process all accessible SharePoint sites or select only some of them manually. It is also possible to provision groups by selecting the Automated selection.
-
All sites – if the Administrator selects all sites, then all accessible sites will be processed and provisioned.

-
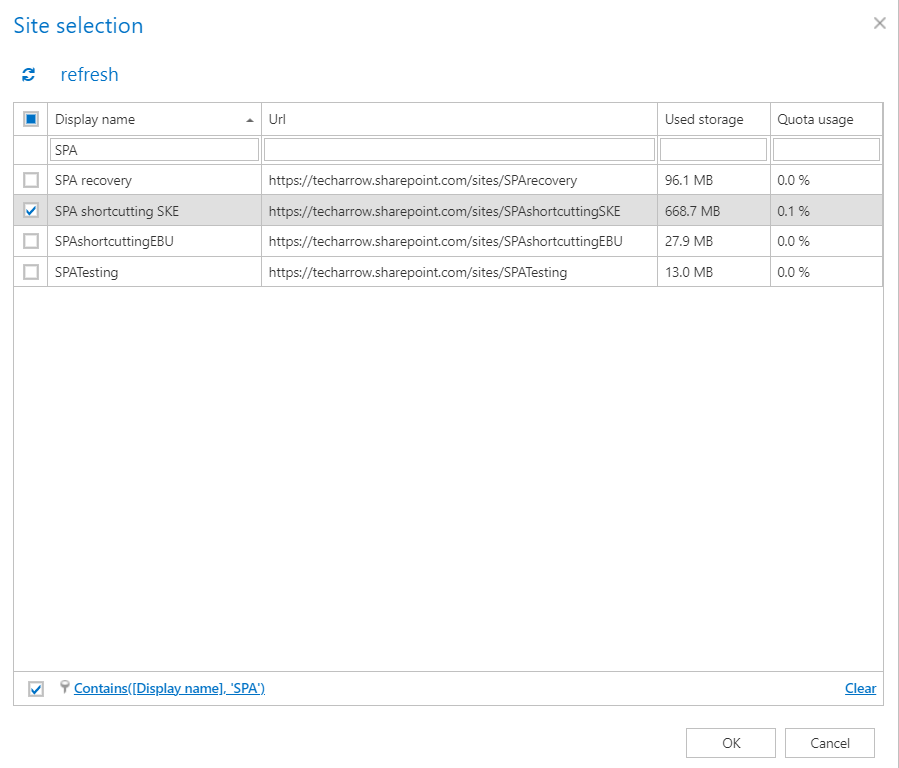
Manual selection – in case of Manual selection, the user can pick which sites to process and add to the address book. If he decides to select them manually, the
 select option will appear.

After clicking on it, the Site selection window will open. Here, it is possible to select the sites to be processed. After the selection is made, click OK.
-
Automated selection – there is also the option to set up Automated Site provisioning. After selecting this option from the Sites to process dropdown list, click on + new.

The Site selection window will open.
Here, you will be able to specify a list of filters for a group, based on which sites do you want to be processed. Every filter is associated with one group. All sites matching the specified filter will be added into the group.
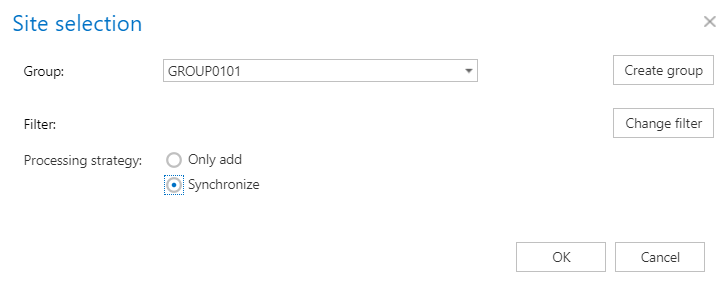
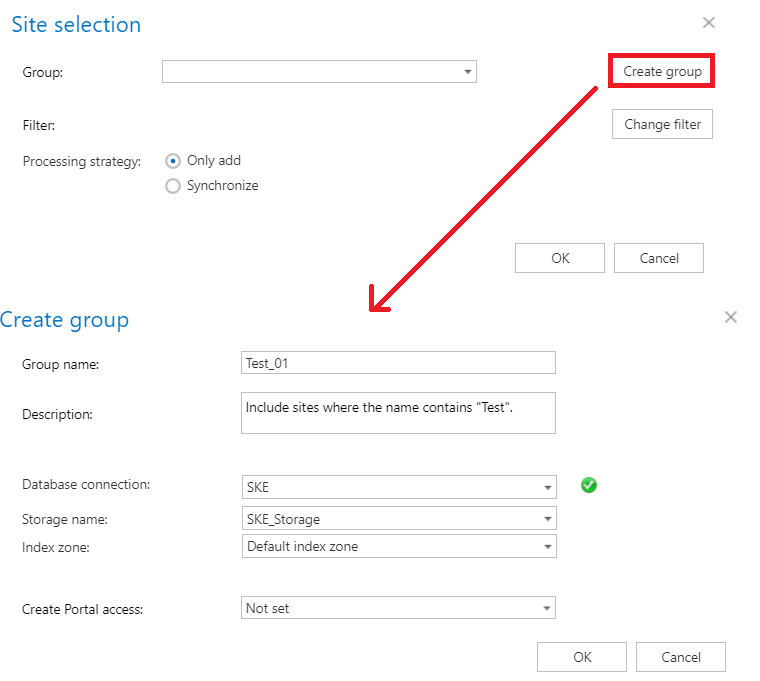
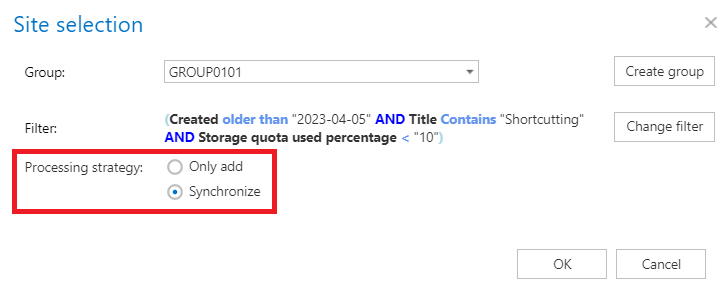
Before specifying a filter, you will first need to select a Group from the dropdown list. If you have no groups created, is it possible to create one directly from here by clicking on the Create group button (more information about group creation can be found in this section).
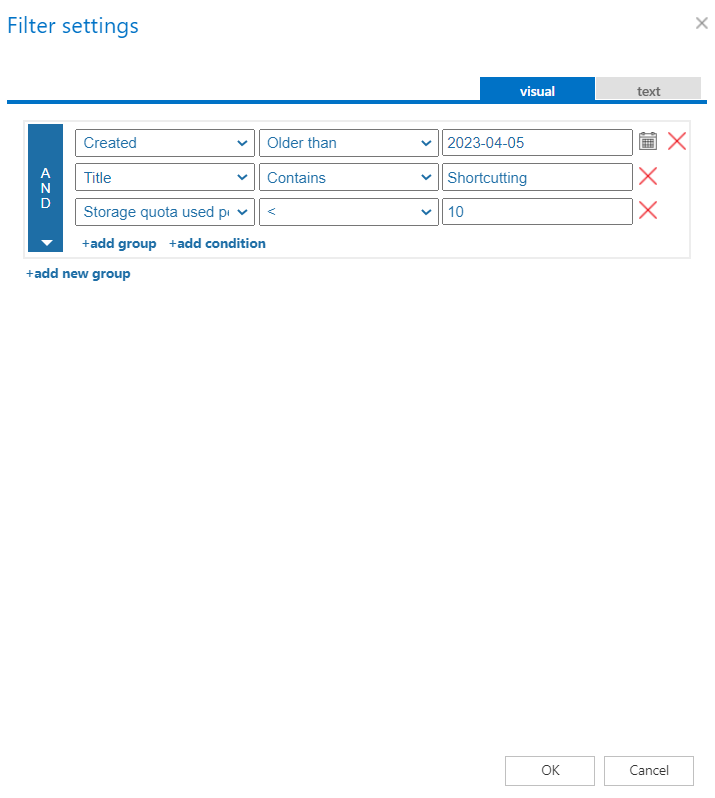
To specify a filter, click on the Change filter button. Specify your desired filtering options in the Filtering settings window, then click OK.
 warning
Important: Please note, that the Sites to provision section is visible only if Microsoft 365 SharePoint type is selected on the System settings page!
Select one of Processing strategy options:
- Only add – new sites matching the filtering settings will be added, but the previously added sites won’t be updated during the process
- Synchronize – add or remove sites from the group based on the filtering settings. The new sites will be added to the group, and the sites no longer matching the filtering settings will be removed from the group
Click OK. The group settings (database, store, index zone) will be applied to the sites that are members of the group. If the site has already associated database, store or index zone, it won’t be overwritten by the provisioning job.
Important: Sites connected to a Teams team will not be provisioned by automatic provisioning.
✓ Default provisioned site settings
In this section, the Administrator can select the default database connection, the storage, and the assigned index zone for the provisioned sites and OneDrive groups. During the run of the provisioning job, if a new site/group provisioned, the selected database, store, and index zone will be automatically assigned to them.
On the other hand, if a database, store or index zone is already assigned to the provisioned site or group, it won’t be updated during the next run of the provisioning job.

✓ OneDrive groups to provision (AAD)
In this section, it is possible to select OneDrive groups that the Administrator would like to add to the Address book and later use for OneDrive archiving. This option is only visible if OneDrive archiving is enabled on the System settings page.

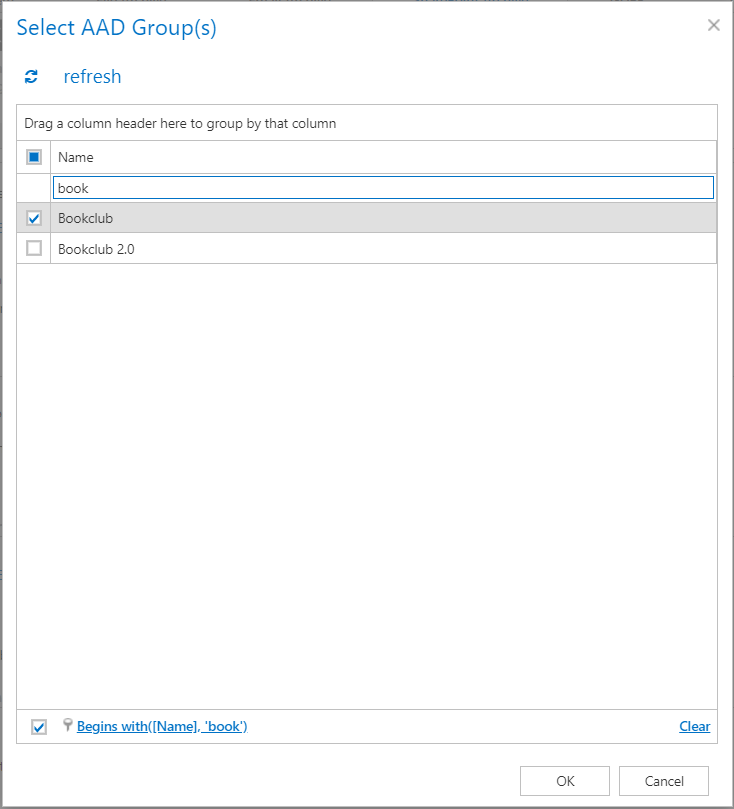
To manually select from the available groups, click on the ![]() select button. The Select AAD Group(s) window will open. Here, it is possible to select the AAD groups to be processed. After the selection is made, click OK.
select button. The Select AAD Group(s) window will open. Here, it is possible to select the AAD groups to be processed. After the selection is made, click OK.
If you want to add a group that is not in the list of available groups, click on the + add button. The Add AAD group window will open. Here you can specify the group’s name and then click OK to add it to the AAD groups list in the Provisioning settings.

Important: Please note, that the OneDrive groups to provision (AAD) section is visible only if Microsoft 365 SharePoint type is selected on the System settings page!
✓ Notification settings
If the provisioning job could not run properly due to some reasons, contentACCESS can send a warning about the problem. The notification email message will be sent to the email address that is set here under Recipient list option. Here you can also choose when these email messages should be sent: only if errors occur, or when errors or warnings occur, or always, regardless of the faultless running of the provisioning job.
