SharePoint archive System settings
General SharePoint archive system settings are available on the System settings page. To configure these settings, navigate to SharePoint Archive => Settings => System settings on the ribbon:
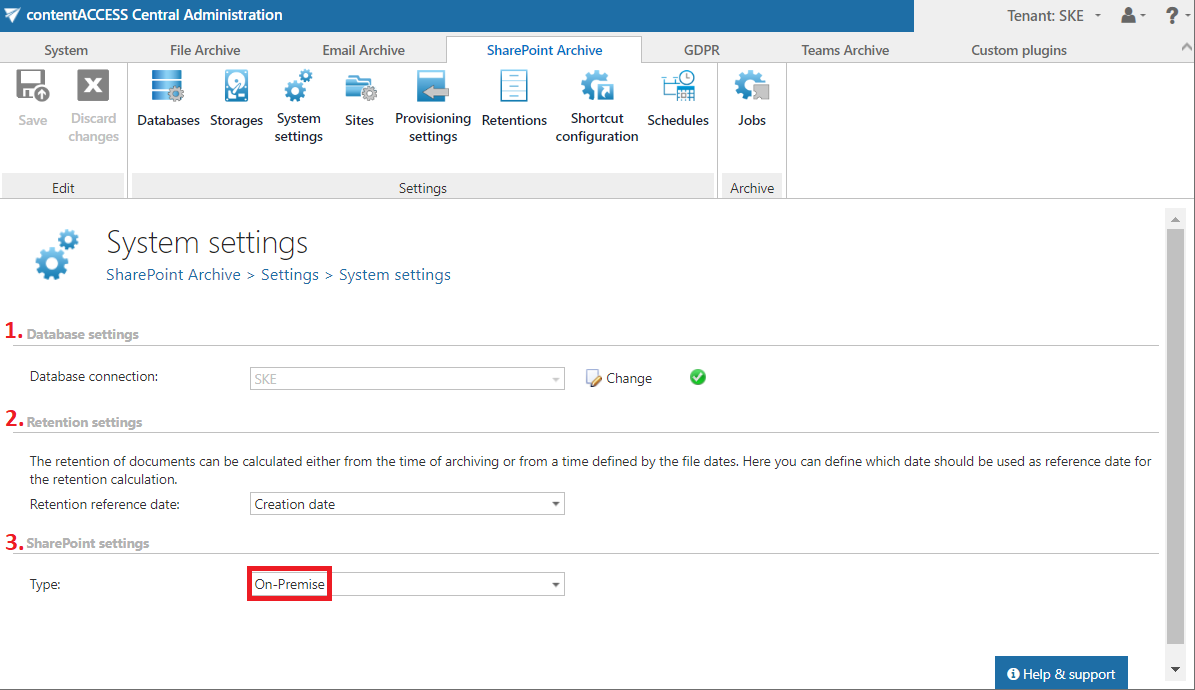
Screenshot: SharePoint settings – On-premise type
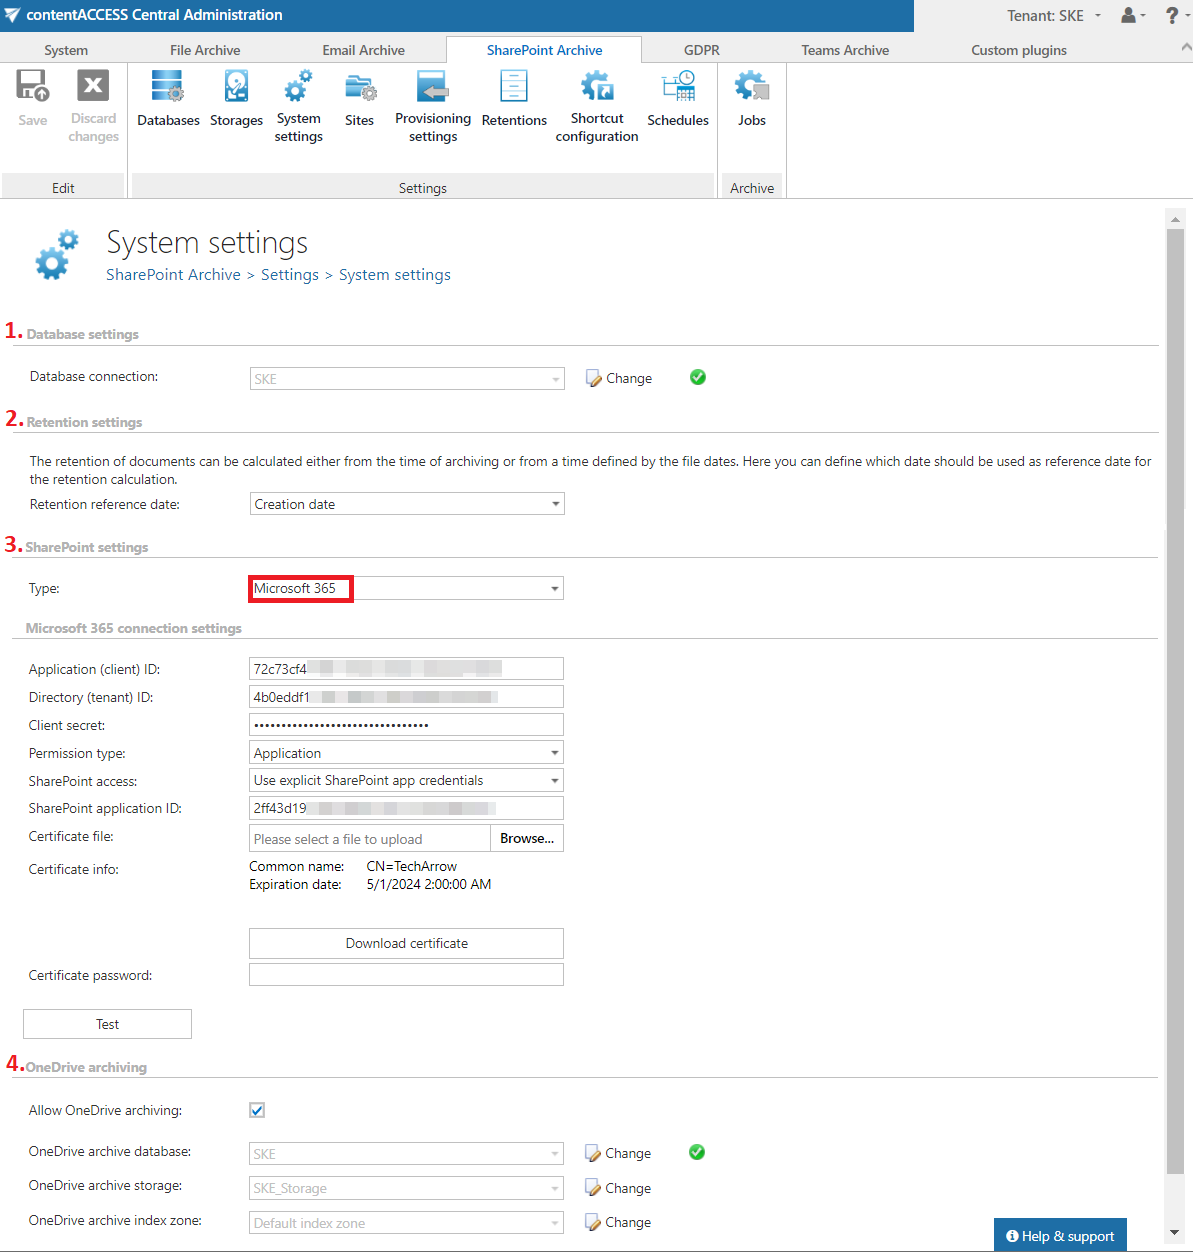
Screenshot: SharePoint settings – Microsoft 365 type
1. Database settings
The main system database (previously configured on Teams Archive => Settings => Databases page) for the SharePoint Archive is selected here. All the site connections (and its settings) are kept in this database. Select the database connection to be applied from the dropdown list (deploy it by clicking "Deploy" in the warning message if needed) and save your settings.
2. Retention settings
The date from which the retention of the items will be calculated, can be selected here. Choose the setting to be applied from the dropdown list. There are three types of retention reference dates:
- Creation date – the date when the document was originally created. If you select 'Creation date' as the retention reference date, the retention period will be calculated starting from when the document was first made
- Modification date – the date when the document was last modified or updated. Selecting ‘Modification date’ means the retention period will begin from the last time the document was edited or changed
- Most recent date – this date refers to the most recent significant date associated with the document, which could be either the creation date or the last modification date, depending on which is later. Using ‘Most recent date’ as the retention reference means that the retention period will be calculated from the latest relevant activity on the document

3. SharePoint settings
In this section, the Administrator decides whether SharePoint archive is used with On-premise SharePoint or Microsoft 365 SharePoint.
If the On-premise type is selected:
- The Sites tab becomes visible, and the Administrator can configure the SharePoint site connections to be archived. For more information, refer to this chapter.
- The Authentication type can be configured as Basic or Integrated.
- With Basic authentication, dedicated SharePoint credentials (user name and password) are used for the connection.
- With Integrated authentication, SharePoint is accessed with the contentACCESS service user. This works only if the service is configured as a different user on the Service settings page.
- In On-premise mode, provisioning processes the created site connections without the Sites to process and OneDrive groups to provision (AAD) sections.

If the Microsoft 365 type is selected:
- The Microsoft 365 connection settings and OneDrive archiving sections become available.
- The connection with the Microsoft SharePoint application is configured here.
- Application ID and Directory ID are generated during the app registration on Azure Portal.
- The Client secret can be generated manually in Certificates & secrets after registration.
- SharePoint archive registration is described in this section.
Permission type has two options in the dropdown list:
- Application – this permission type allows you to connect to the SharePoint endpoint of the Graph API without providing the username and password. To grant this permission type, it is necessary to contact Microsoft. For more information about how to request access to Microsoft Protected API, read this chapter in this manual.
- Delegated – if you do not have the application permission type, you can specify the user who is able to access all sites with this option. The superuser must also has to be the owner of all sites to be archived. It is recommended to use the explicit SharePoint app credentials, but the Administrator can use the Teams account to connect to the SharePoint if necessary.
SharePoint access
There are two options:
- Use explicit SharePoint app credentials – pick this option if the SharePoint related permissions are registered your application on Azure portal
- Use the Teams app credentials – pick this option if the SharePoint related permissions are registered in a separate app
SharePoint application ID: application ID of the registered SharePoint app, this needs to be filled in case Use explicit SharePoint app credentials is selected in the previous step.
Certificate file: a .pfx file, which contains the private and public key of the certificate. Must be the same certificate as the .cer file that has been uploaded to Azure during app registration. The app can be registered by using this PowerShell script too.
Certificate password: the password for the .pfx file.
It is also possible and recommended to test the connection by clicking the Test button.
4. OneDrive archiving
OneDrive archiving needs to be enabled on the System settings page. Check the Allow OneDrive archiving checkbox and set the following:
OneDrive archive database: select an already configured connection from the dropdown list. Here the metadata will be stored. For further information on how to set database connections, please refer to section Database.
OneDrive archive storage: choose an already configured storage from the dropdown list. The processed binaries will be stored here. For more information on how to set storages check section Storages above.
OneDrive archive index zone: set the Index zone that will be assigned to the items by the archive job.