SharePoint recovery job configuration
SharePoint recovery is used to recover already archived SharePoint items that have been deleted from the original SharePoint location or restore the shortcut to the original file. All items that can be archived by contentACCESS are also recoverable. contentACCESS is able to recover subsites, libraries, and folders, so if they have been deleted, you don't have to create them manually again for the recovery job to work. It is also able to recover complete sites with their settings if the connection set in the connections to process is a site.
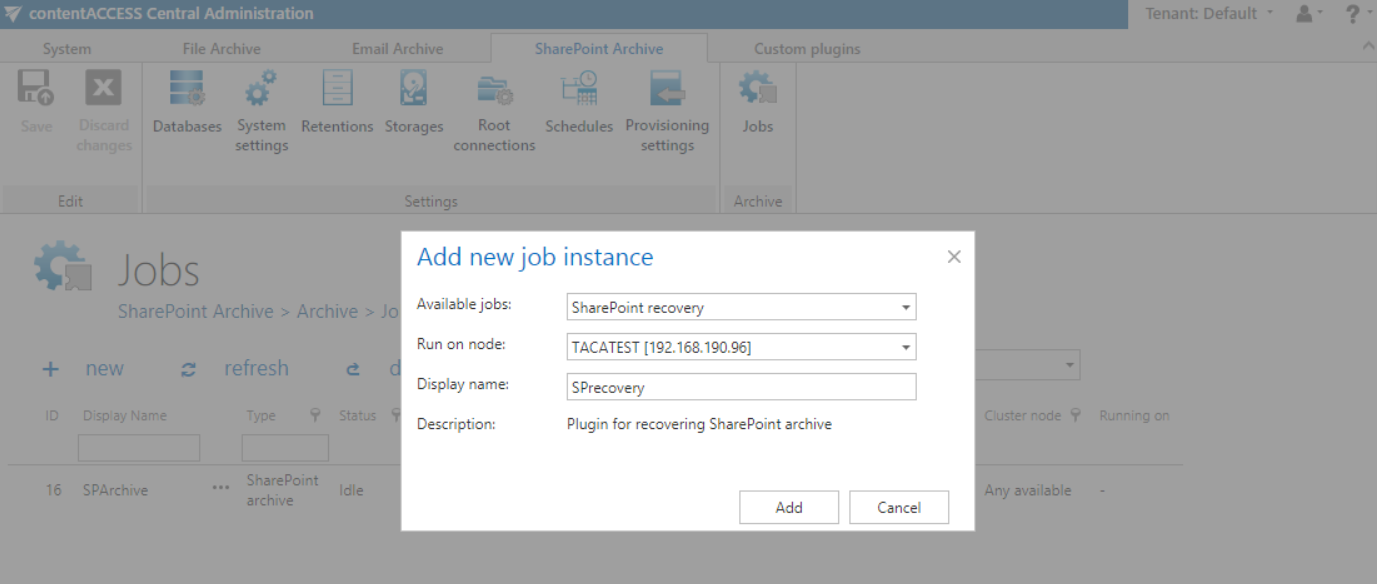
To create a SharePoint recovery job, create a SharePoint recovery job instance first on the SharePoint archive’s Jobs page:
Further, configure this job as follows:
✓ Report mode settings: if the Use report mode checkbox is checked, the job will run in report mode. After the job finishes its run in this mode, the user will be able to download a .csv report file here in this section. The file will contain a list of files/items that belong to the folder(s)/list(s) of the site(s) that is (are) selected in section Connections to process of the job and some information to them, including whether they will be processed or not.

✓ Scheduling settings: in this step the running times of the recovery job must be selected. It is possible either to select a scheduler from the list or to create a new scheduler via create new option. Recovery jobs are run only in specific cases. In most of the cases it is recommended to set a One time scheduler for the recovery job (e.g. with start date 7th of September at 6 PM), or to start the job manually from the status bar. (For more information about how to set schedulers refer to the section Schedules above.)

✓ Recovery settings: in this section, the user configures what will be recovered and how it will be recovered:
1. Recover all site related settings – recovers site related settings
2. Recover – what will be recovered
- Files and structure – the recovery job will create the archived folder structure and recover the items from the archive, or the job will restore the shortcuts based on the filtering settings. The shortcut must have a .html extension and must be in the database for the user to restore it.
- Structure only – the recovery job will create the archived folder structure, but no items will be recovered
3. Overwrite existing file – when to overwrite the item if it already exists in the target location. The recovery and shortcut restoring follow the logic depending on the settings:
-
Never – if the item exists, it will not be processed. Recovery scenarios:
1. If the versioning is enabled on the SP site and we recover all versions => recovers the full version history (missing/deleted items) or just the missing versions (existing items)
2. If the versioning is disabled on the SP site and we recover all versions => recovers only the latest archived version (missing/deleted items) or no action (existing items)
3. If the versioning is enabled on the SP site and we recover last or specific version => recovers the selected version (missing/deleted items) or no action (existing items)
4. If the versioning is disabled on the SP site and we recover last or specific version => recovers the selected version (missing/deleted items) or no action (existing items) -
Always – always overwrite existing items with the archived version. Recovery scenarios:
1. If the versioning is enabled and we recover all versions => recovers full version history (missing/deleted items) or just the missing versions (existing items)
2. If the versioning is disabled and we recover all versions => recovers only the latest archived version (missing/deleted or existing items)
3. If the versioning is enabled and we recover last or specific version => recovers the selected version (missing/deleted items) or recover the selected version and this will be the latest version = overwrite the current version (existing items)
4. If the versioning is disabled and we recover last or specific version => recovers the selected version (missing/deleted or existing items) -
If older/newer than the archived version – the item will be processed only if its latest version in SharePoint is older/newer than the archived one. Recovery scenarios:
1. If the versioning is enabled and we recover all versions => recovers full version history (missing/deleted items) or just the missing versions (existing items)
2. If the versioning is disabled and we recover all versions => recovers the latest archived version (missing/deleted items) or recovers the latest archived version for the items with the last modified date fulfilling the condition (existing items)
3. If the versioning is enabled and we recover last or specific version => recovers the selected version (missing/deleted items) or recover the selected version of items if their latest version fulfills the condition = will be the latest version (existing items)
4. If the versioning is disabled and we recover last or specific version => recovers the selected version version (missing/deleted items) or recover the selected version for items with the last modified date fulfilling the condition (existing items)
4. Set the modification date of recovered items to
- Original – the modification date of the archived item will be set on the recovered file
- Recovery date – the date, when the recovery job is running will be set on the recovered file
5. What to recover
- All versions – recover the full version history of items or the missing versions if the items exist
- Last known version – recover the latest archived version of the item if it doesn’t exist in SharePoint
- Specific date – recover the version from the specified (modification) date or before of the item if it does not exist in the SharePoint

✓ Sites to process: in this section the user is required to specify the folder(s) of the site that were deleted and need to be recovered from the archive. The options are changing based on the settings.
On-premise mode – select site option is accessible for the users. Add new connection via + select site button => the Site to recover dialog will open.
Microsoft 365 type – the user can either process all sites (all provisioned sites will be recovered) or selected sites or select sites and/or groups in this section. Add new connection via "+ select site" or + select group button, and specify the root and the relative URL in the pop-up window.
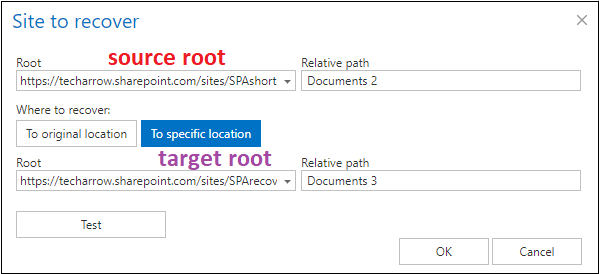
First, we select the Root (source) site path from the dropdown list and enter the folder/list to the Relative path text box if necessary. Next, select where the items from the folder/list will be recovered to:
To original location – items will be recovered to the place where they were archived from
Click on the To original location button. You can test the accessibility by clicking on the Test button. Click OK.

To specific location – items will be recovered to a different site/folder
Click on the To specific location button. A new dropdown list will appear. Here you can select the destination site for the recovery (it must be also previously configured as site connection). You can also enter the folder/list to the Relative path text box if necessary. You can test the accessibility by clicking on the Test button – in this case, it checks the accessibility of both locations (the upper “source” and the below “target” location). Click OK.
✓ Filtering settings: click on the Change filter button and set the filtering according to your needs and/or regulations. To learn more about how to work with the filtering settings, please, check this section of our documentation.
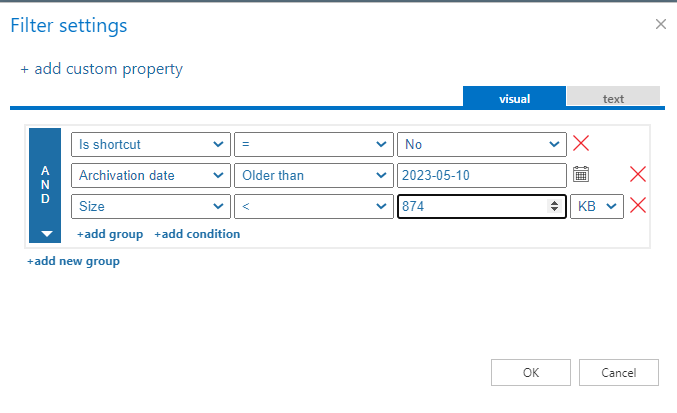
Important: “Is shortcut” is not an archive property. It only allows the job to restore the shortcuts if there are shortcuts in SharePoint. When the site/library is empty, the “Is shortcut=yes” filter won’t process anything. If there are shortcuts in the selected site/library, the “Is shortcut=yes” condition will be met, and the shortcuts will be replaced by the original, BUT! The missing files won’t be recovered.
✓ Notification settings: the user may select here, in which case he needs to get notifications from the recovery job. It is possible to set here that the notification emails will be sent only in case of errors or warnings, or they can be sent in all cases, too. Into the Recipient list textbox, the user should insert the email addresses of the people, to whom these emails should be sent to. Notifications emails may be used as tools of the troubleshooting process.

✓ Resource settings: the number of workers threads running in parallel. Save your settings and wait until the scheduler starts the recovery process (or start it immediately using the status bar).
