contentACCESS File Handler for Windows
Introduction
The contentACCESS File Handler for Windows enables Windows File Explorer to correctly open modern shortcut files (.alink) on a local server.
.alink files are contentACCESS shortcuts used in Microsoft 365 SharePoint, OneDrive, and Teams. When a rarely used document is offloaded from Microsoft 365 to the contentACCESS Archive, the original document is replaced by a small shortcut file (the .alink).
In Microsoft 365, your organization registers a contentACCESS file handler in the tenant so that opening an .alink file directly in SharePoint, Teams, or OneDrive correctly redirects you to the contentACCESS Shortcut Handler web service.
However, if you download an .alink file to your PC, or if you use OneDrive to synchronize libraries locally, Windows does not know what to do with .alink files by default, because the tenant-side handler only works inside Microsoft 365.
The contentACCESS File Handler for Windows solves this by registering a Windows file association for .alink. When you open an .alink file on your PC, the handler mimics the Microsoft 365 behavior and redirects you to the contentACCESS Shortcut Handler service. That service then provides:
- Document preview
- Document restore
- Document download
The handler can be installed in two ways:
- Manual deployment – the user downloads and installs the application directly on their own server. This is suitable for individual users or small-scale rollouts.
- GPO deployment – an administrator deploys the handler centrally across multiple servers using GPO, Intune, SCCM, or a similar management tool. This is the recommended approach for organizational deployments.
Manual deployment
This section describes how to manually download, install, and configure the contentACCESS File Handler for Windows on a local server, including downloading the application, running the installer, and configuring the server URL and email address for your environment.
How to download and install the file handler
-
Download the
contentACCESS.FileHandler.Win.exeapplication from Download Center > Tools.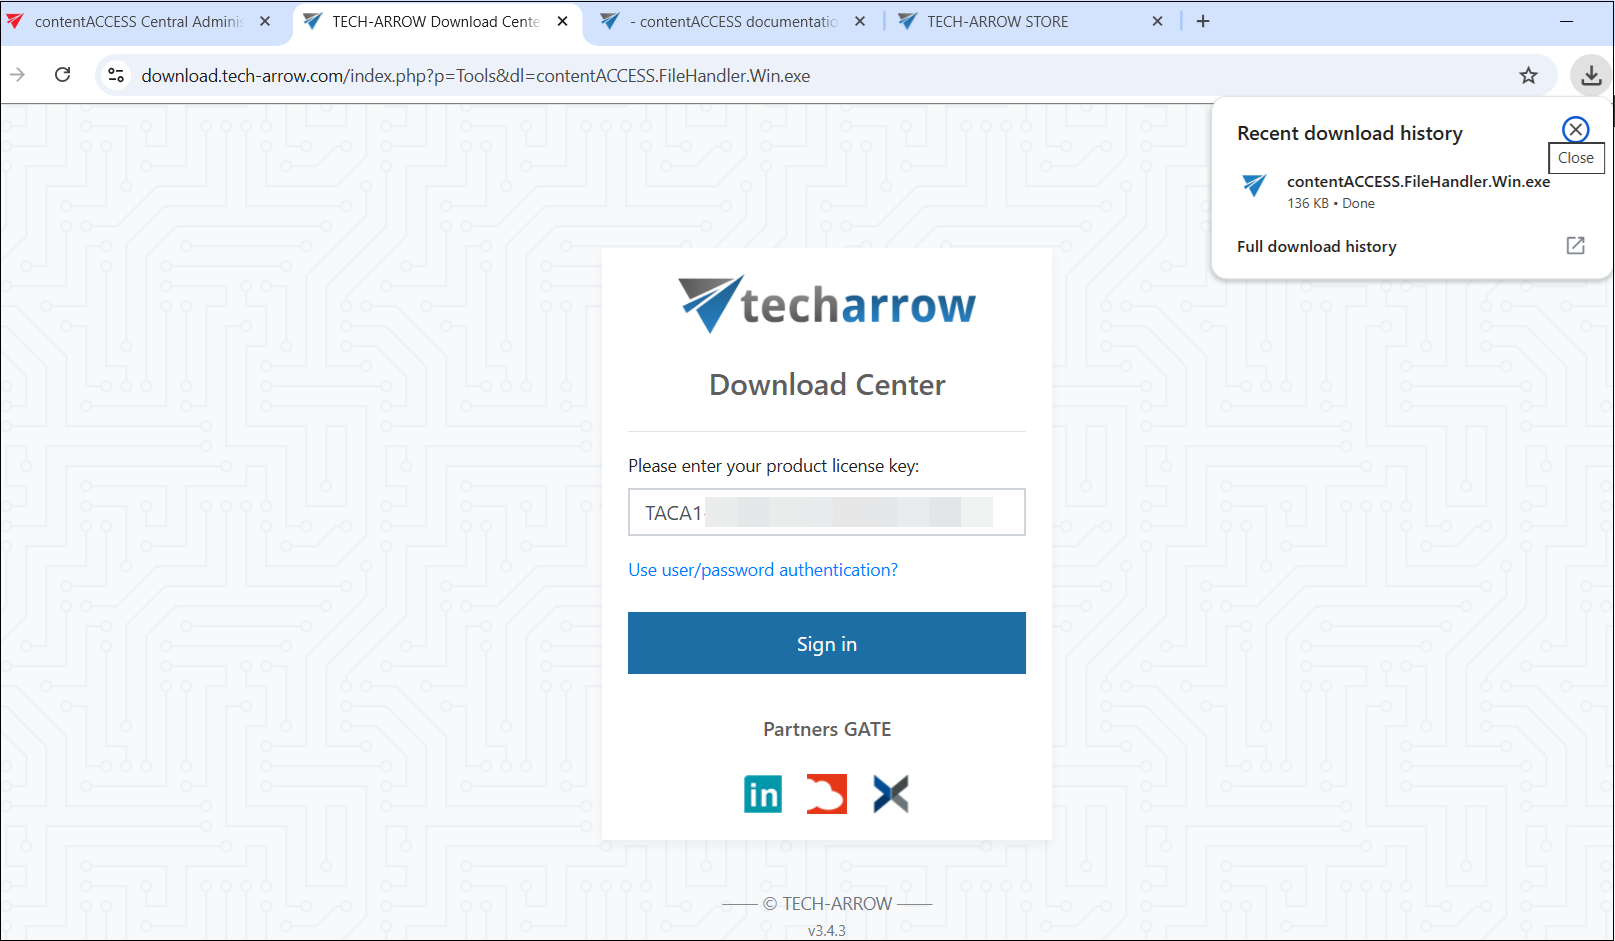
-
Start the application, and on the first screen, select Install and press Enter. This installs the handler for the current Windows user.
infoNote: The application is copied into your user profile under:
C:\Users\<USER>\AppData\Local\TECH-ARROW\contentACCESS.FileHandler.Win.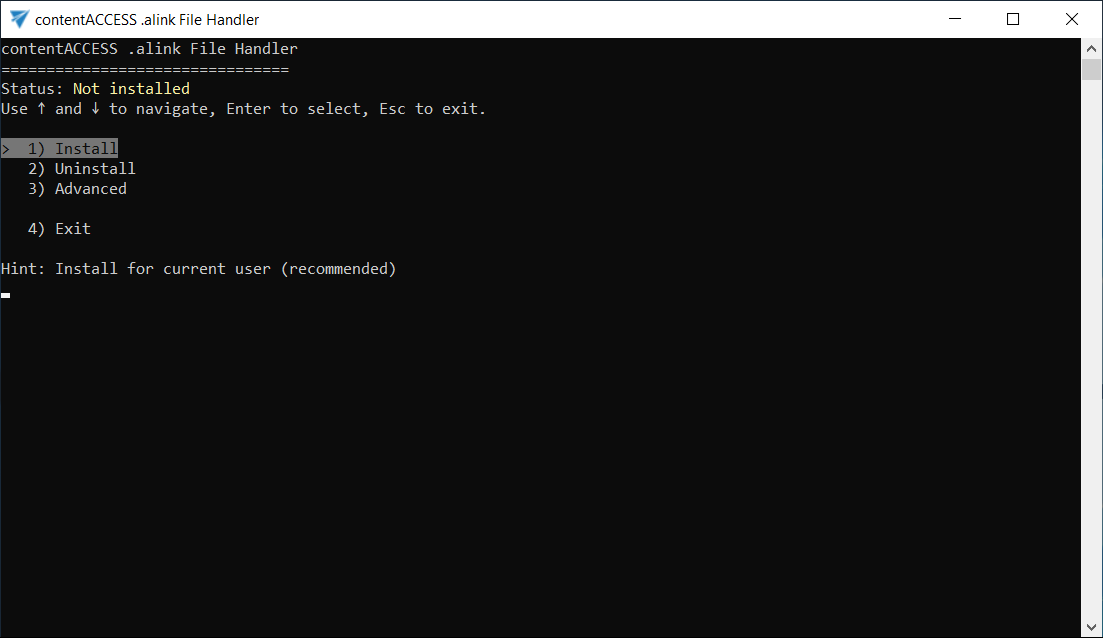
-
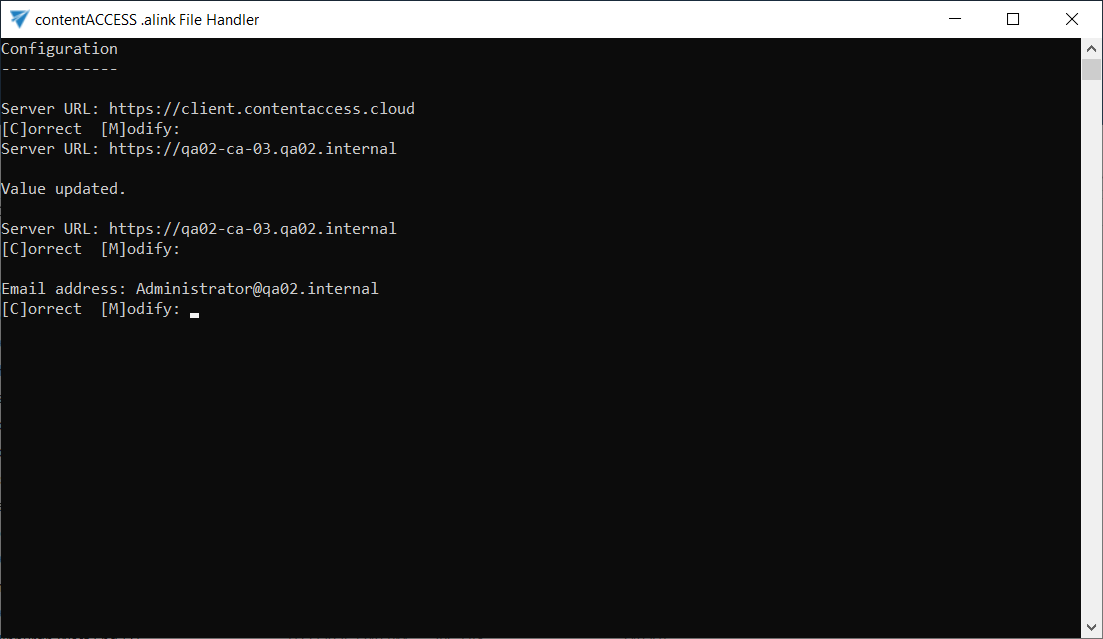
After installation, the application asks you to configure two values: server URL and email address. For each value you can choose [C]orrect (keep the current value) or [M]odify (enter a new value).
First, configure the server URL. By default, the current server URL is displayed (typically
https://client.contentaccess.cloud). If you wish to keep it, choose [C]orrect.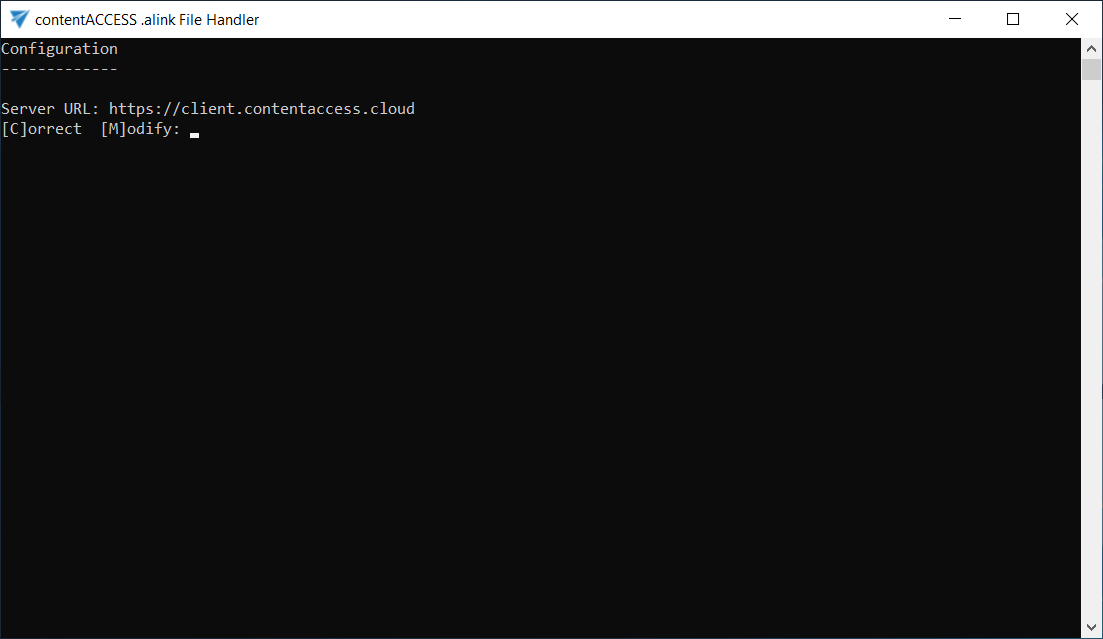
If you would like to use a different URL, choose [M]odify, enter the desired address, and press Enter. If the value is valid, a "Value updated" message appears, and the new value is applied.
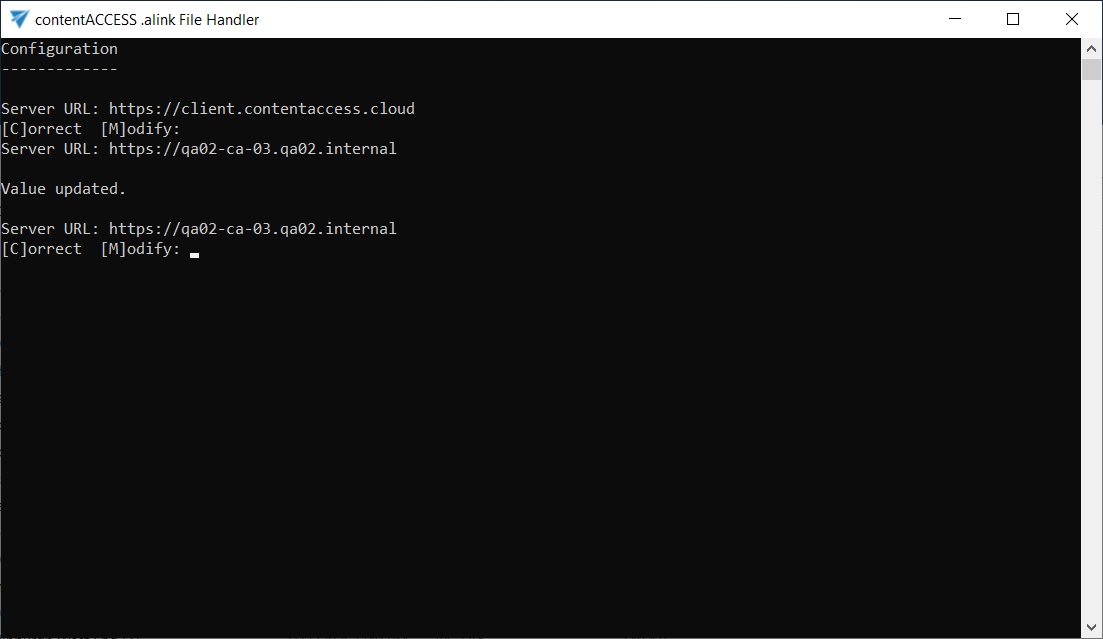
After confirming the server URL with [C]orrect, you move to the next step to configure the email address. Here, you can again choose to keep the displayed email address by selecting [C]orrect, or change it by selecting [M]odify.
-
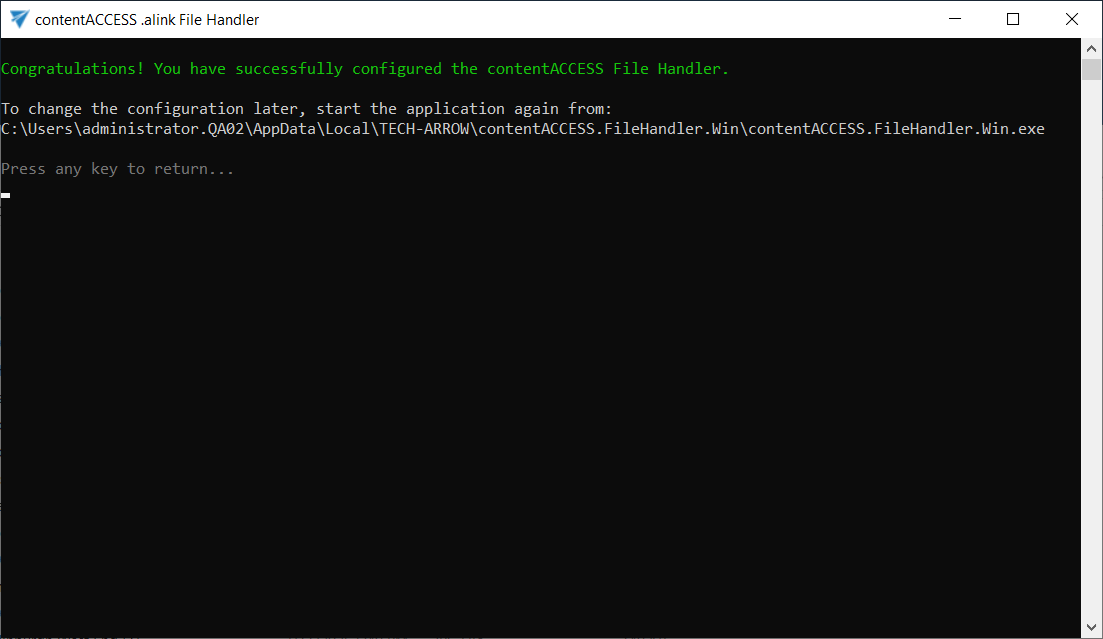
When finished, a success message appears, showing where the application is installed so you can run it again later.
How to use the contentACCESS File Handler for Windows
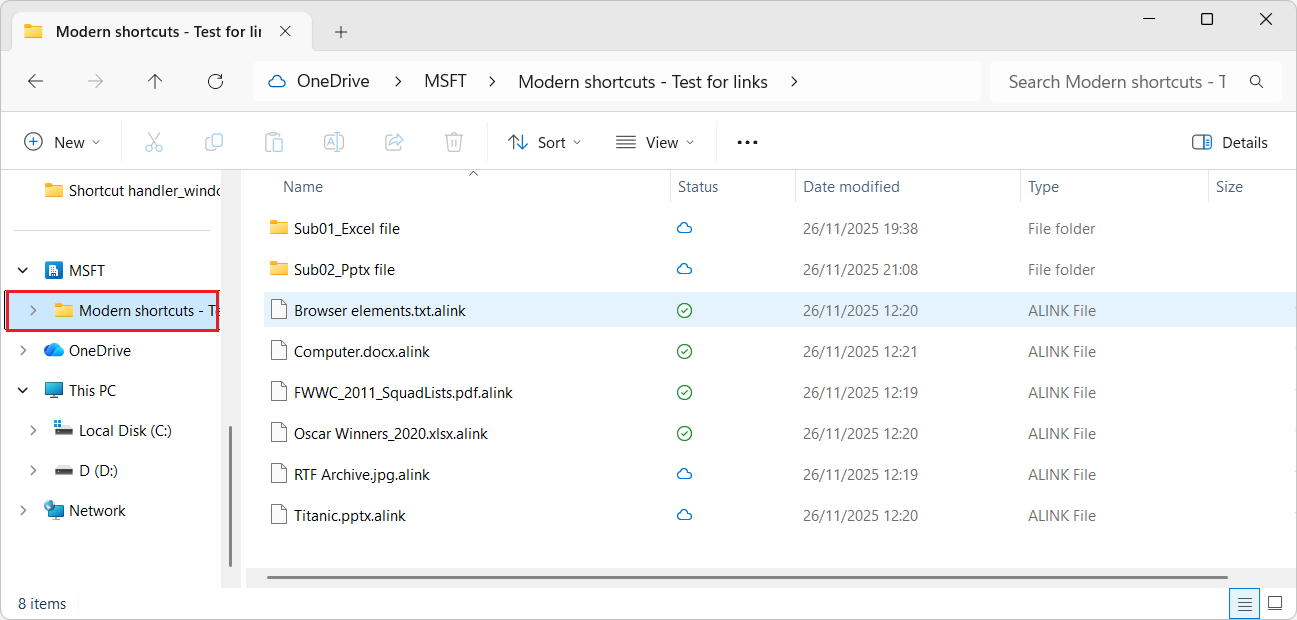
Once you have installed and configured the required values, locate an .alink file on your local server (for example, in a OneDrive-synchronized folder) and double-click it. Your default browser opens and redirects you to the contentACCESS Shortcut Handler service.
You can find detailed information about the contentACCESS Shortcut Handler service and its functions in the contentACCESS Portal manual, with separate chapters for SharePoint and OneDrive shortcuts.
Change configuration later or uninstall the application
If you need to change the configuration later, start the application again. It is typically located in your user profile under: C:\Users\<USER>\AppData\Local\TECH-ARROW\contentACCESS.FileHandler.Win\contentACCESS.FileHandler.Win.exe.
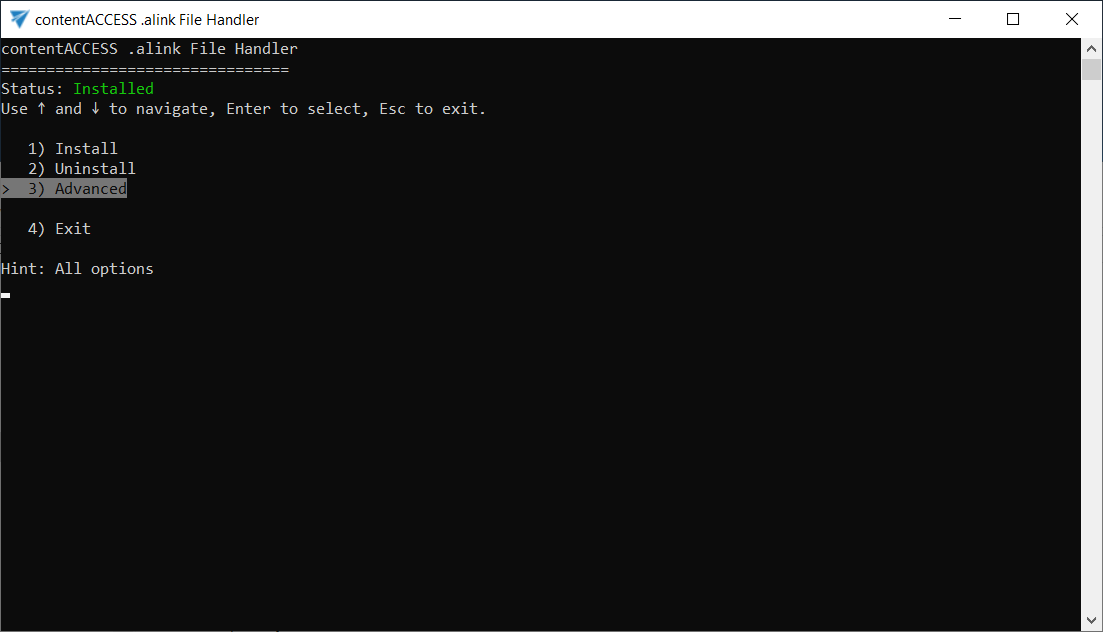
From the menu, choose Advanced first, then select Configure.
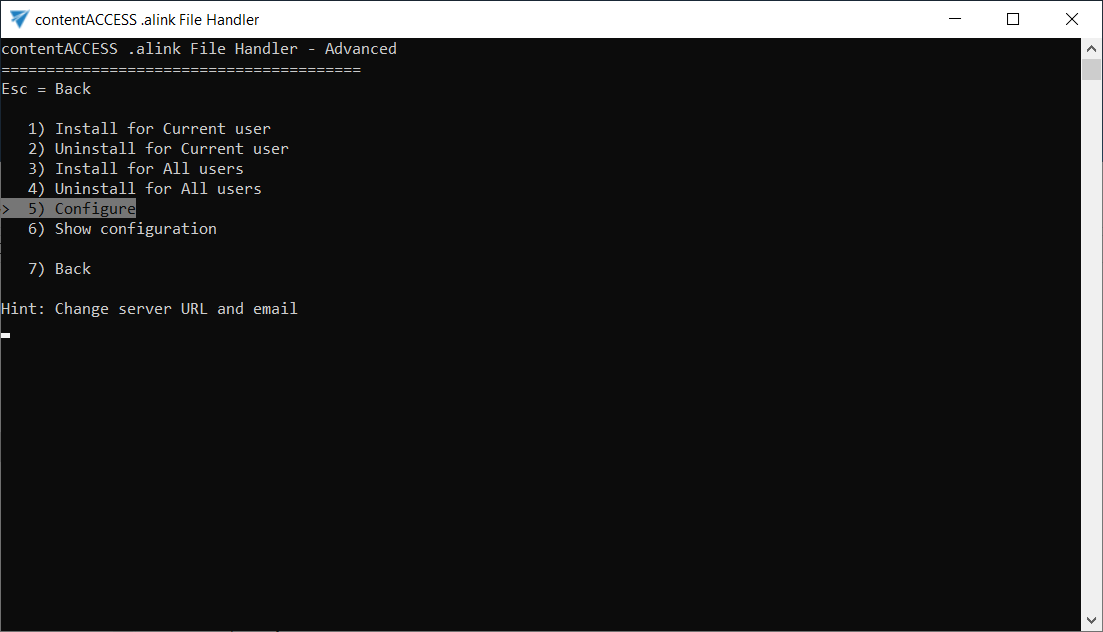
The Configuration page appears again, where you can confirm or modify the server URL and email address.
You can also uninstall the application by selecting the Uninstall option from the menu.
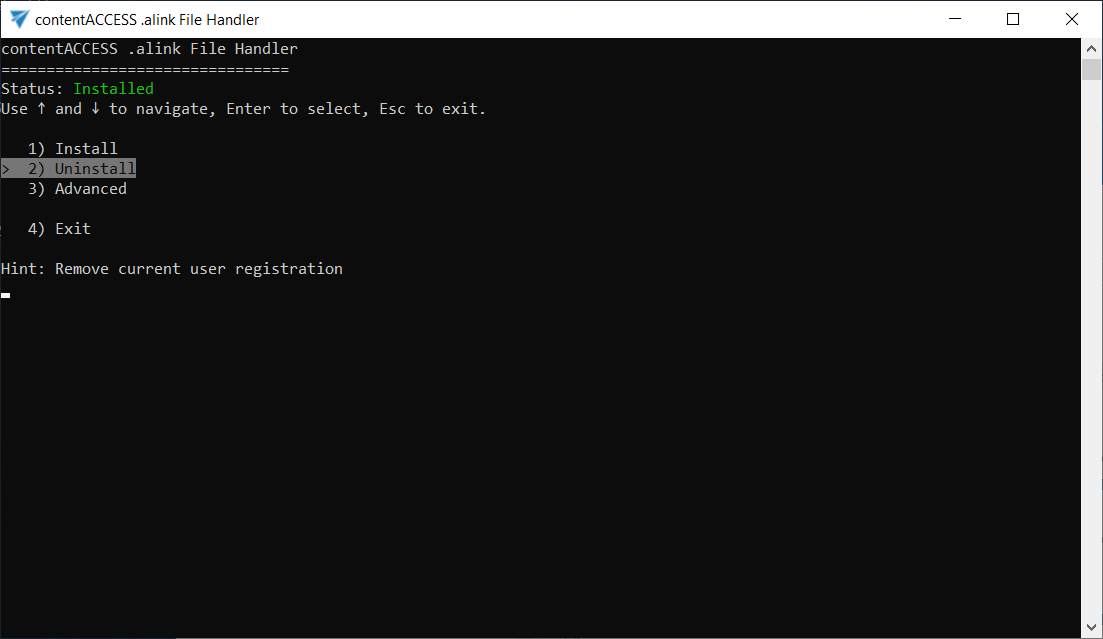
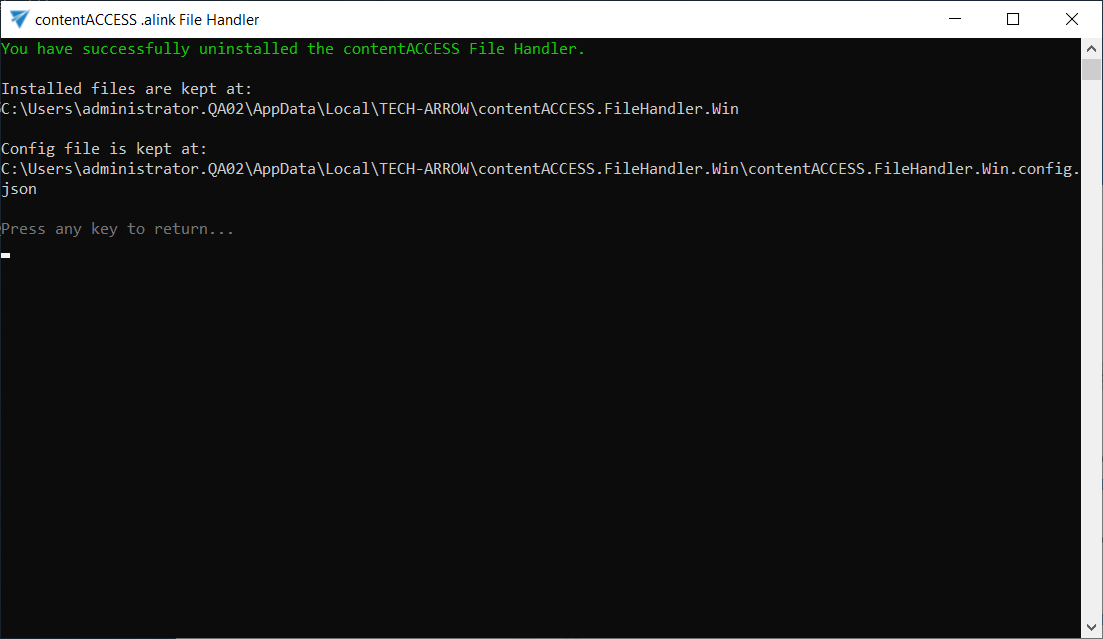
This removes the Windows registration for .alink for your current user, but keeps the installed application and configuration files in their installation location.
Group Policy Objects (GPO) deployment
This section describes how to deploy the contentACCESS File Handler for Windows across multiple servers using GPO, Intune, SCCM, or a similar management tool. Instead of installing the handler manually on each server, you copy the application files to a defined location and create the required Windows registry entries centrally. The deployment can be scoped per user (HKCU) or machine-wide for all users (HKLM).
The deployment registers the Windows file association for .alink files, so that double-clicking an .alink file launches contentACCESS.FileHandler.Win.exe. The following identifiers are used:
- Extension:
.alink - ProgId:
contentACCESS.alink
The application reads its configuration from contentACCESS.FileHandler.Win.config.json, which must be placed next to contentACCESS.FileHandler.Win.exe.
The handler can be deployed per user (recommended) or for the whole server (all users).
A) Per-user deployment (HKCU) – recommended
1) Copy files (per user)
Copy contentACCESS.FileHandler.Win.exe to the following location on the user's server:
%LOCALAPPDATA%\TECH-ARROW\contentACCESS.FileHandler.Win\contentACCESS.FileHandler.Win.exe
It is also recommended to place the configuration JSON file next to the EXE so the application can read its settings on startup:
%LOCALAPPDATA%\TECH-ARROW\contentACCESS.FileHandler.Win\contentACCESS.FileHandler.Win.config.json
2) Registry (per user)
To register the .alink file association for the current user, create the following values under HKEY_CURRENT_USER\Software\Classes:
Windows Registry Editor Version 5.00

; .alink -> ProgId
[HKEY_CURRENT_USER\Software\Classes\.alink]
@="contentACCESS.alink"
"Content Type"="application/x-contentaccess-alink"

; ProgId
[HKEY_CURRENT_USER\Software\Classes\contentACCESS.alink]
@="contentACCESS Shortcut"

[HKEY_CURRENT_USER\Software\Classes\contentACCESS.alink\DefaultIcon]
@="\"C:\\Users\\<USER>\\AppData\\Local\\TECH-ARROW\\contentACCESS.FileHandler.Win\\contentACCESS.FileHandler.Win.exe\",0"

[HKEY_CURRENT_USER\Software\Classes\contentACCESS.alink\shell\open\command]
@="\"C:\\Users\\<USER>\\AppData\\Local\\TECH-ARROW\\contentACCESS.FileHandler.Win\\contentACCESS.FileHandler.Win.exe\" \"%1\""
.reg files require a concrete path. Replace <USER> with the actual username, or generate per-user values via a user logon script.
B) All-users deployment (HKLM)
Use this option only if you want a machine-wide association. The contentACCESS.FileHandler.Win.exe must be placed in a shared location readable by all users.
1) Copy files (machine)
Copy contentACCESS.FileHandler.Win.exe to a shared location that is readable by all users, for example:
C:\Program Files\TECH-ARROW\contentACCESS.FileHandler.Win\contentACCESS.FileHandler.Win.exe
It is also recommended to place the configuration JSON file next to the EXE so the application can read its settings on startup:
C:\Program Files\TECH-ARROW\contentACCESS.FileHandler.Win\contentACCESS.FileHandler.Win.config.json
For all-users deployment, leave userEmail empty in the configuration file so the application resolves it automatically for each user.
2) Registry (machine)
To register the .alink file association machine-wide for all users, create the following values under HKEY_LOCAL_MACHINE\Software\Classes:
Windows Registry Editor Version 5.00

[HKEY_LOCAL_MACHINE\Software\Classes\.alink]
@="contentACCESS.alink"
"Content Type"="application/x-contentaccess-alink"

[HKEY_LOCAL_MACHINE\Software\Classes\contentACCESS.alink]
@="contentACCESS Shortcut"

[HKEY_LOCAL_MACHINE\Software\Classes\contentACCESS.alink\DefaultIcon]
@="\"C:\\Program Files\\TECH-ARROW\\contentACCESS.FileHandler.Win\\contentACCESS.FileHandler.Win.exe\",0"

[HKEY_LOCAL_MACHINE\Software\Classes\contentACCESS.alink\shell\open\command]
@="\"C:\\Program Files\\TECH-ARROW\\contentACCESS.FileHandler.Win\\contentACCESS.FileHandler.Win.exe\" \"%1\""
Configuration file
Place contentACCESS.FileHandler.Win.config.json next to contentACCESS.FileHandler.Win.exe. The file uses the following JSON structure:
{
  "defaultAction": "preview",
  "archiveServerUrl": "https://client.contentaccess.cloud",
  "userEmail": ""
}
The fields are:
defaultAction: defines the action triggered when opening an.alinkfile. Set topreviewby default.archiveServerUrl: the base URL of the contentACCESS server (default:https://client.contentaccess.cloud).userEmail: optional. If left empty, the application resolves the email address automatically through the default Active Directory.
Uninstall / rollback
To remove the handler, delete the following registry keys, depending on the deployment mode used:
...\Software\Classes\contentACCESS.alink...\Software\Classes\.alink(only if its default value iscontentACCESS.alink)
Note: If icons or file associations do not update immediately after removal, sign out and back in, or restart Windows Explorer.
Troubleshooting
The following are common issues you might encounter when using .alink files, along with suggested steps to resolve them:
- Nothing happens when I open an
.alinkfile – run the application to verify its status; it should show Installed. If it shows Not installed, run Install. - I get redirected to the wrong server – reconfigure the server URL using the Advanced option to set the correct server URL.
- Windows does not update the icon immediately – it may take time for the icon to display, or you may need to restart Windows Explorer or sign out and back in.
.alinkfiles are opening with the wrong application (e.g., a PDF viewer) – this can happen if a different default app was selected by mistake. To fix this, go to Default apps in Windows, search for.alink, and select the contentACCESS File Handler application. If needed, you can manually locate it at:C:\Users\<USERNAME>\AppData\Local\TECH-ARROW\contentACCESS.FileHandler.Win\contentACCESS.FileHandler.Win.exe.