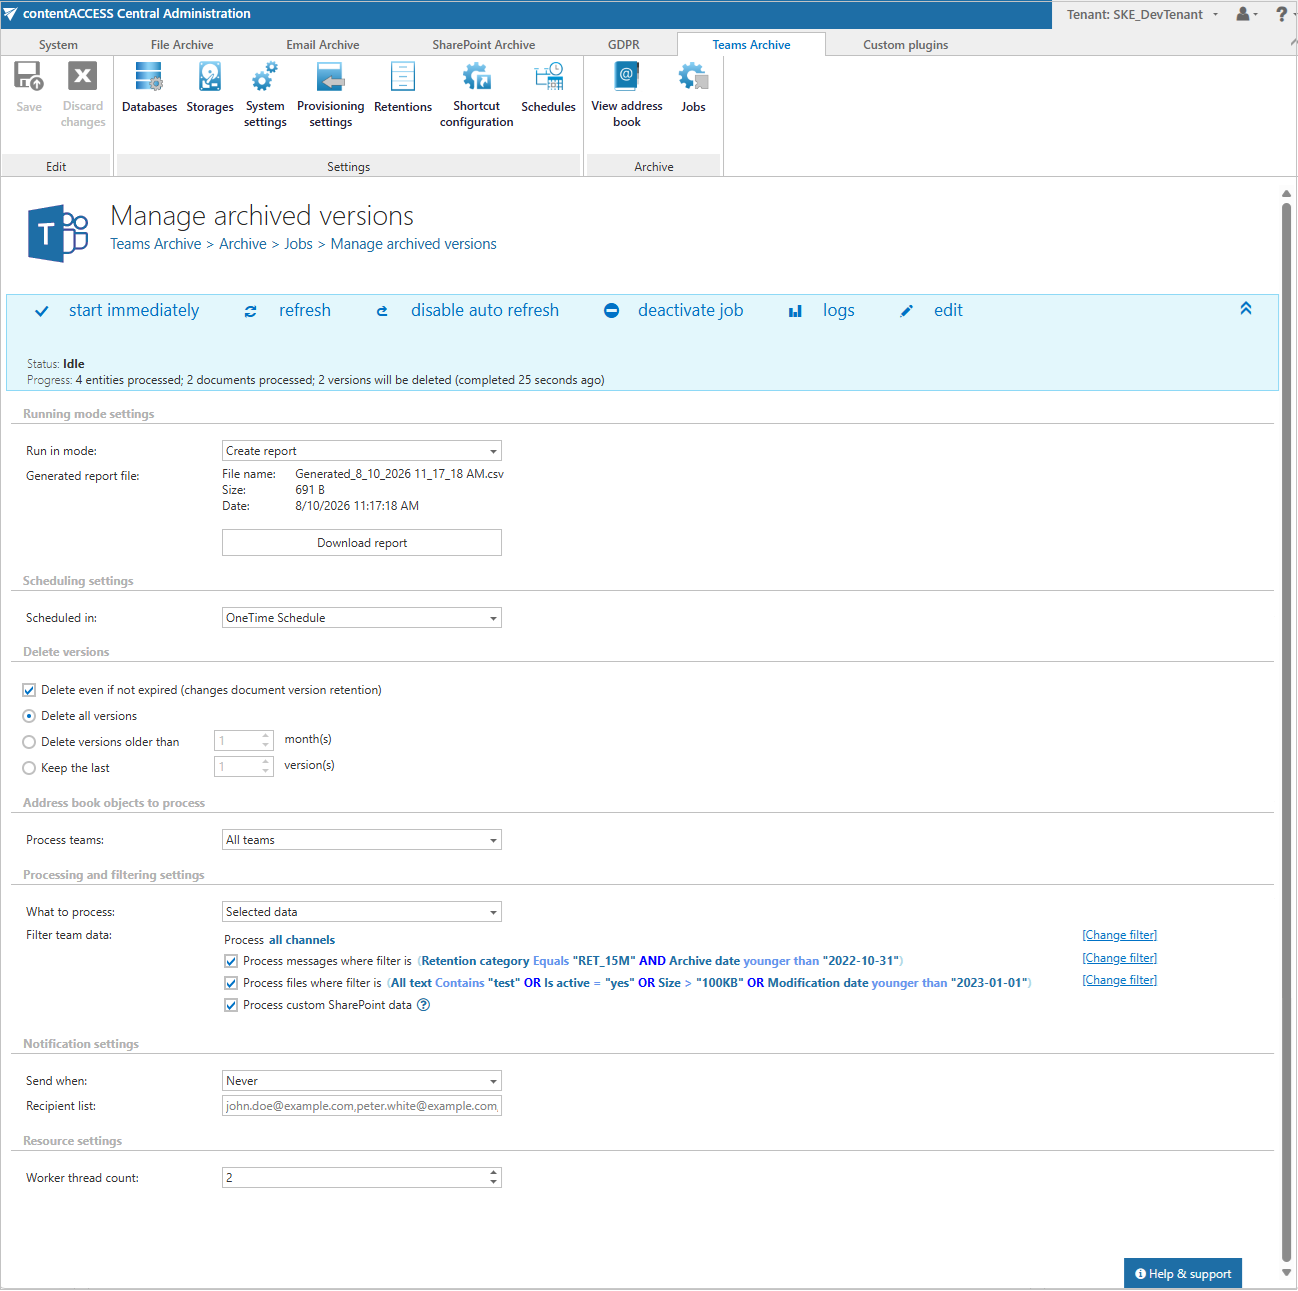
Configuration of Manage archived versions job in Teams archive
Introduction
The Manage archived versions job is used to remove archived file and message versions in Teams archive. By default, the job processes only versions whose retention period has already expired. If needed, administrators can enable an option to override document version retention so that the job also processes versions that have not expired yet. This retention override option is license-dependent and is available only with a valid Retention changer license.
With this job, administrators can control how archived versions are removed, for example by keeping the last X versions of each archived file or message, or by keeping versions younger than a selected threshold, either a fixed date or X months. The job can run in Immediate processing, Create report, or Apply report mode, allowing for a controlled workflow where affected items are first reviewed before being processed.
This page describes how to create and configure a Manage archived versions job instance, including its running mode, scheduling, version deletion rules, address book object selection, filtering, notification, and resource settings.
Create a new job instance
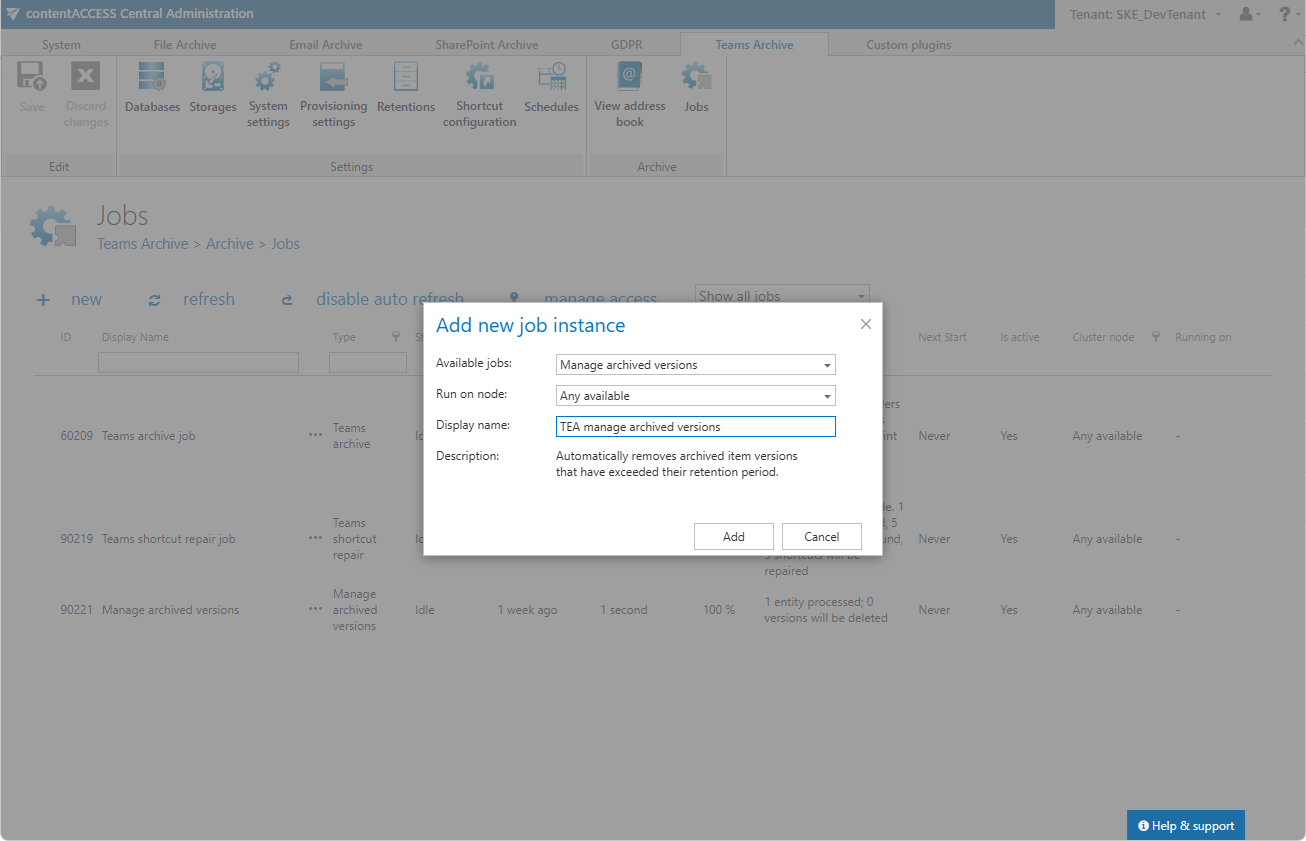
- Navigate to Teams Archive tab => Archive group => Jobs, then click + new.
- In the Add new job instance dialog, select Manage archived versions from the Available jobs list.
- Select the node where the job should run from the Run on node list. If you do not want to specify a dedicated node, select Any available.
- Enter a Display name.
- Click Add.
On the job configuration page, review the sections described below. Most of them are mandatory, while filtering settings are optional.
Running mode settings
The job can run in three modes:
-
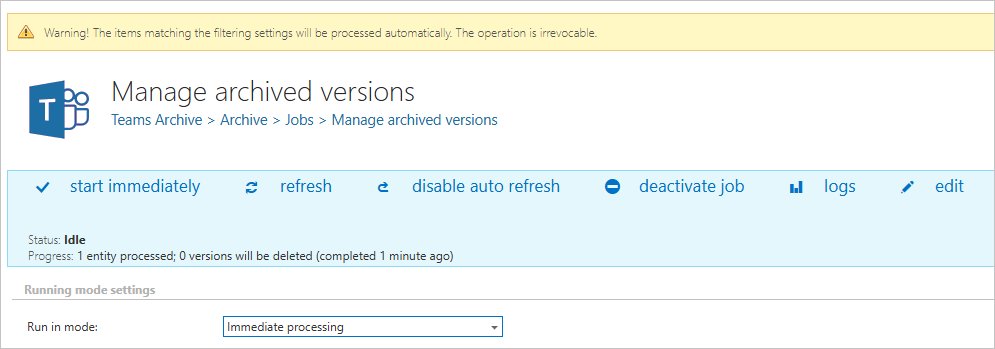
Immediate processing — Collects all archived file and message versions matching the filtering criteria and deletes them immediately.
-
Create report — Collects archived file and message versions matching the filtering criteria and generates a CSV report listing the affected items. The administrator can review and edit the list before any deletion takes place.

-
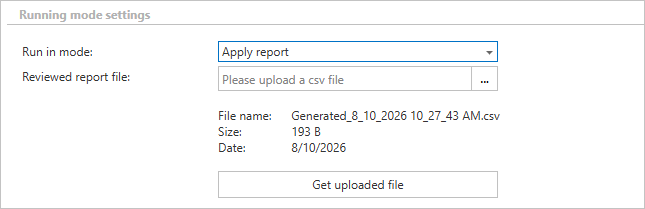
Apply report — A CSV file previously generated in Create report mode must be uploaded here. The administrator can remove items from the list before running the job; only the versions listed in the file will be processed and deleted.
Scheduling settings
In this section, the job schedule must be configured. The job can run either as a one-time task or on a recurring schedule. You can select an existing scheduler from the Scheduled in dropdown list or create a new one by clicking Create new.... For more information on configuring schedulers, refer to Schedules.

Delete versions
In this section, you can define which archived file and message versions should be removed.
- Delete even if not expired (changes document version retention): If checked, the job deletes versions regardless of whether their retention period has expired. Enabling this option overrides the document version retention setting. This option is license-dependent and is only available if the tenant has a valid license for the Retention changer feature.
When this checkbox is unchecked, the options below apply only to expired versions:
- Delete all expired versions — All archived versions whose retention period has already expired will be deleted.
- Delete expired versions older than [X] month(s) — Only expired versions that are older than the specified number of months will be deleted.
- Keep at least the last [X] version(s) — Regardless of expiry, the specified number of most recent versions will always be retained.

When this checkbox is checked, the retention period is no longer considered, and the options apply to all versions:
- Delete all versions — All archived versions will be deleted regardless of their retention status.
- Delete versions older than [X] month(s) — Versions older than the specified number of months will be deleted.
- Keep the last [X] version(s) — The specified number of most recent versions will always be retained.

Address book objects to process
In this section, select the team(s) to be processed. There are two available options:
-
Process All teams — the job will process versions from all previously provisioned and archived teams.

-
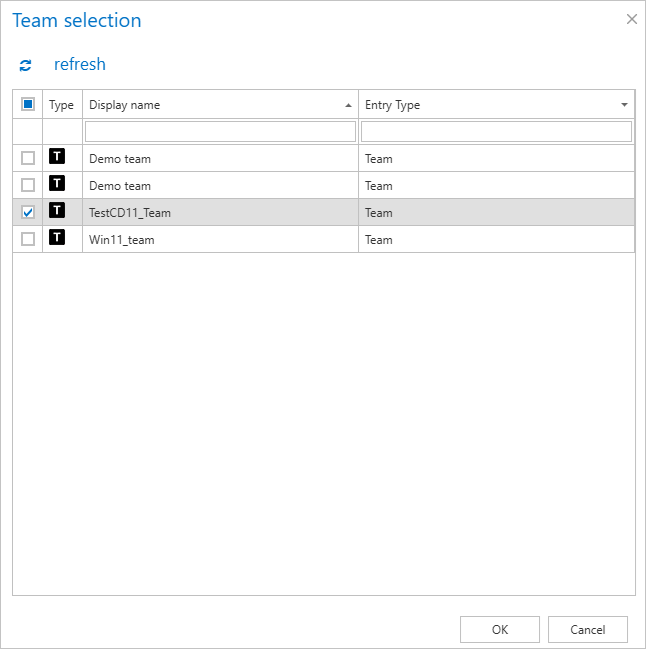
Process Selected teams — teams are added manually via the select option, one by one. Click select to open the Team selection dialog.

Processing and filtering settings
In this section, you can define which items will be processed during the job. First, select what to process: all data or selected data. With the all data option, the Manage archived versions job includes all channels' messages, files, and non-channel related SharePoint data.

If you select the selected data option, the Filter team data settings appear:

-
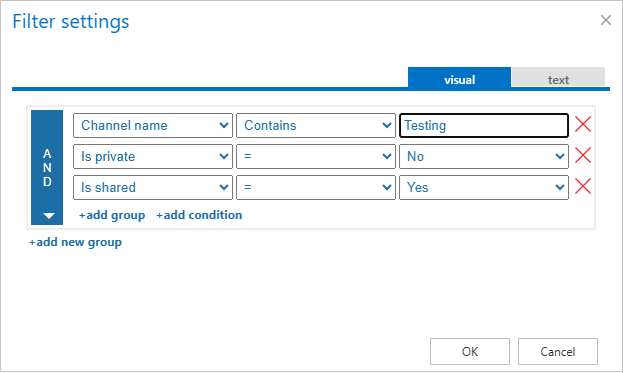
Process all channels (or filter them out) — Decide whether all channels' file versions will be processed or just the versions from channels matching the filtering settings. Channels can be filtered out by name or by type (IsPrivate=Yes/No).
infoNote: The default channel in Teams is General, which is created automatically with the team. This channel is displayed in the background as "General" even if users set or use different languages for the Teams client. Because of this, when you want to filter out the default channel by name, it must be added in English (other channels can be filtered out using the supported languages), otherwise the job will not process this channel.
-
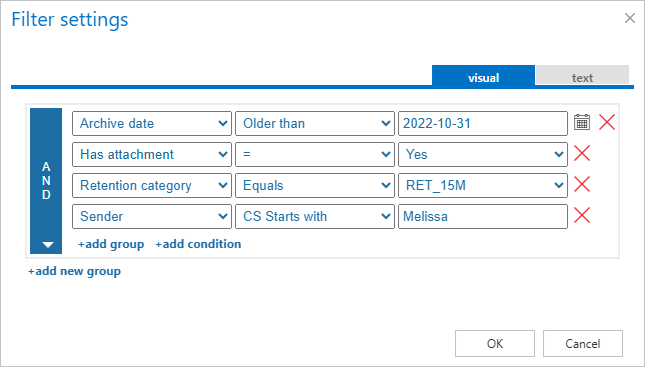
Process messages where filter is [not set] — Only the messages (all or filtered) will have their versions processed if this checkbox is selected. If no filter is added, all messages from the defined channels will be processed. It is also possible to process only selected messages from the team(s) by clicking the Change filter button (or not set). This opens the Filtering settings window, where filters for the Manage archived versions job can be defined.
-
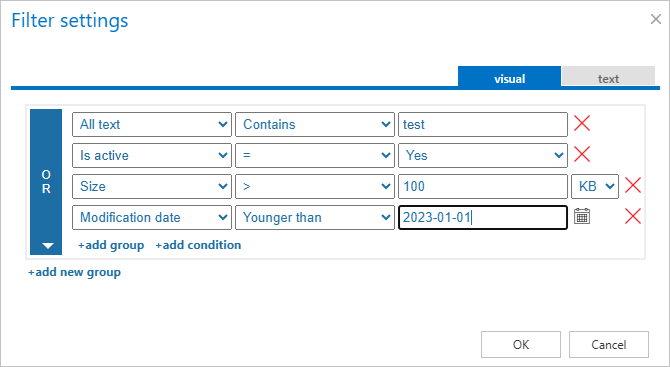
Process files where filter is [not set] — Only the files (all or filtered) will have their archived versions processed from the selected team(s) and/or from the Teams-connected SharePoint sites if this option is selected. If no filter is added, all files from the defined channel(s) will be processed. It is also possible to process only selected files by clicking the Change filter button (or not set), which opens the Filtering settings window. You can also filter out channel-related files or files from Teams-connected SharePoint sites using the Is custom data=Yes/No filter.
-
Process custom SharePoint data — SharePoint is deeply integrated into Teams. Files stored in Teams reside in SharePoint sites, which Teams uses for file storage (these are called Teams-connected sites). These sites are created automatically whenever a user creates a team. Files stored in both Teams and SharePoint sites can be processed using the Process files option, but items that are available only on the SharePoint sites (lists, tasks, calendar items, contacts, manually created document/picture libraries) are skipped by that option. To process those items with the Manage archived versions job, the Process custom SharePoint data option must be selected. This option allows you to process or skip custom SharePoint lists and document libraries. For more information about Teams and SharePoint integration, see this article.
warningImportant: The Process custom SharePoint data function does not work by itself. The Process files option must also be selected, otherwise the job will run without doing anything. However, the files can be easily filtered out (for example,
NOT Creation date has value=no), so that only the SharePoint data is processed.
To configure the filtering settings, click the Change filter or not set button and set the filters according to your needs and/or regulations. To learn more about filtering, refer to Filtering in jobs.
Notification settings
In this section, you can configure job notifications. You can choose whether notification emails are sent always, never, or only when an error or warning occurs. In the Recipient list textbox, enter the email address(es) of the recipients. If there are multiple recipients, separate the addresses with a comma (,) or semicolon (;).

Resource settings
In this section, you can configure job resource settings. Set the value that determines how many items are processed simultaneously. The recommended default value is 2.

Save the job
Once the job is configured, click Save. The job will be listed in the Jobs list and will run according to the defined schedule.