Sharing with contentACCESS version newer than 4.2
Introduction
The Share function allows users to share large files that cannot be sent as email attachments by creating a sharing link for the selected items. The link can then be sent to other users, without requiring invitations, additional applications, or large email attachments.
Prerequisites
Before using the Share function in officeGATE, complete the following configuration:
-
Configure the Sharing job in contentACCESS.
The Sharing job can be configured under System -> Services -> Sharing job in the Central Administration interface of contentACCESS. For more information, see Sharing job. -
Configure the Sharing settings in contentACCESS.
The Sharing settings can be configured under System -> Services -> Sharing settings in the Central Administration interface of contentACCESS. For more information, see Sharing settings.
After successfully connecting to contentACCESS, the Share function becomes available in officeGATE.
Open the Share function
Items can be shared from officeGATE from the following locations. All options work in the same way:
-
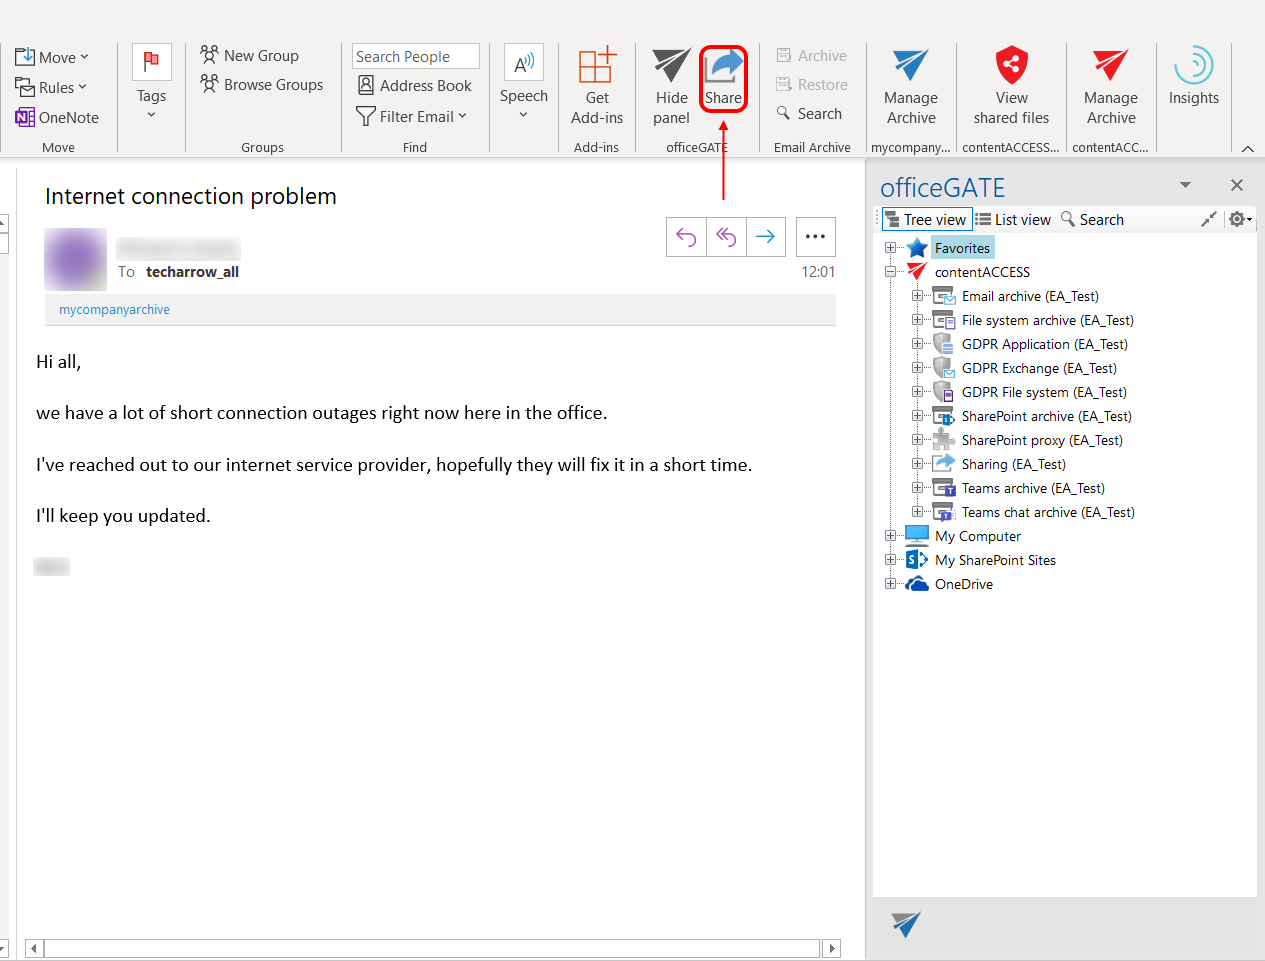
Share button in the toolbar.
-
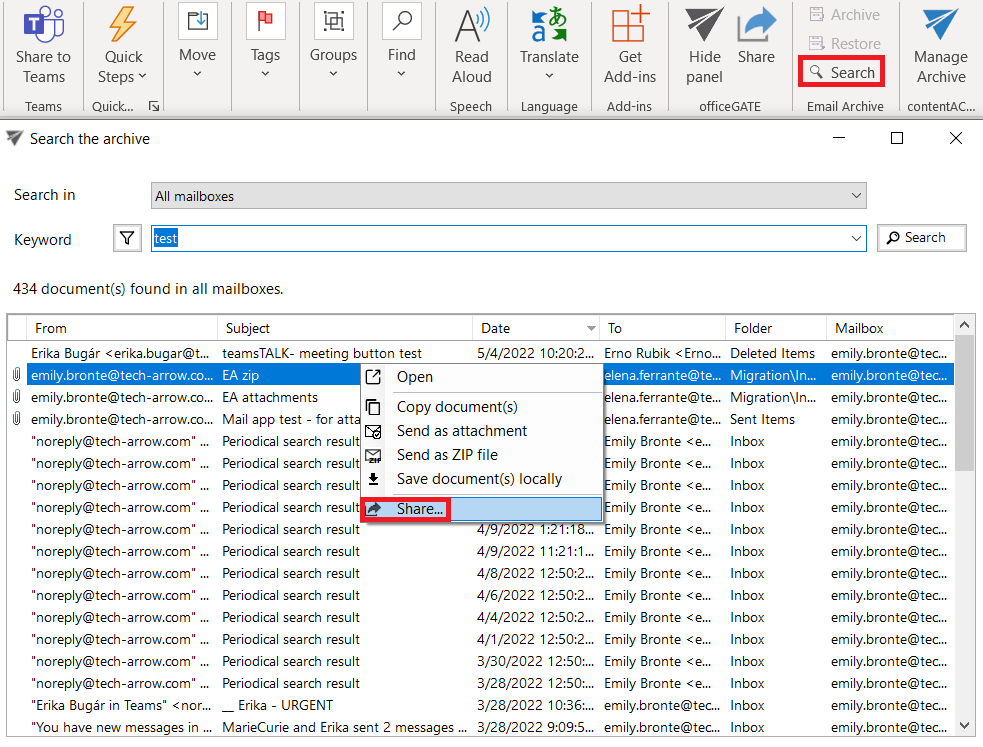
Context menu of search results when using the Email archive buttons.
-
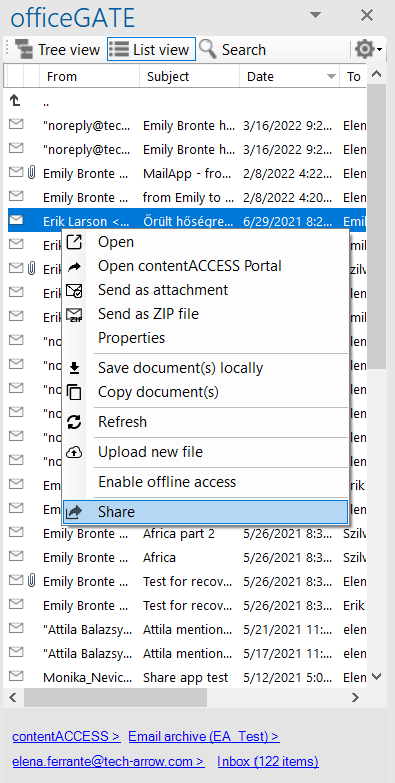
Context menu of items in List view.
-
Context menu of search results.
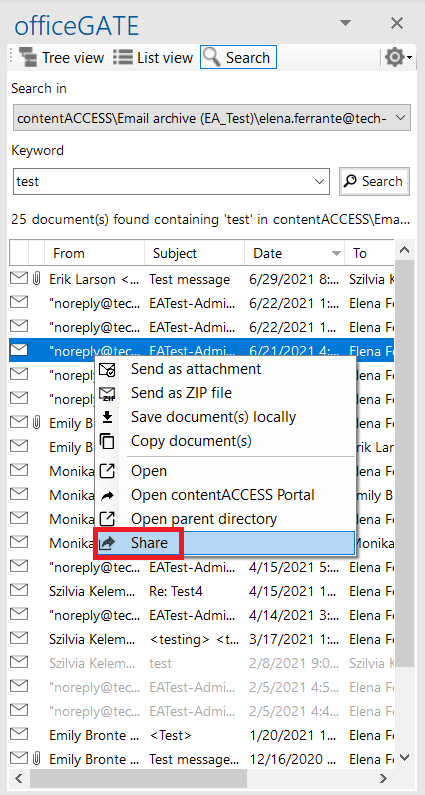
-
Share option in the Properties of an item.
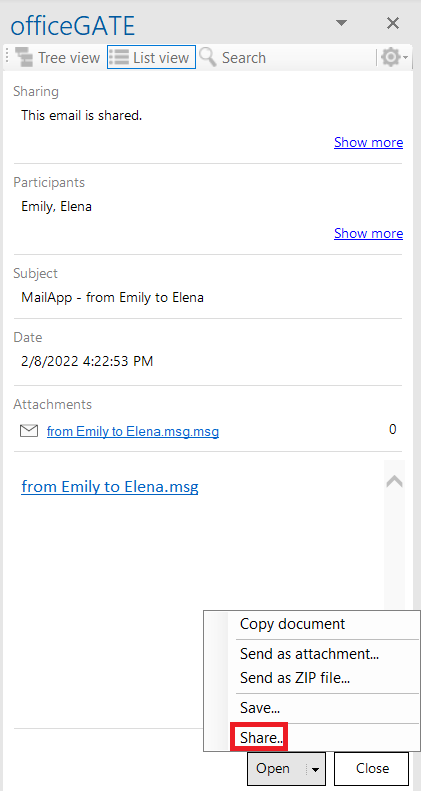
-
Context menu of folders in Tree view and List view.
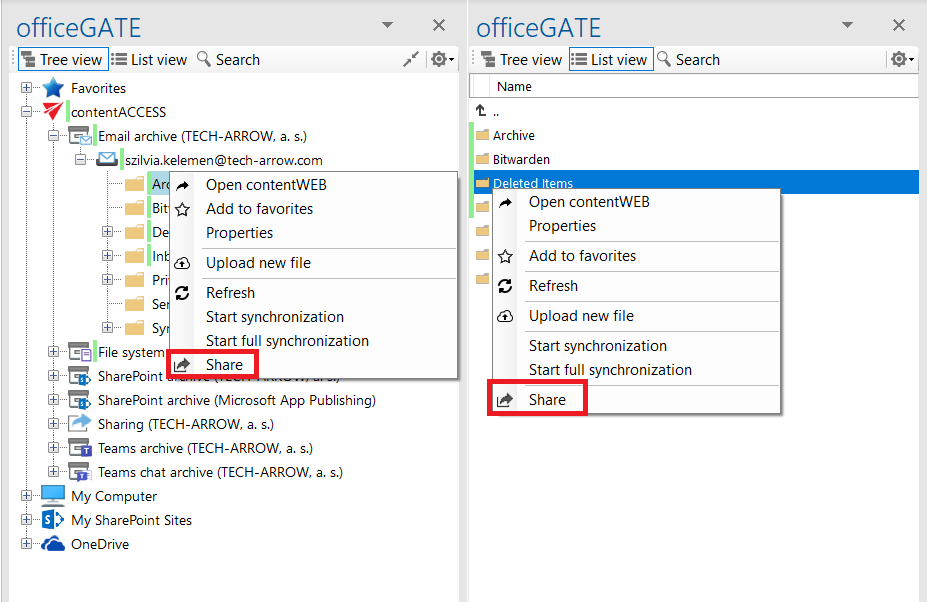
-
Share option for attachments in the email preview.
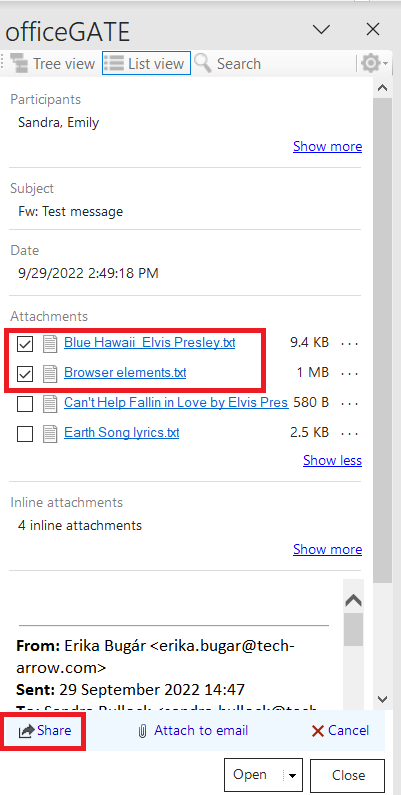
Share attachments from the email preview
Attachments can be selected from the email preview, including multiple attachments. When attachments are selected, a toolbar appears with the following actions:
- Share – shares the selected items from the archive.
- Attach to email – attaches the selected attachments to a new email and sends them to the specified recipients.
- Cancel – cancels the operation and removes the selection.
After clicking Share, the Share view opens.
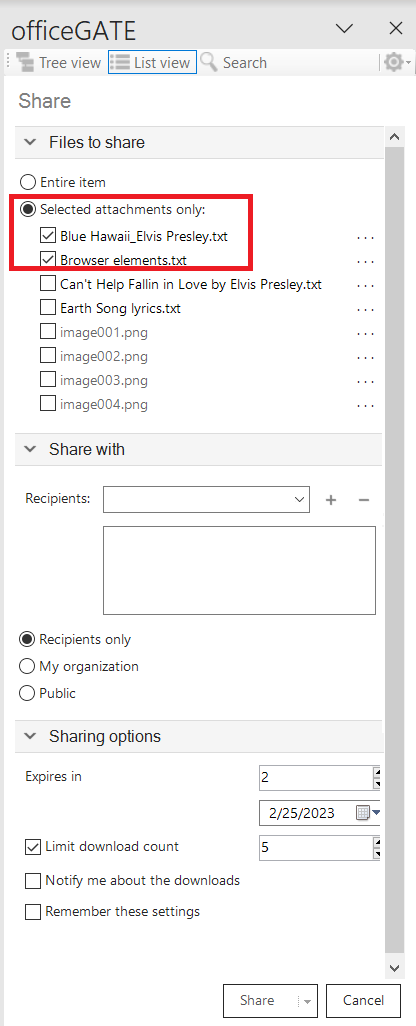
Screenshot: Share attachment from email preview
Configure sharing options
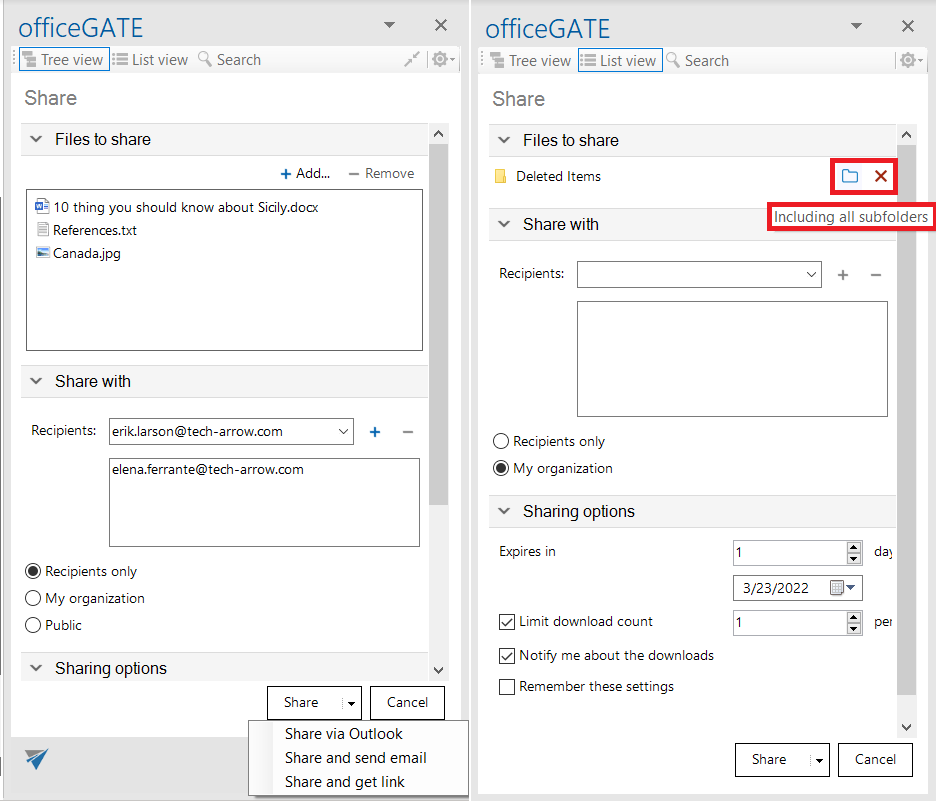
Files to share
The Files to share section contains the items selected for sharing.
When using the Share toolbar button, add items by clicking +Add and browsing for the desired items, or by dragging and dropping items into the field.
When sharing folders, use the folder icon to include subfolders or remove selected folders from the list.
Share with
In the Share with section, enter the recipient in the Recipients field and click +. Add each recipient separately.
Then specify who can access the shared items:
- Recipients only – only the specified recipients can access the shared items, even if the email containing the link is forwarded.
- My organization – only people from the organization specified under Central Administration -> System -> Services -> Sharing settings can access the shared items.
- Public – anyone with the link can access the shared items.
Options
In the Options section, specify how many days the items should expire in, or select an expiration date from the calendar.
You can also limit the number of downloads. The download limit is applied according to the selected Share with option:
- Recipients – number of downloads per recipient.
- My organization – number of downloads per user.
- Public – total number of downloads.
Note: Folder sharing works with Recipients and My organization only.
Notify me about the downloads
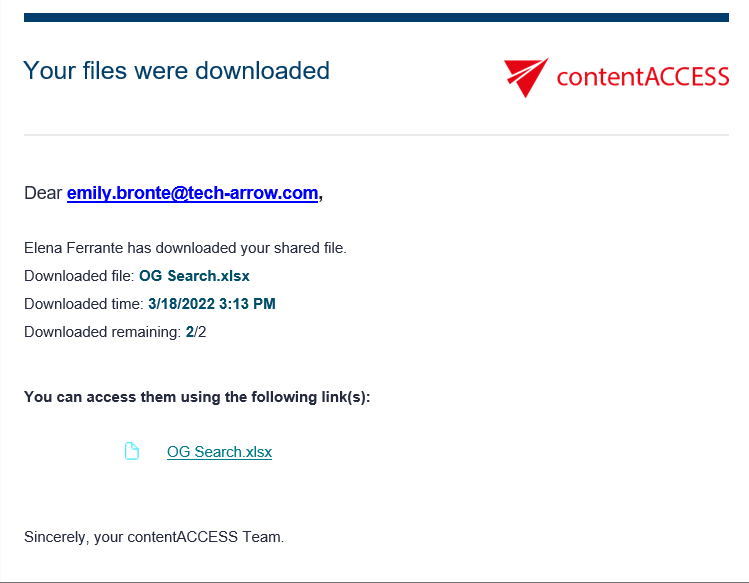
The Notify me about the downloads function allows the owner to receive information when recipients download shared items.
When a shared item is downloaded, a notification email is sent to the owner containing:
- User who downloaded the item.
- Downloaded file.
- Download time.
- Remaining downloads.
Remember sharing settings
Select Remember these settings to save the current sharing settings for future use. The Sharing options do not need to be configured again for subsequent shares.
Share the selected items
After configuring the sharing options, choose one of the following methods:
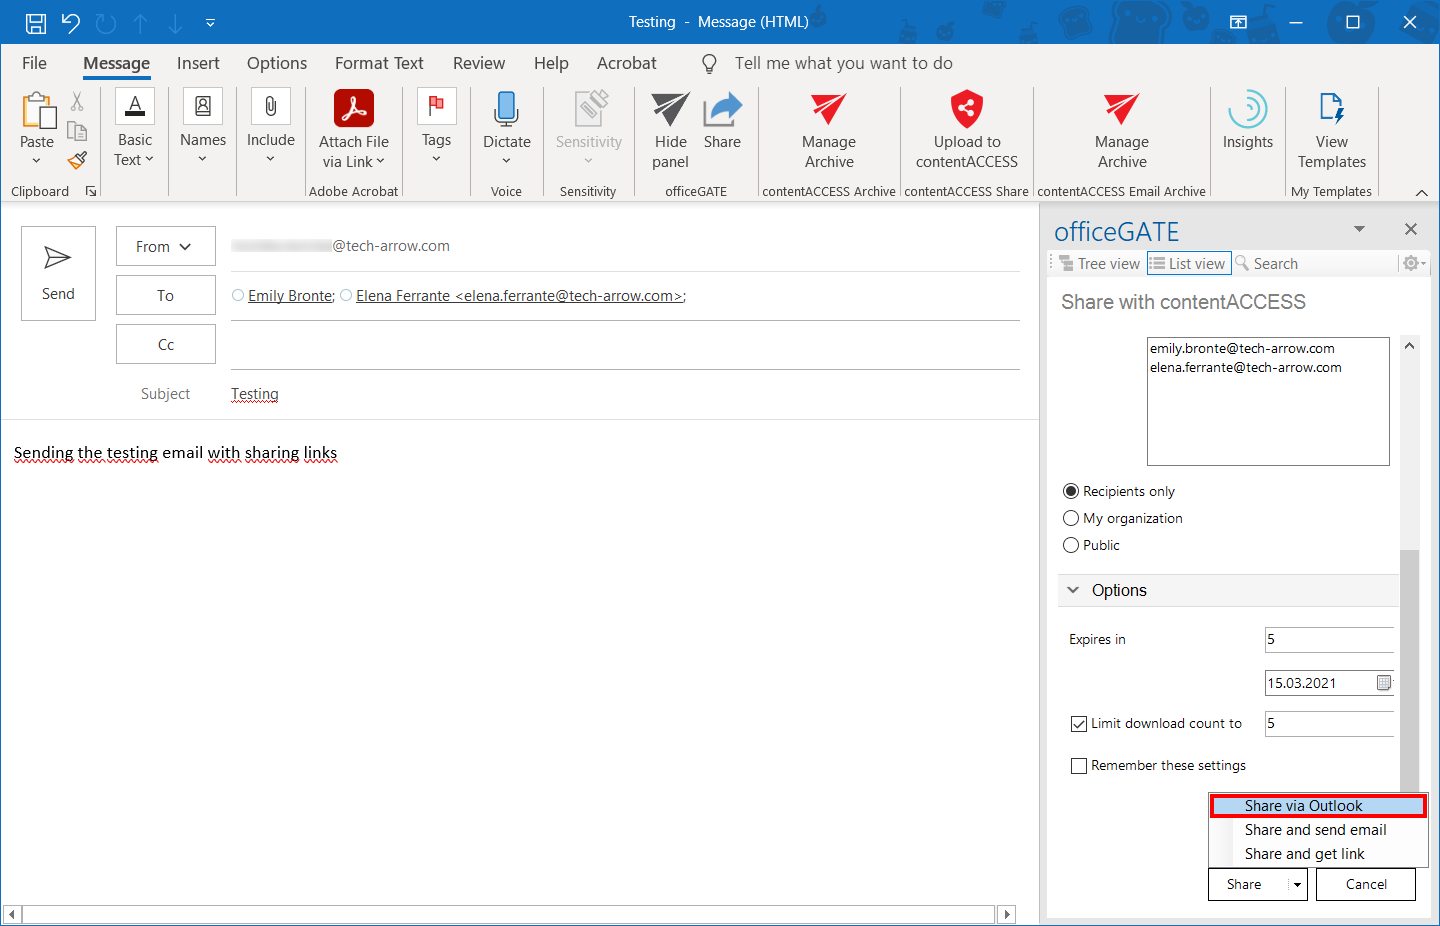
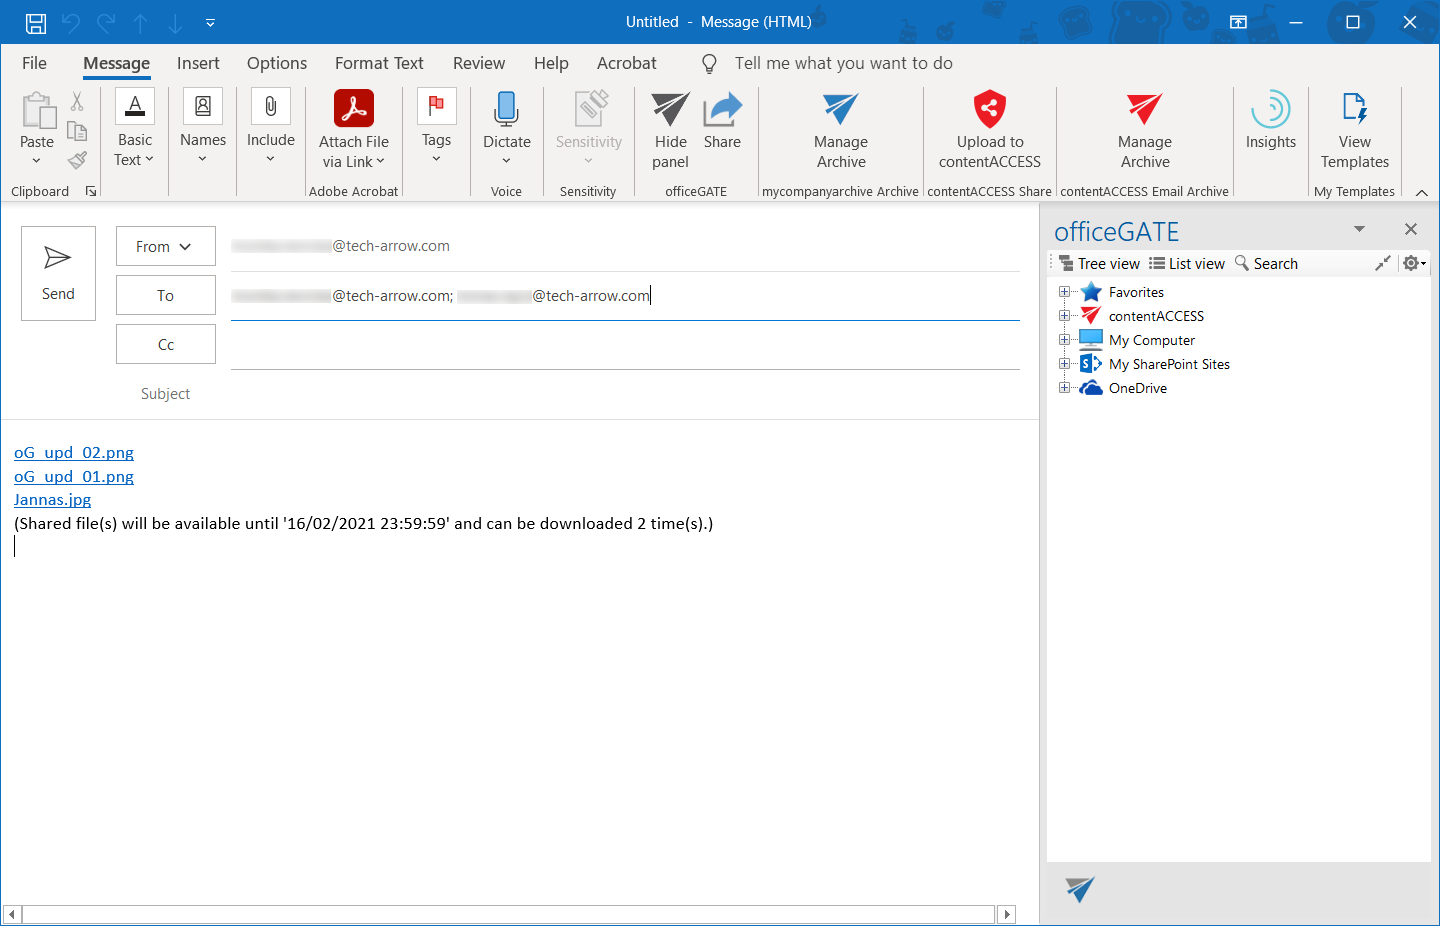
Share via Outlook
Select Share via Outlook to insert links to the shared files into the body of an email.
Share and send mail
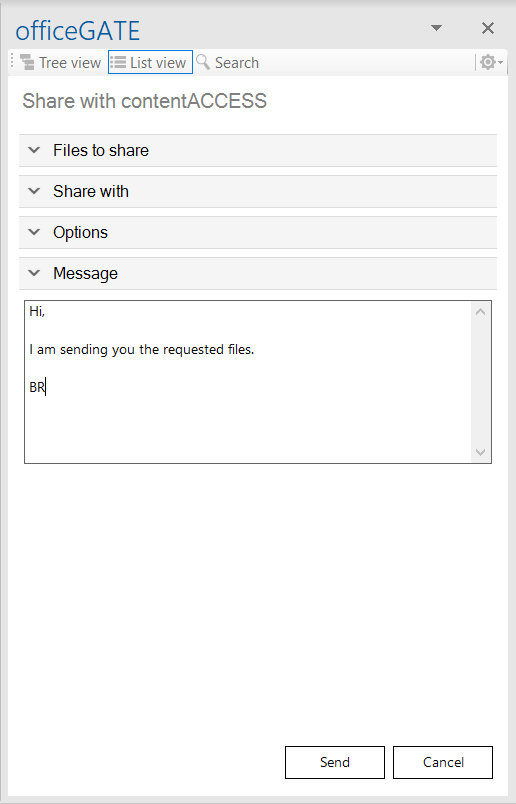
Select Share and send mail to write a message in the Share with contentACCESS window. Click Send to send the email with the sharing links in its body.
At least one recipient must be specified before using this option because the notification email is sent via contentACCESS.
Share and get link
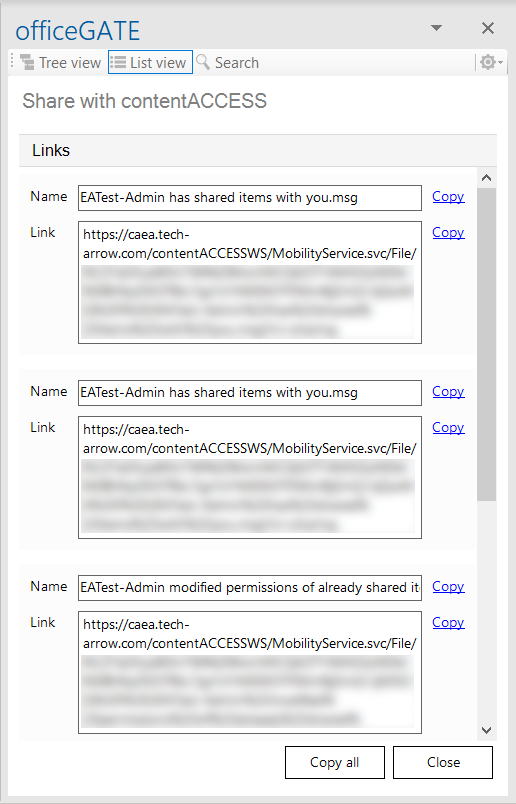
Select Share and get link to open the List of names and links for the shared items. Copy the links and send them to the recipients.
To copy all links at once, click Copy all.
Sharing possibilities
The following sections describe how sharing works from different locations and providers.
Note: In all cases, you must first be logged in to contentACCESS.
Share from the local file system
To share files from the local file system:
-
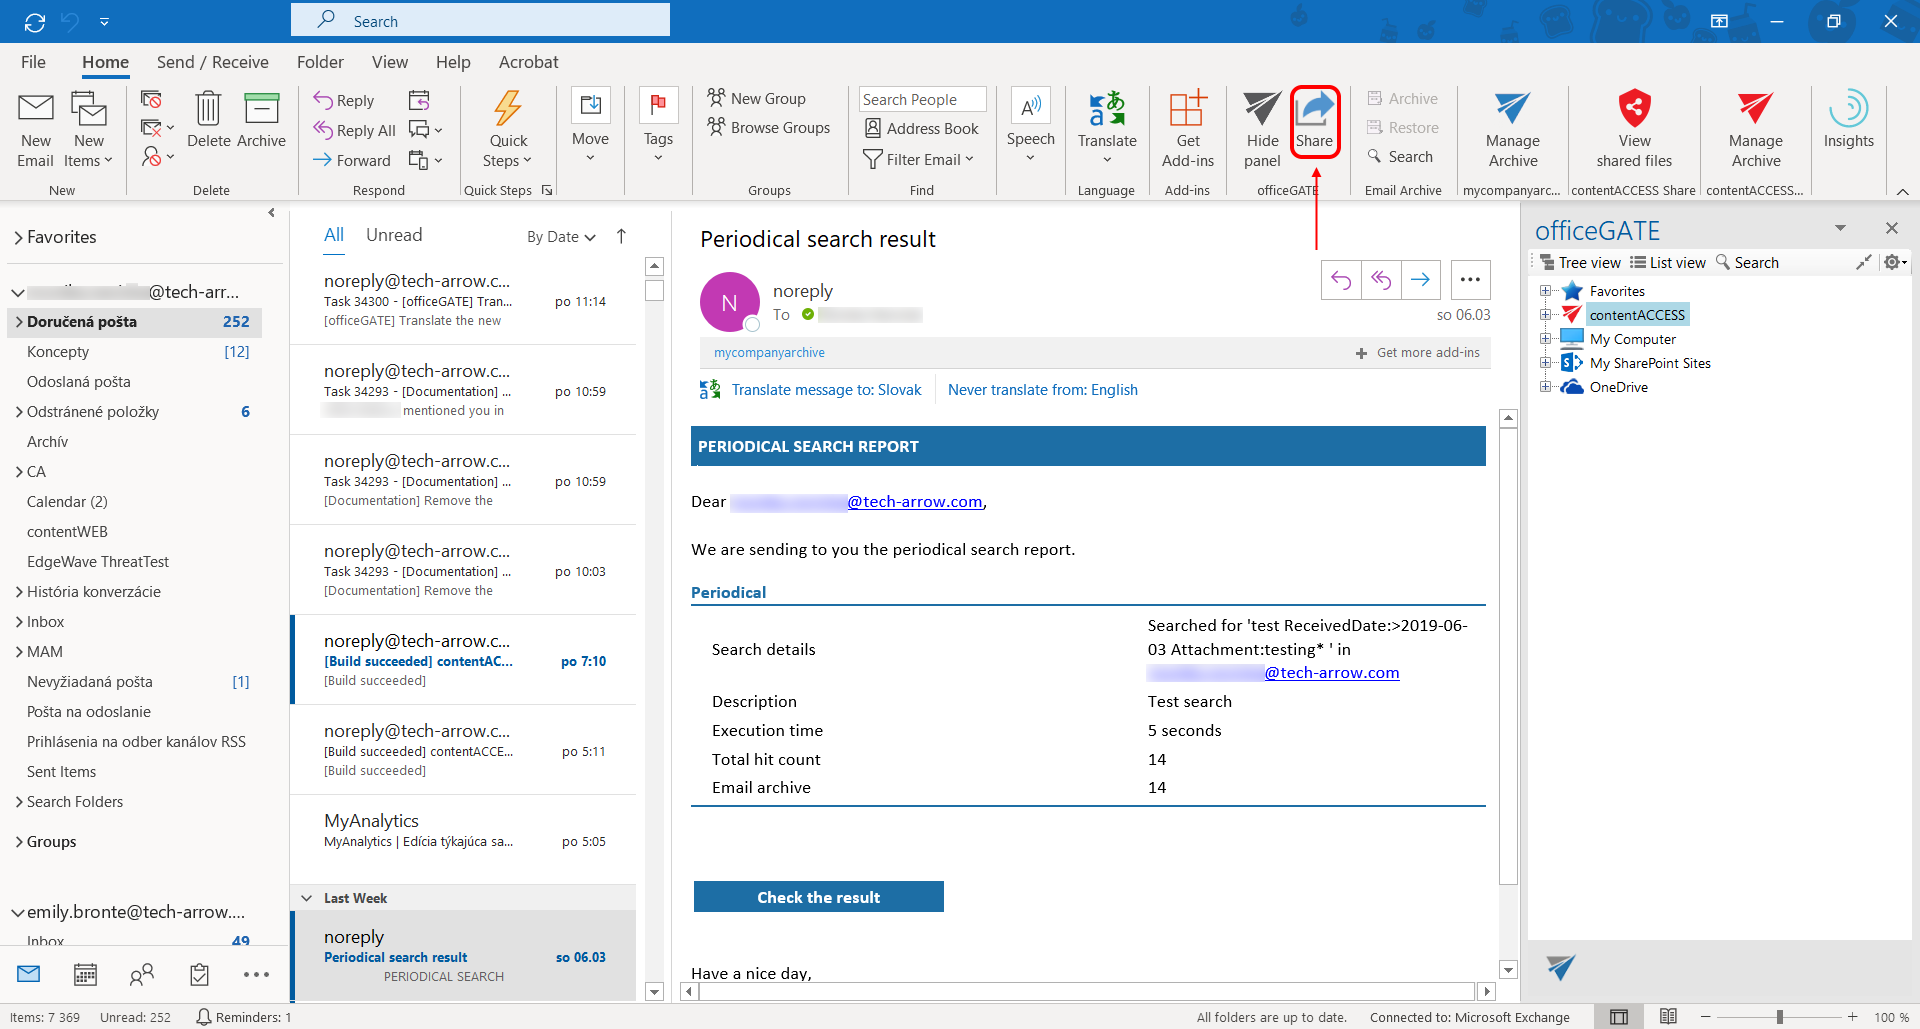
Click Share in the toolbar.
-
Click +Add to browse for local files, or drag and drop local files from File explorer into the Files to share field.
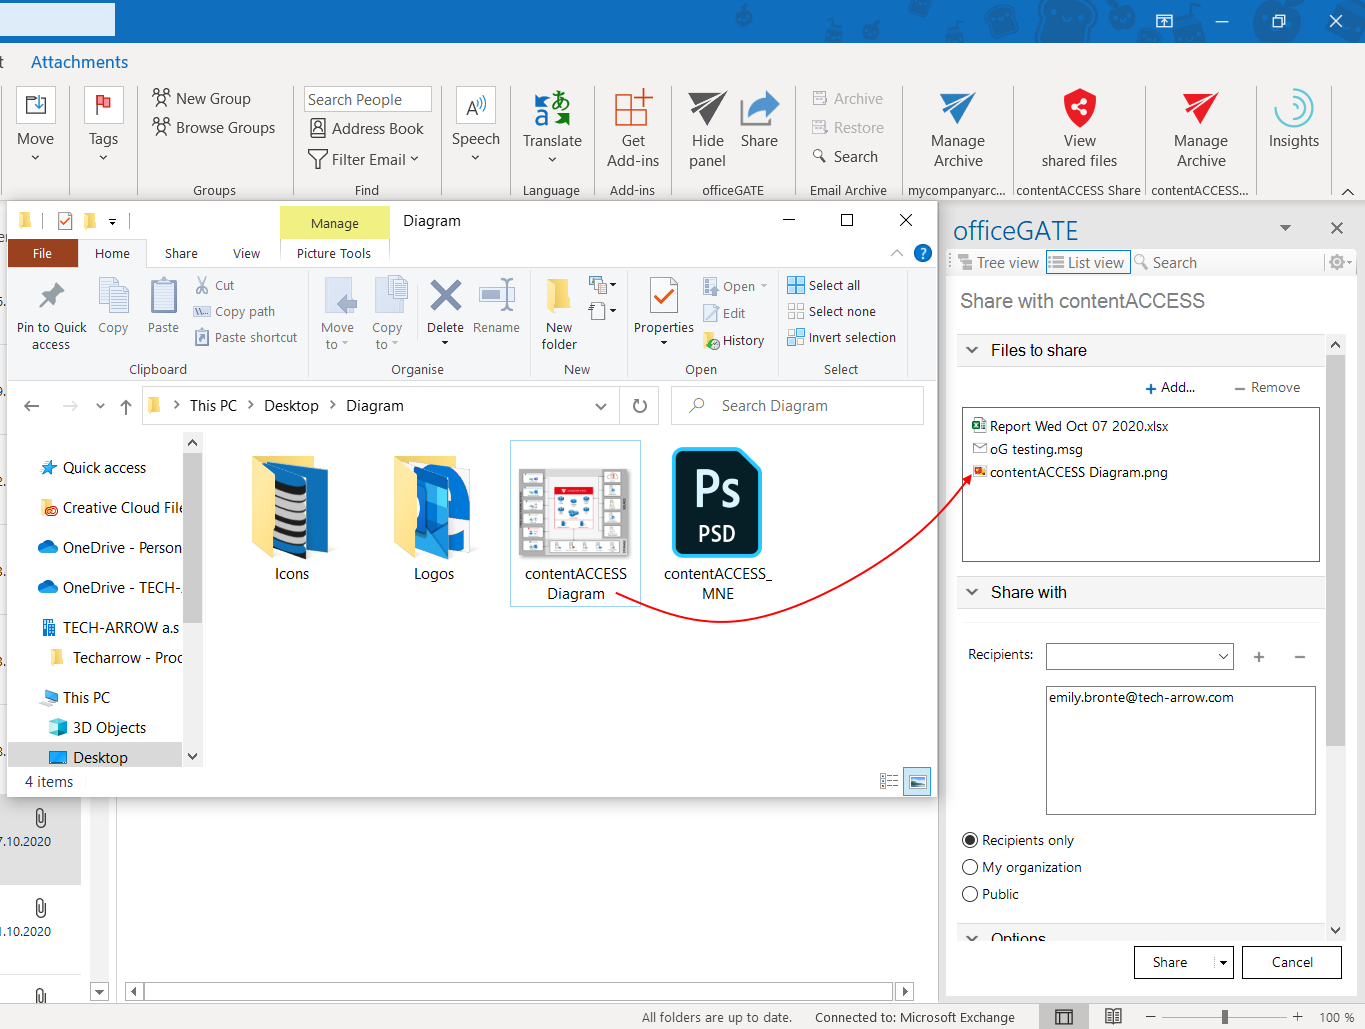
Screenshot: Drag & Drop of a local file
-
Configure the remaining sharing options as described in Configure sharing options.
Share email attachments or a whole email/Outlook item
To share an email attachment or a complete Outlook item:
-
Click Share in the toolbar.
-
Drag and drop the Outlook item, email, or attachment(s) into the Files to share field.
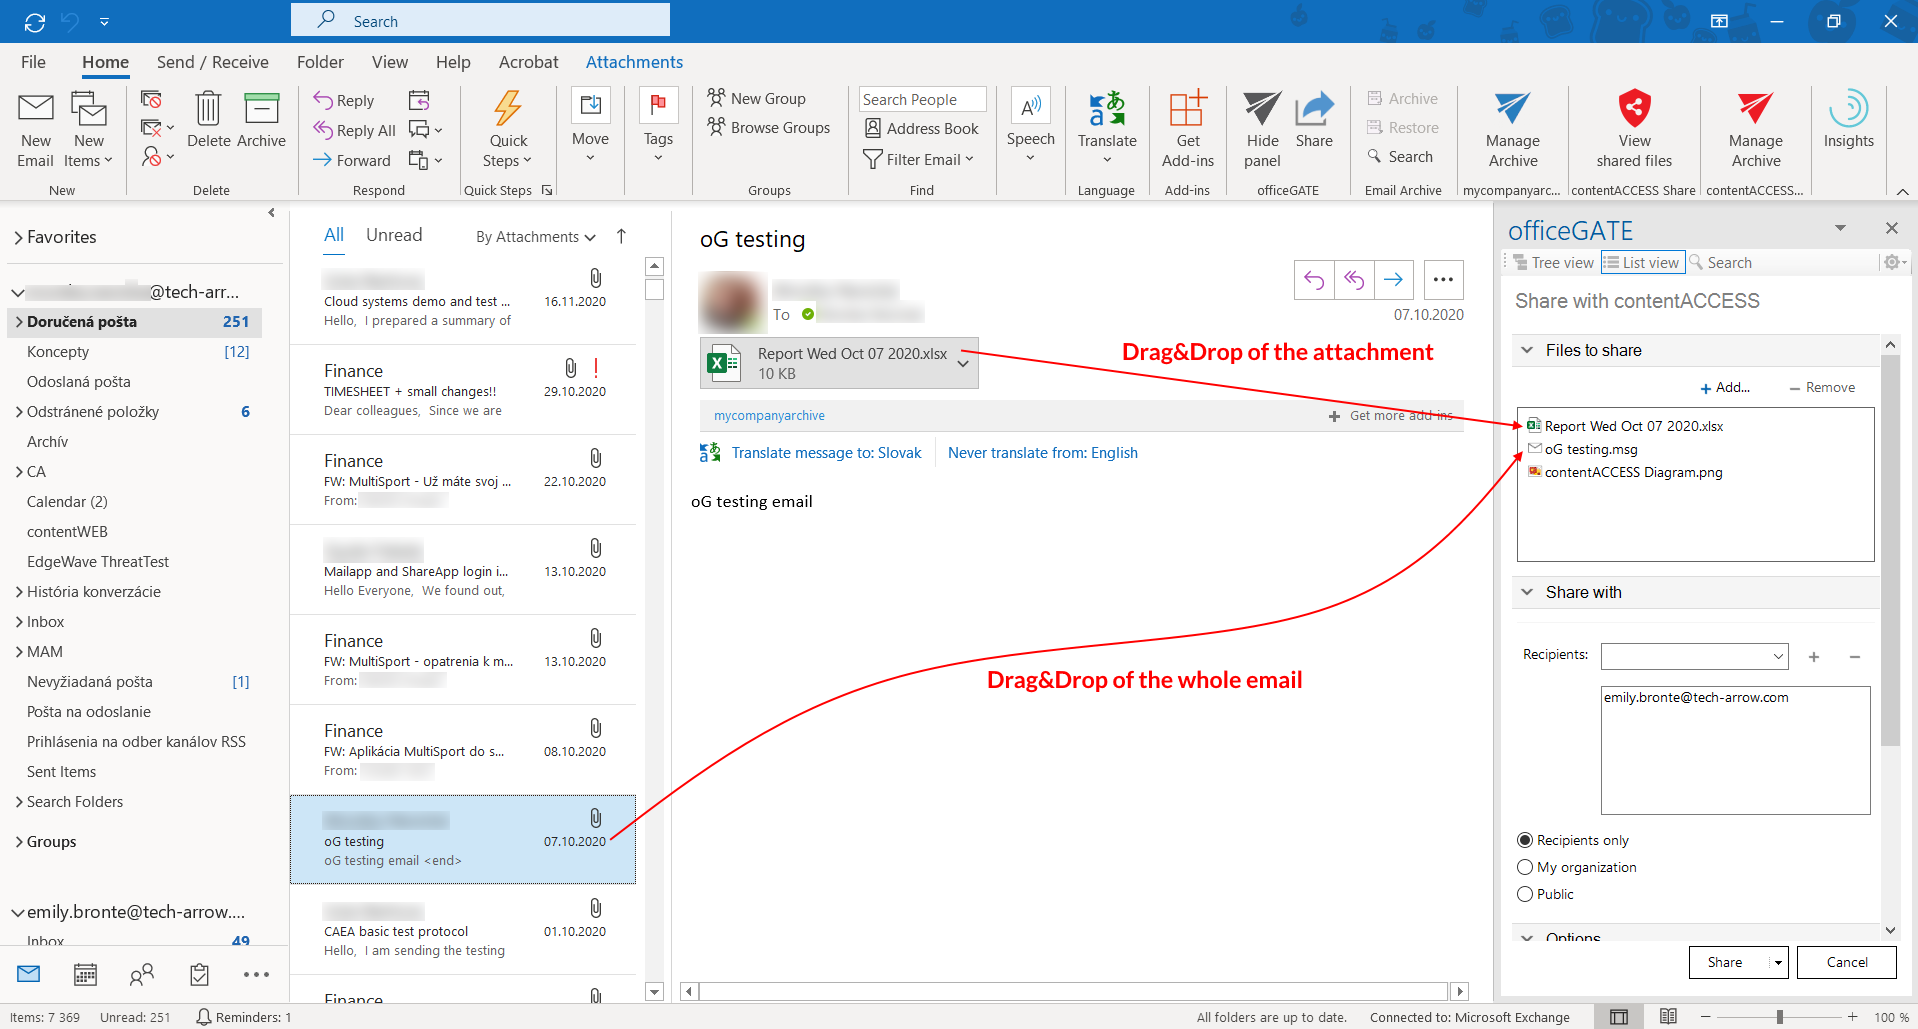
Screenshot: Drag & Drop of the whole email and just the attachment
-
Configure the remaining sharing options as described in Configure sharing options.
Share from the contentACCESS archive
When sharing from the contentACCESS archive, only the document reference is shared. The document content is not duplicated or copied.
-
Log in to the contentACCESS provider.
-
Navigate to the desired archive entity containing the items that you want to share.
-
Select Share from the entity's context menu.
-
When sharing from the Email archive, choose whether to share the whole email or only the selected attachment(s).
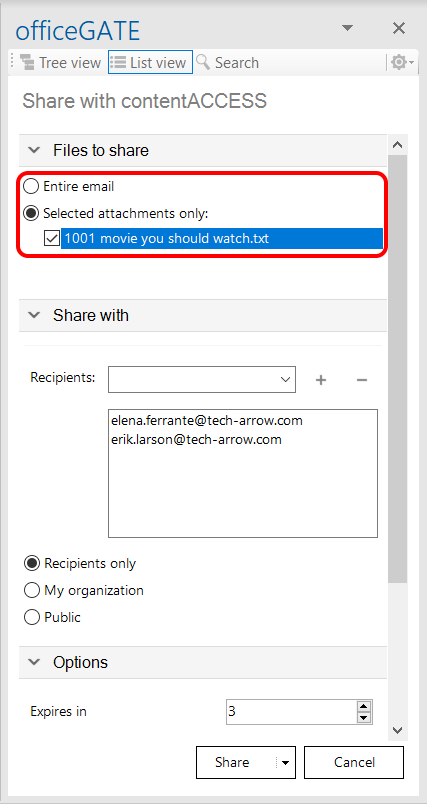
-
Configure the remaining sharing options as described in Configure sharing options.
Share from other providers
When sharing items from My Computer, OneDrive, or My SharePoint Sites, the document is first copied into contentACCESS.
Important: If SharePoint proxy is configured in the Central Administration, only the document reference of the SharePoint and/or OneDrive item is shared. The item content is not duplicated or copied.
To share an item:
-
Navigate to the desired entity.
-
In List view, open the context menu of the item that you want to share.
-
Select Share.
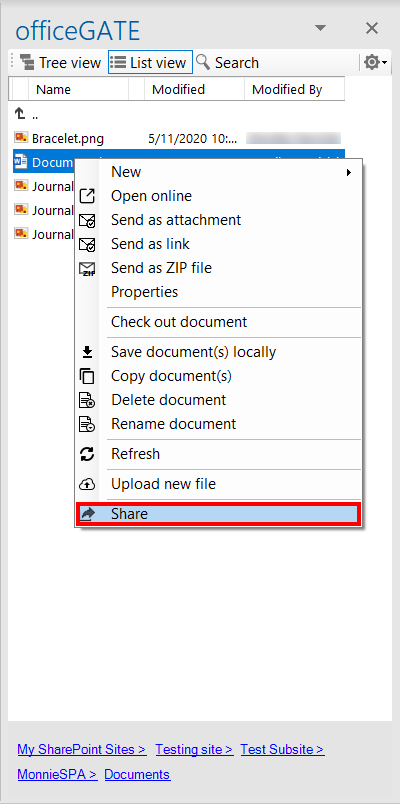
Screenshot: Sharing from My SharePoint Sites
-
Configure the remaining sharing options as described in Configure sharing options.
Create an email with Sharing
Items can be shared directly while writing a new email. There are two ways to do this.
Share files using the toolbar
-
Click Share in the toolbar.
-
In the Files to share section, click +Add and browse for local files, or drag and drop files into the field.
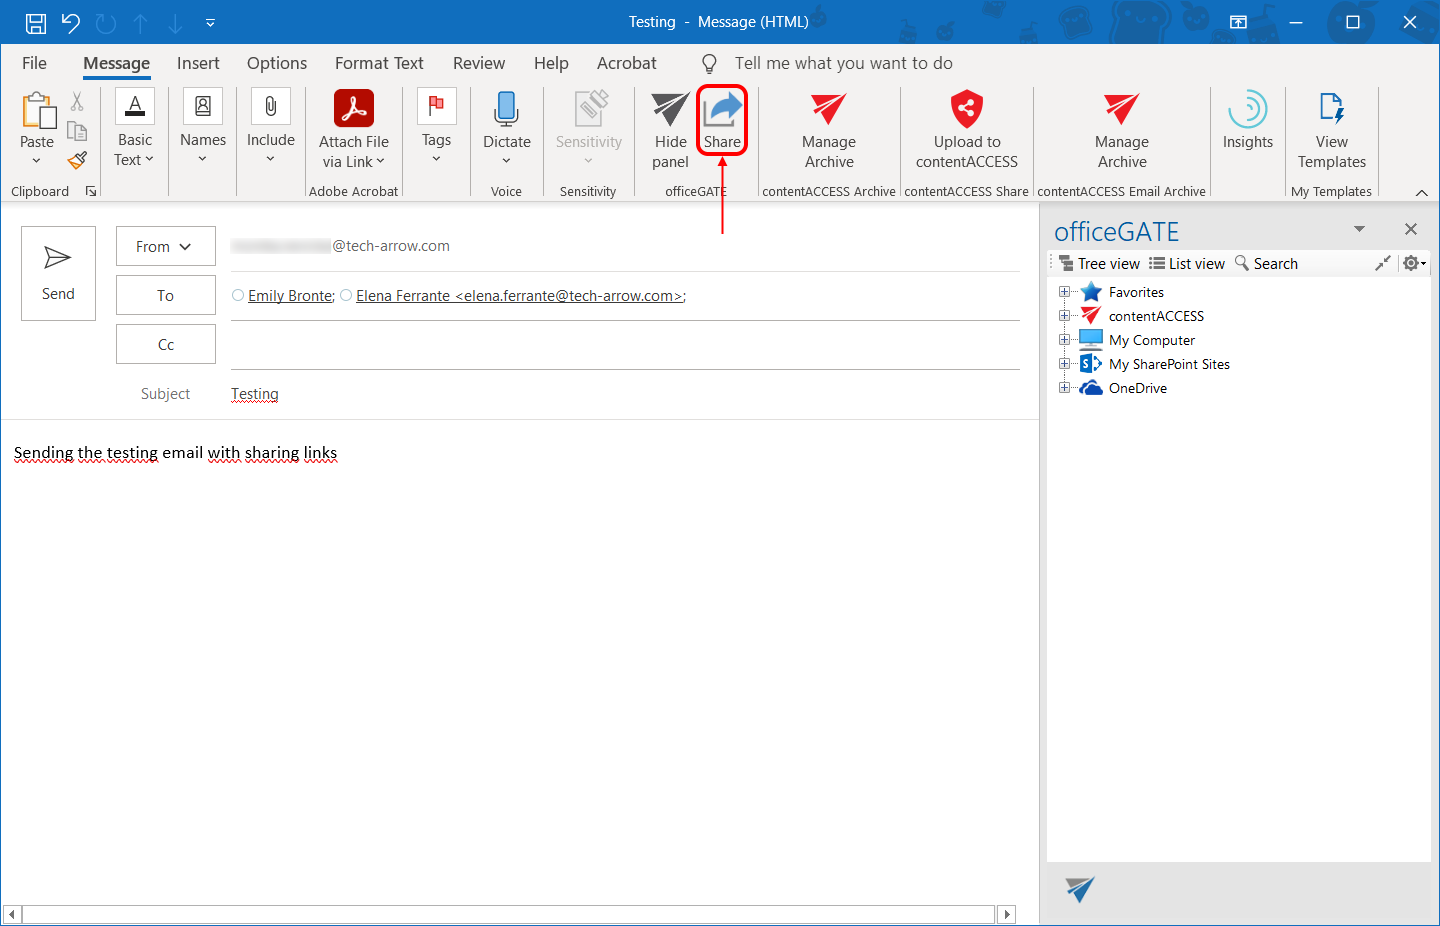
-
Configure the remaining sharing options.
-
Click Share via Outlook.
Share items from the officeGATE pane
-
In the officeGATE pane, select the item or items that you want to share.
-
Select Share from the context menu.
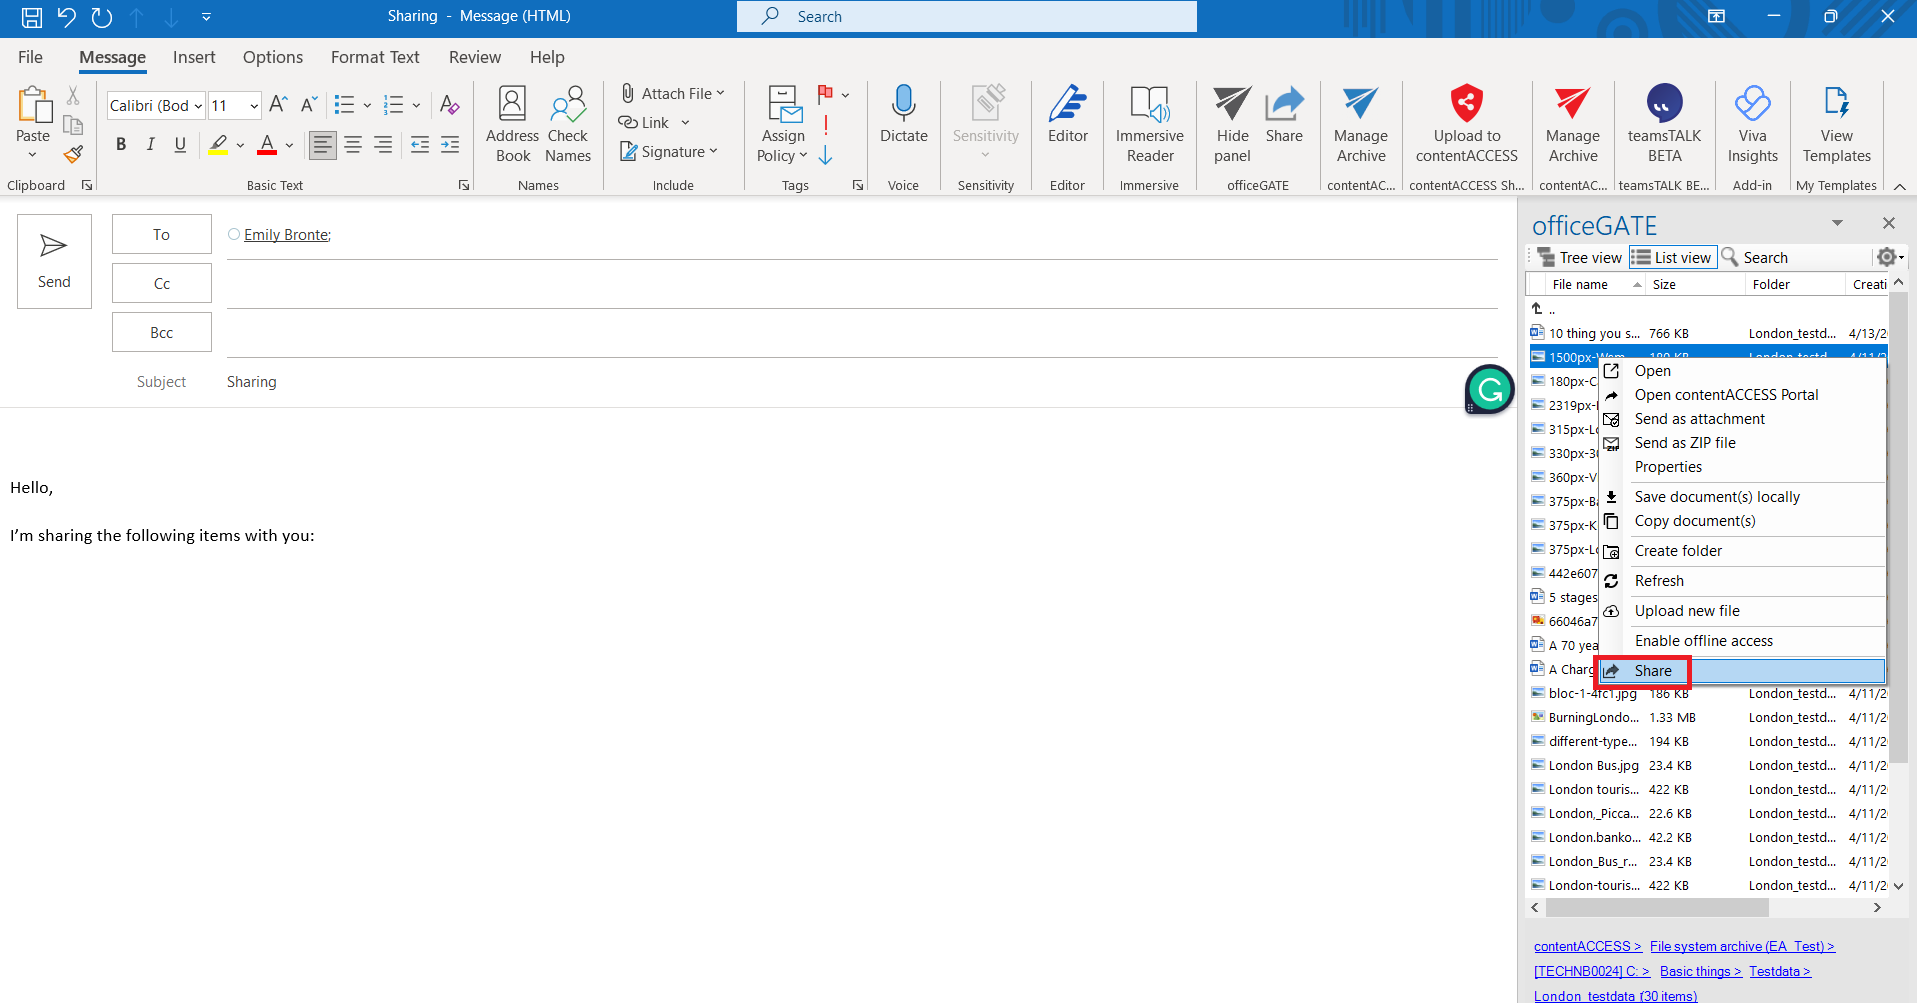
In both cases, the email addresses of the email recipients are automatically synchronized with the Recipients field of the sharing dialog.
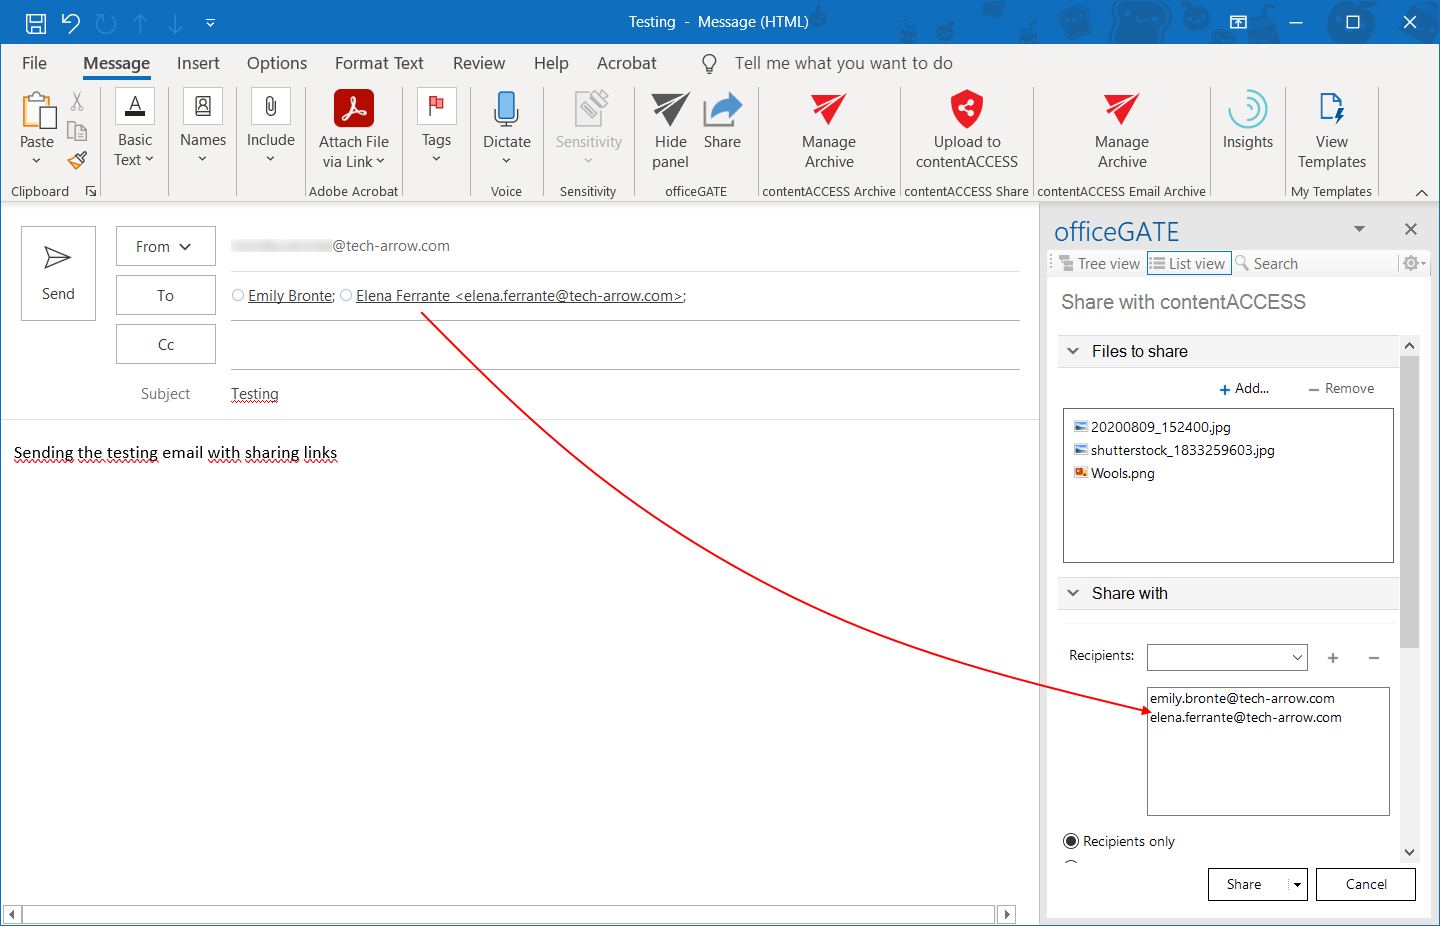
Configure the remaining sharing options and click Share via Outlook. The links to the shared items are inserted into the body of the email, which can then be sent.